To check the internet connection status, UTunnel’s Windows VPN client pings the website google.com by default. However, it is not possible for the UTunnel VPN client to ping google.com in countries where Google is censored, resulting in the app displaying the error message: No Internet Connection!
This issue can be easily fixed by editing the UTunnel config file and replacing the website google.com with any other website that is pingable within the geolocation. This guide explains how to change the ping address in the UTunnel Windows VPN client application.
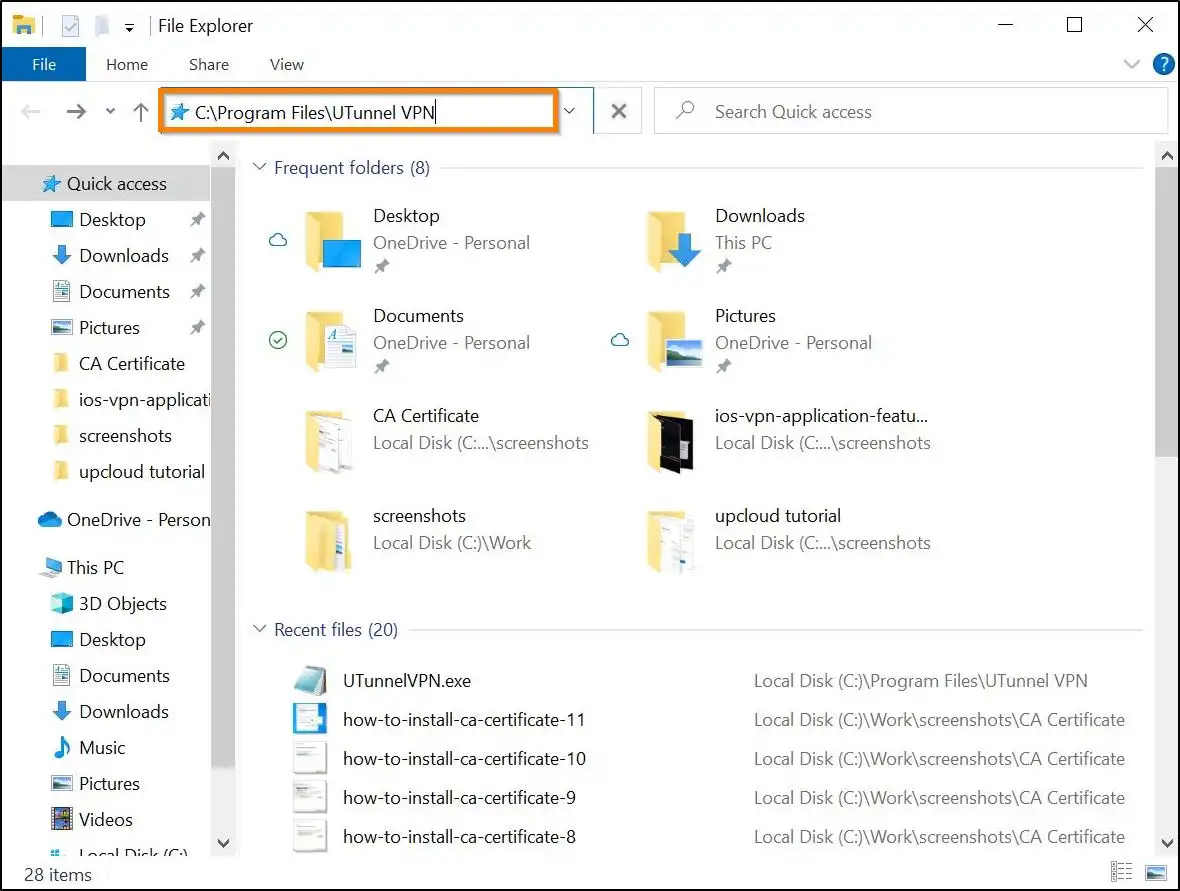
1. Go to Windows File Explorer and paste the address C:\Program Files\UTunnel VPN into the address bar.
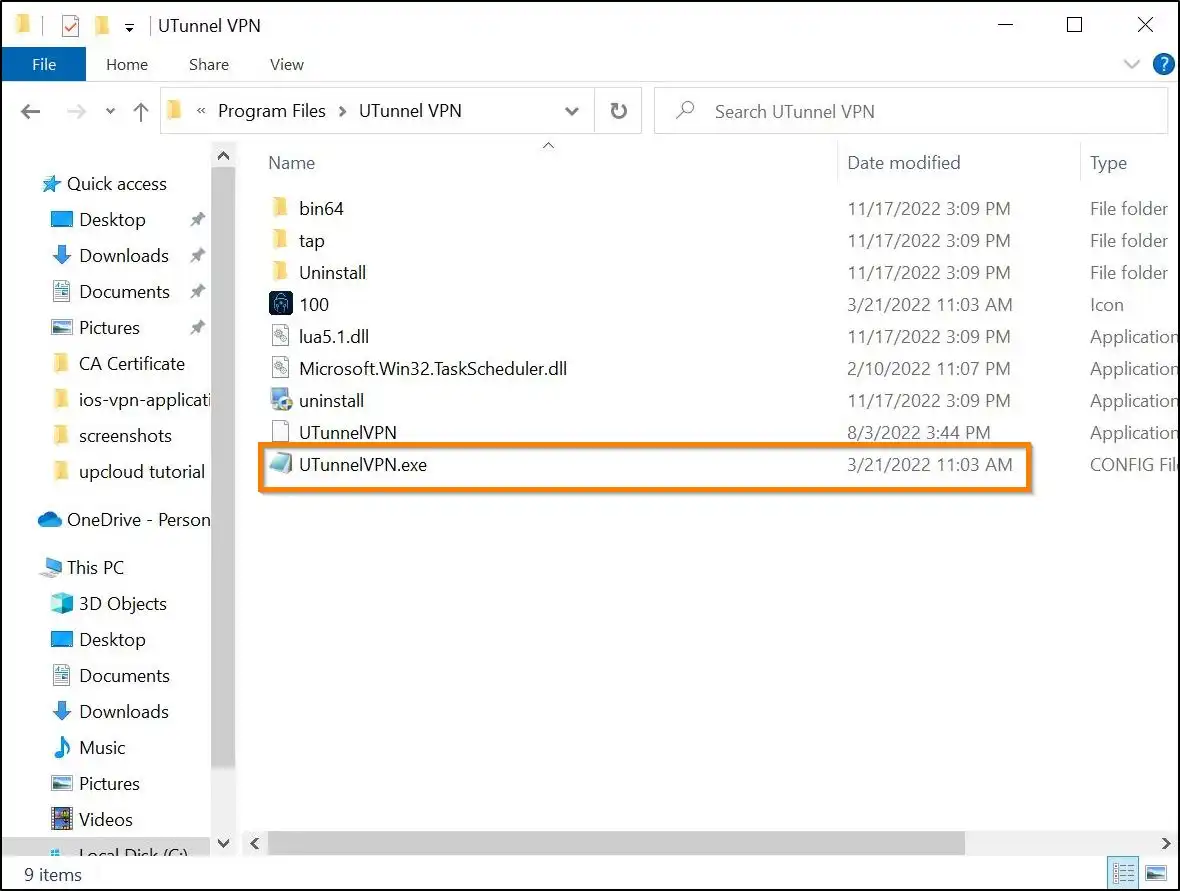
2. You will be directed to UTunnel VPN installation folder. Select the config file named UTunnelVPN.exe and right-click on it to open the file in a text editor like Notepad. Please note that your account needs administrator privileges to make this edit.
3. In the config file, replace google.com with another website that is pingable from your location and save the file.

You have successfully changed the ping address to a pingable website and the UTunnel Windows VPN client can now ping the new website to check the internet connection status.