Once you create a MeshConnect Site and register the MeshConnect agent and start the Site, the resources will be auto-discovered and listed down. Users are also allowed to manually add resources to the Sites in the MeshConnect network.
This guide discusses how to add and manage resources to the Sites in the MeshConnect network from your UTunnel web console.
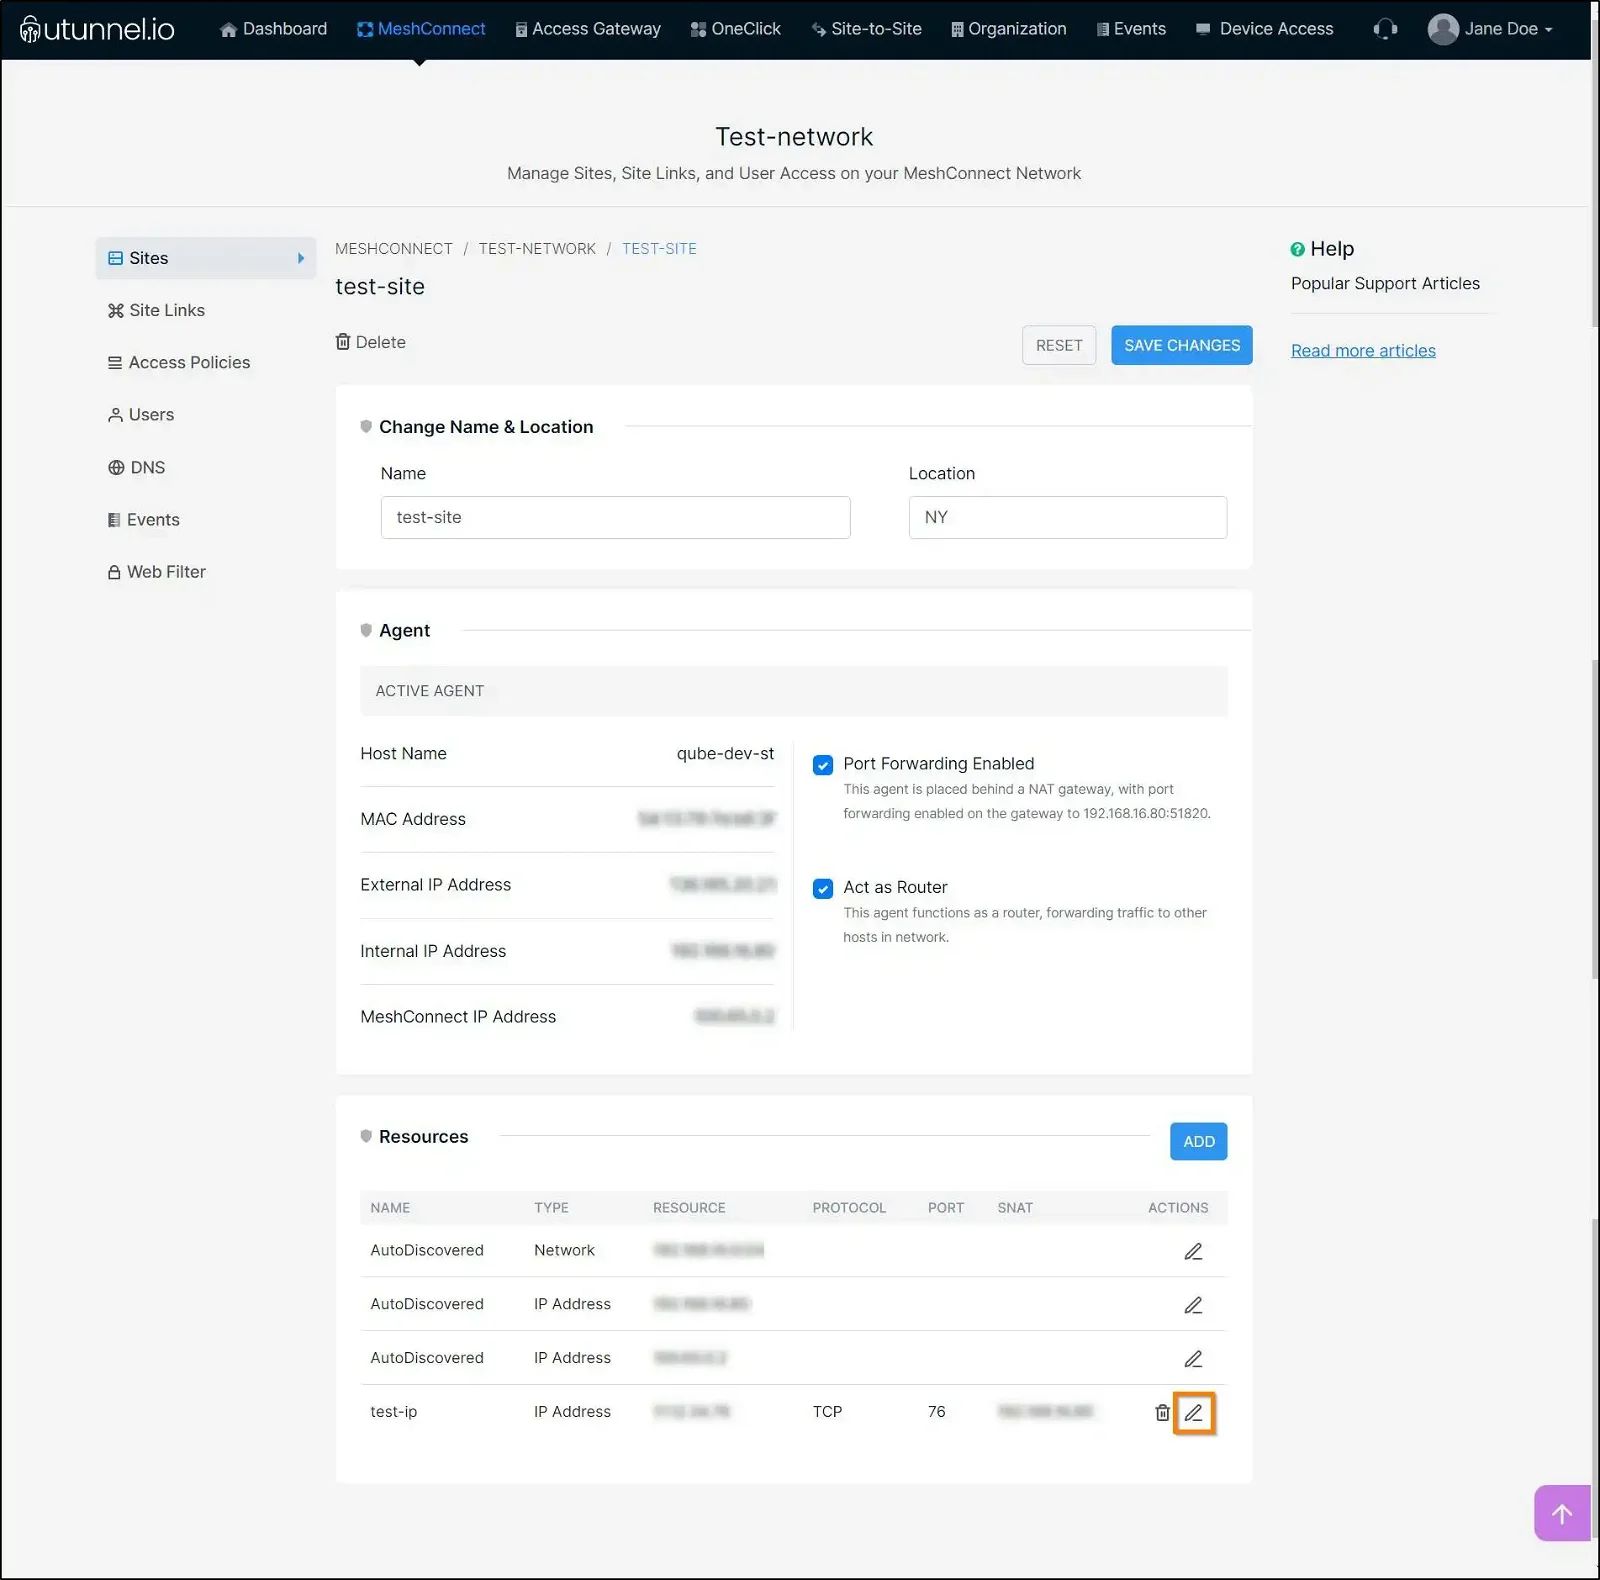
Once you start the Site, the resources will be auto-discovered and listed under the Resources section. Please note that you can only edit the auto-discovered resources and cannot delete them.
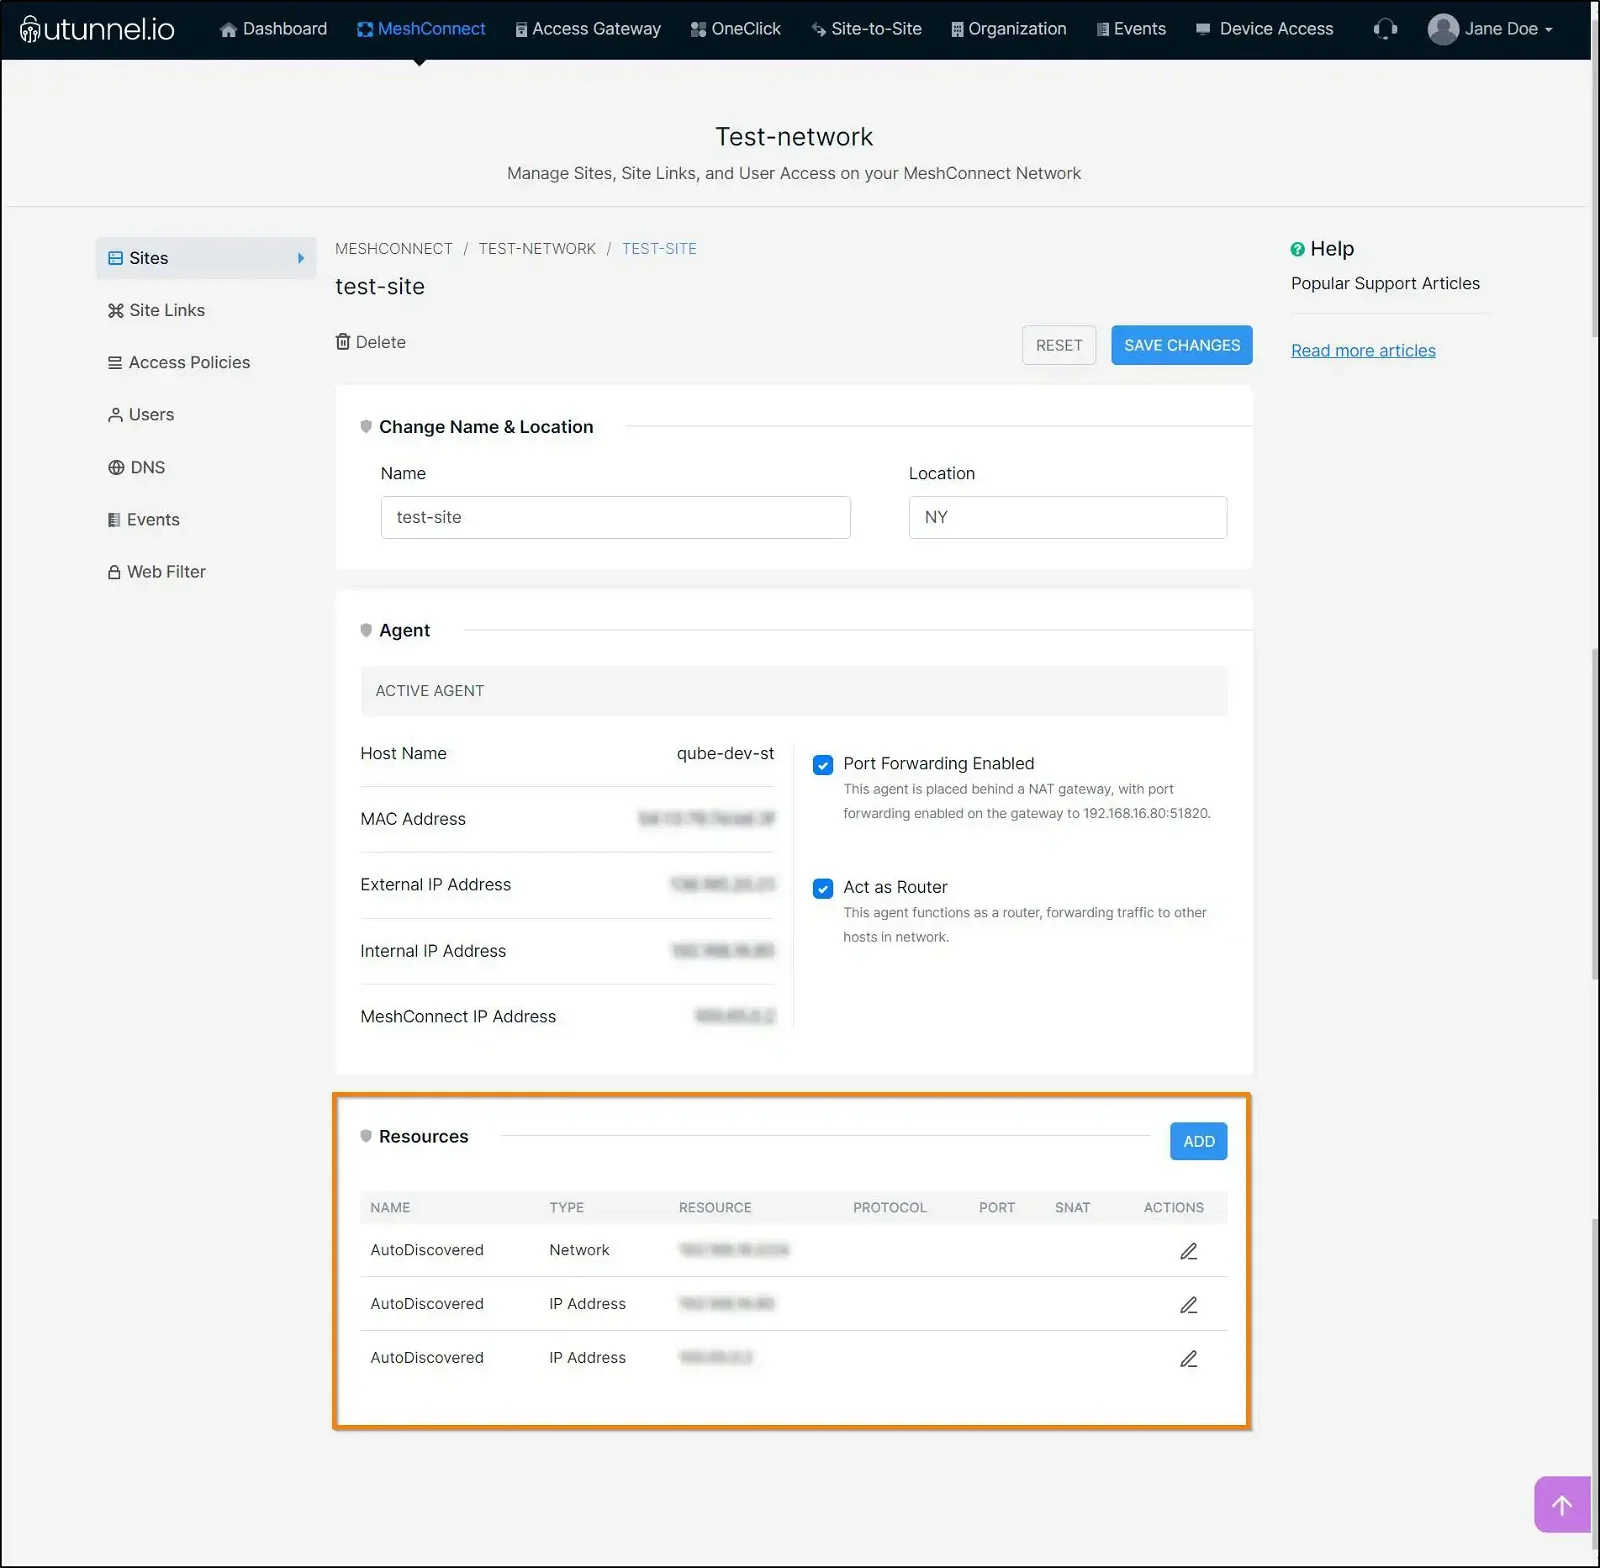
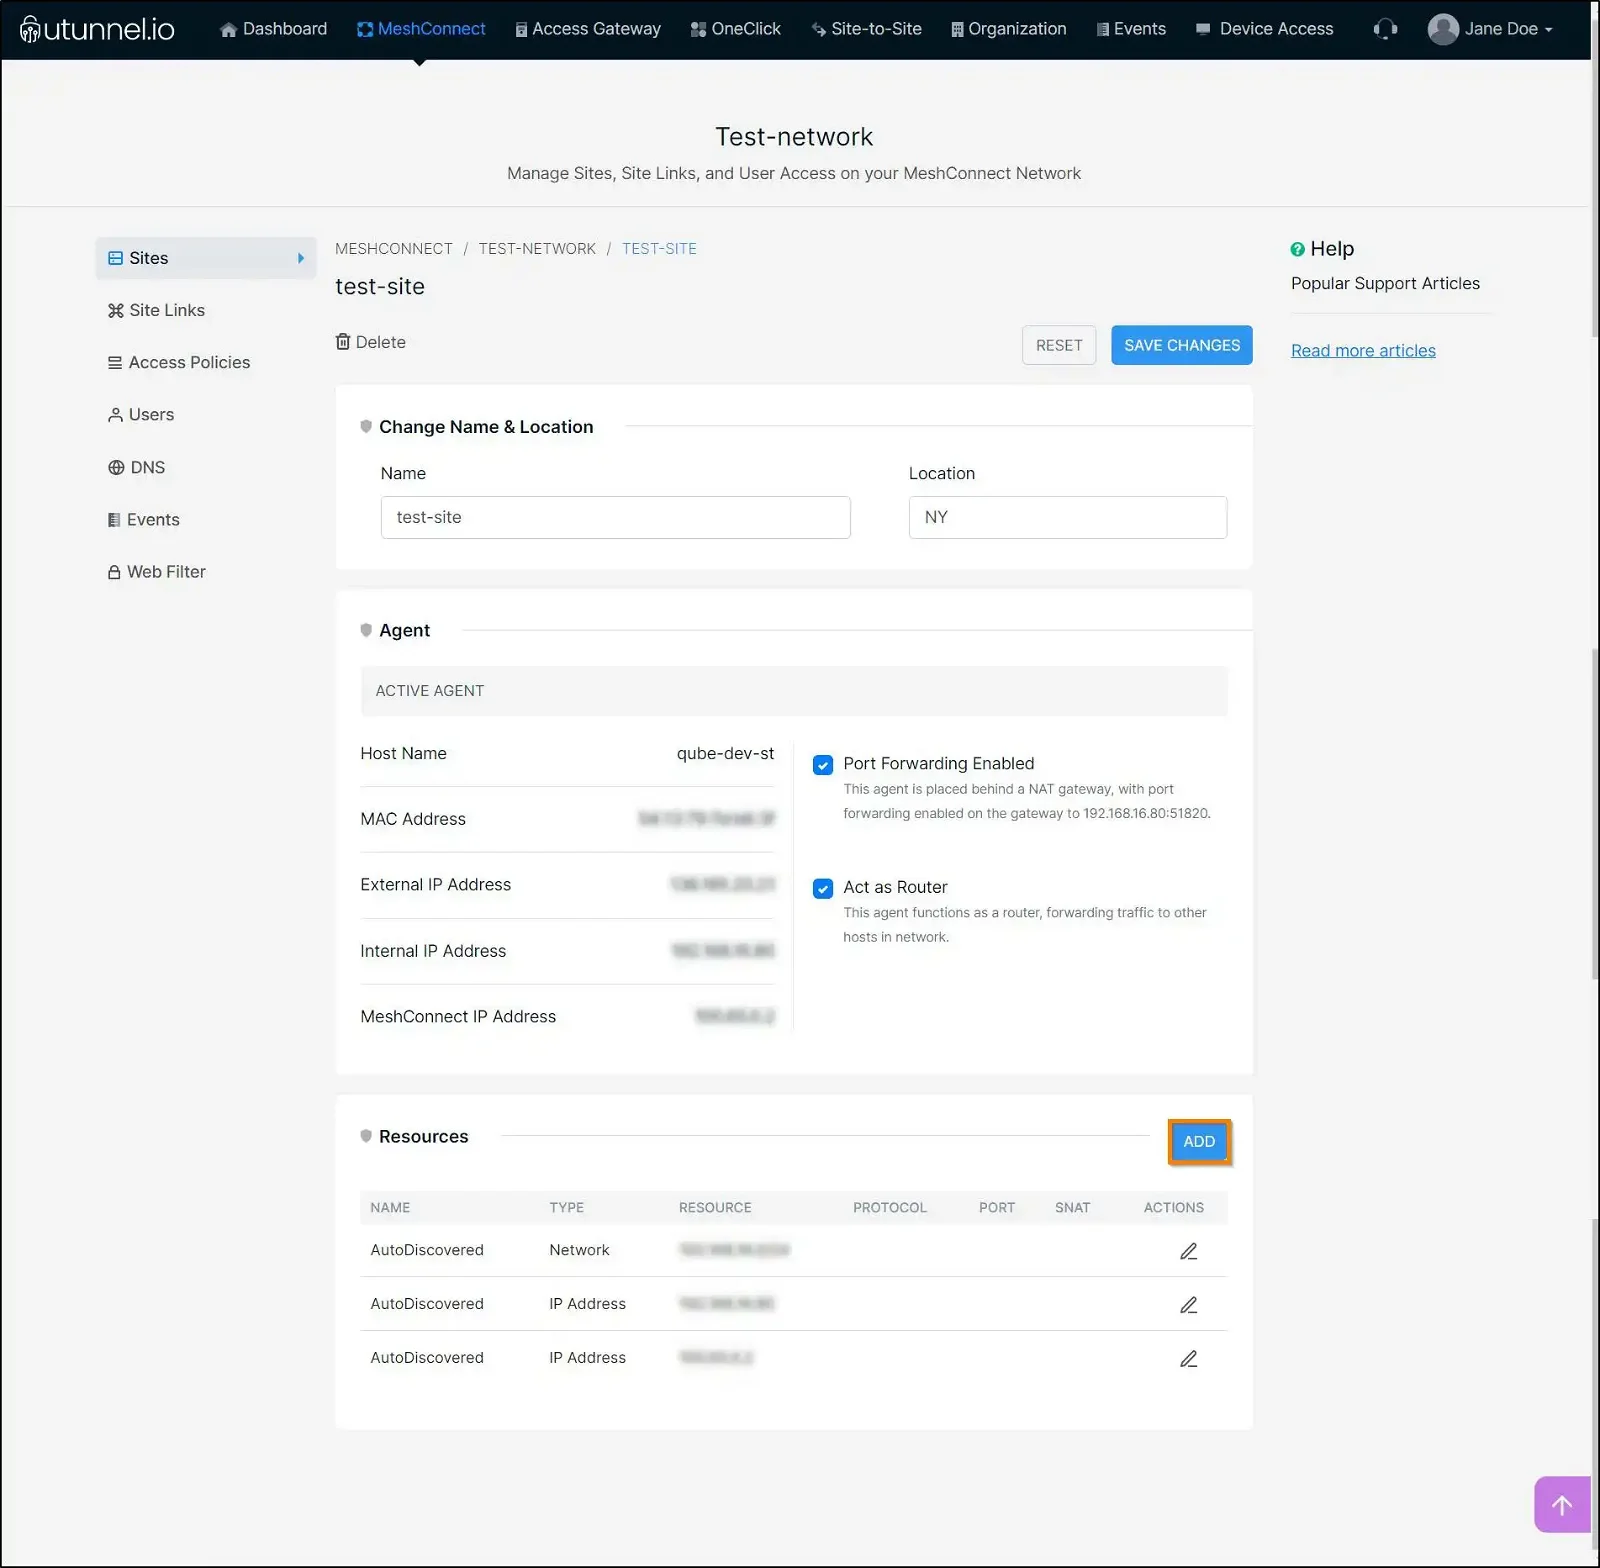
1. You can also manually add resources to the Site by clicking on the ADD button. Please note that to add resources to your Site, the Act as Router option must be enabled.
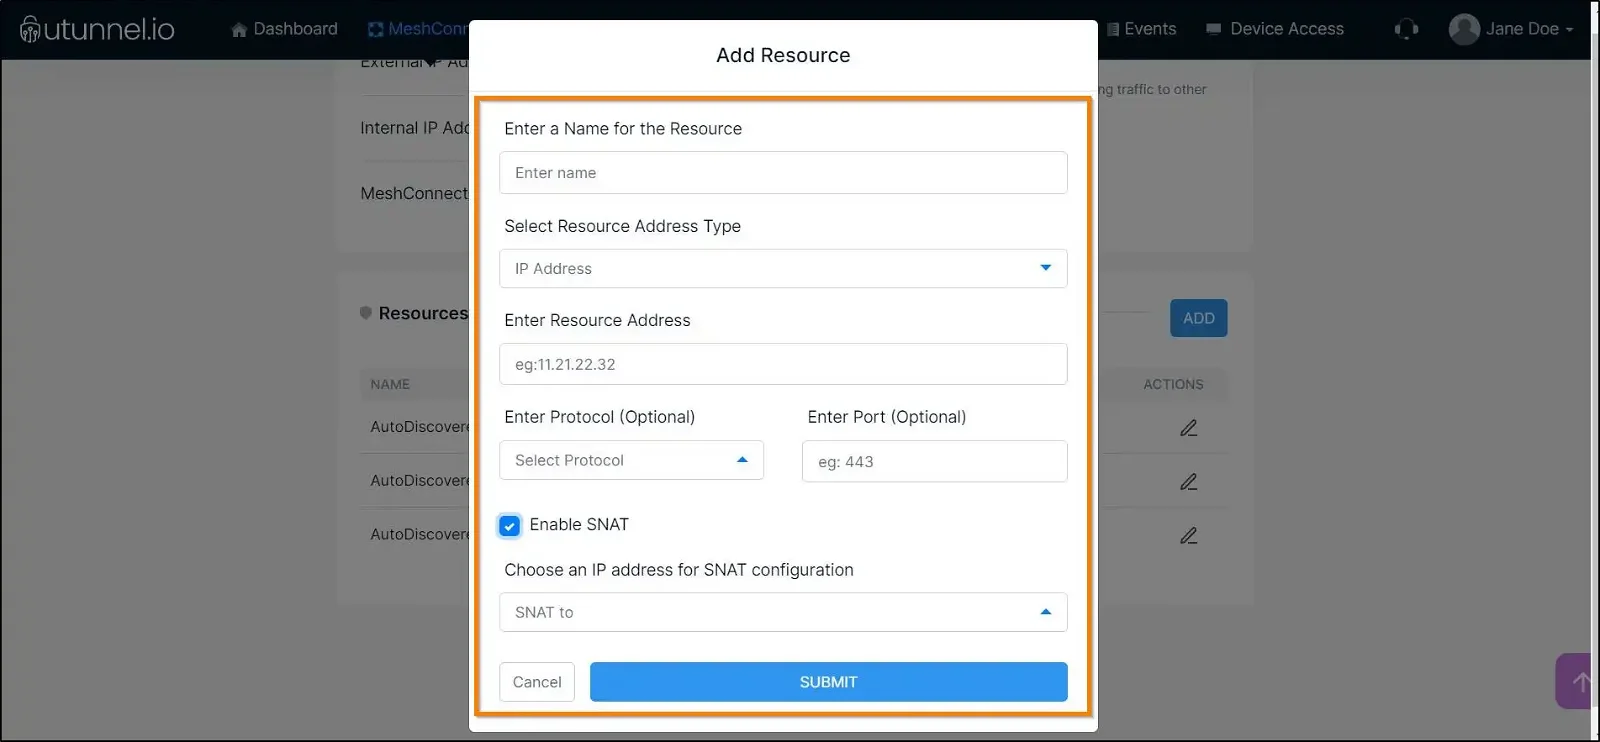
2. You can add resources to the Site by providing the following details:
Enter a Name for the Resource: Enter an easily identifiable name for your site
Select Resource Address Type: Select the type of resource address, either IP address or a network address
Enter Resource Address: Enter the resource IP address or network address
Enter Protocol: Select a protocol from TCP, UDP, ICMP
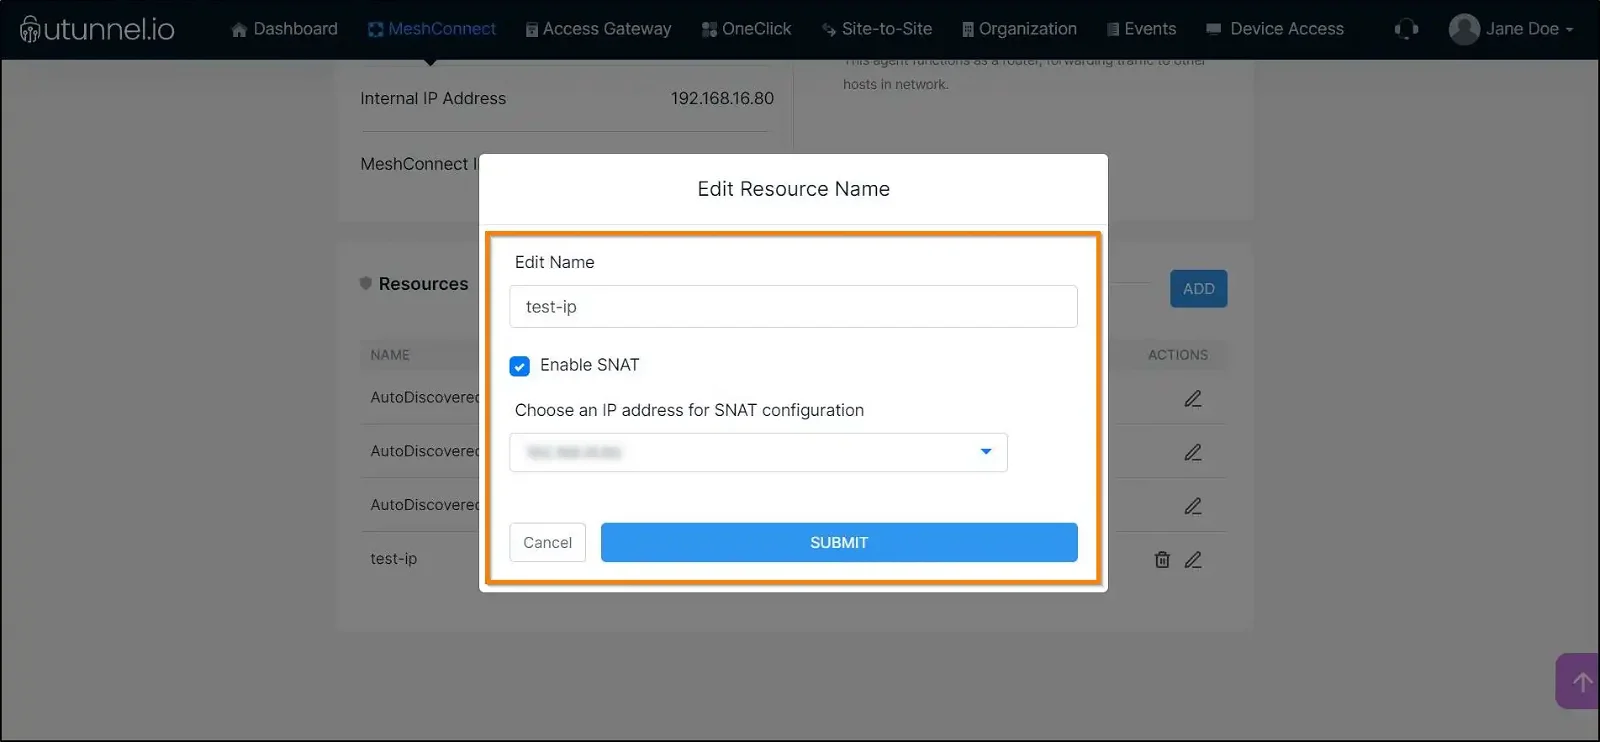
Enable SNAT: SNAT stands for Source Network Address Translation. You have to select a local IP address (an IP address available on the host where the agent is installed) from the drop-down menu while enabling SNAT for a resource. When SNAT is enabled for a resource, the source address on packets destined for that resource will be translated to the selected IP address. Check this box if you want to enable SNAT on the resource. With this enabled, you can choose an IP address from the available list to configure the SNAT.
After keying in the details, click on the SUBMIT button to save the changes.
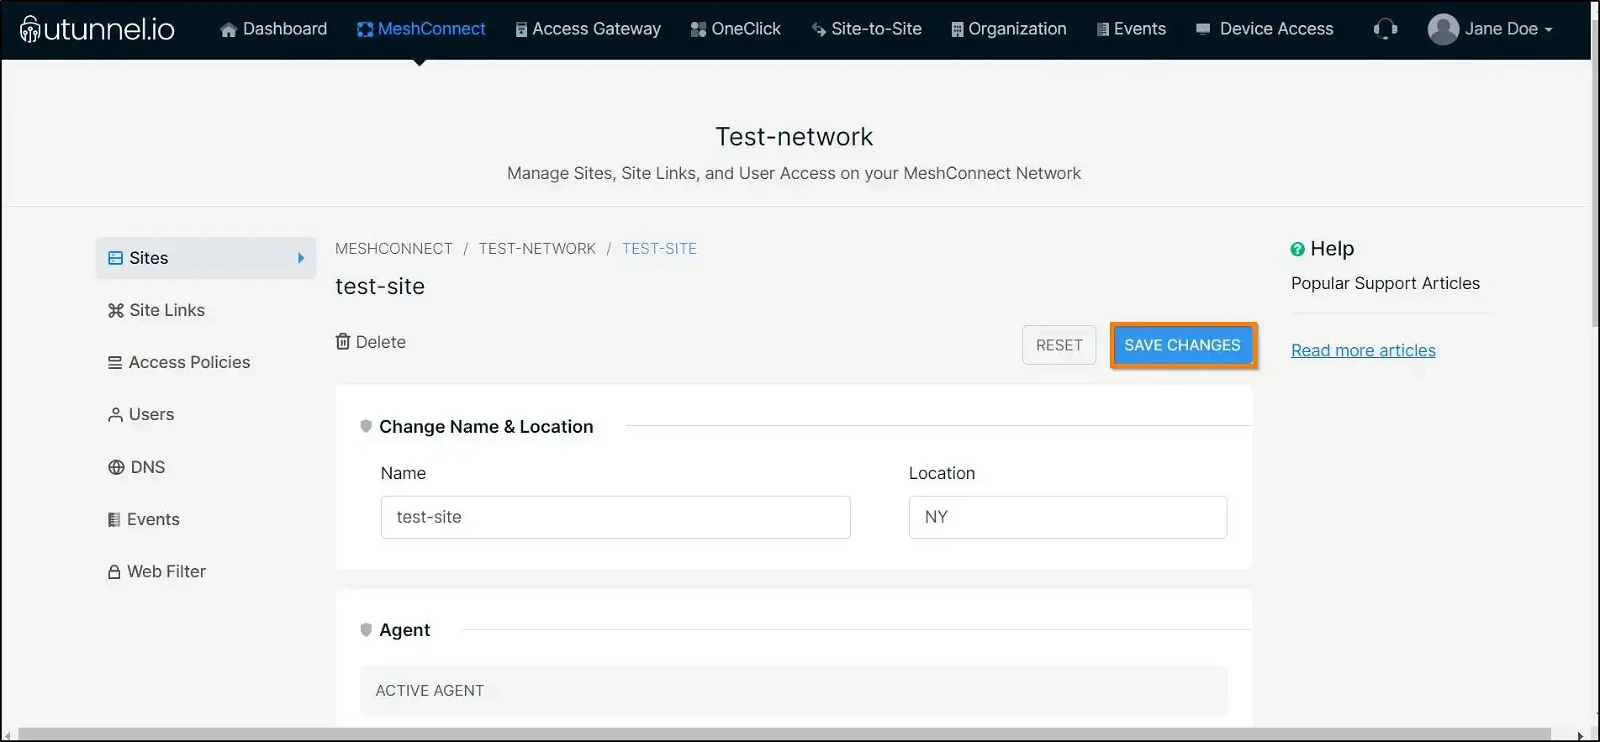
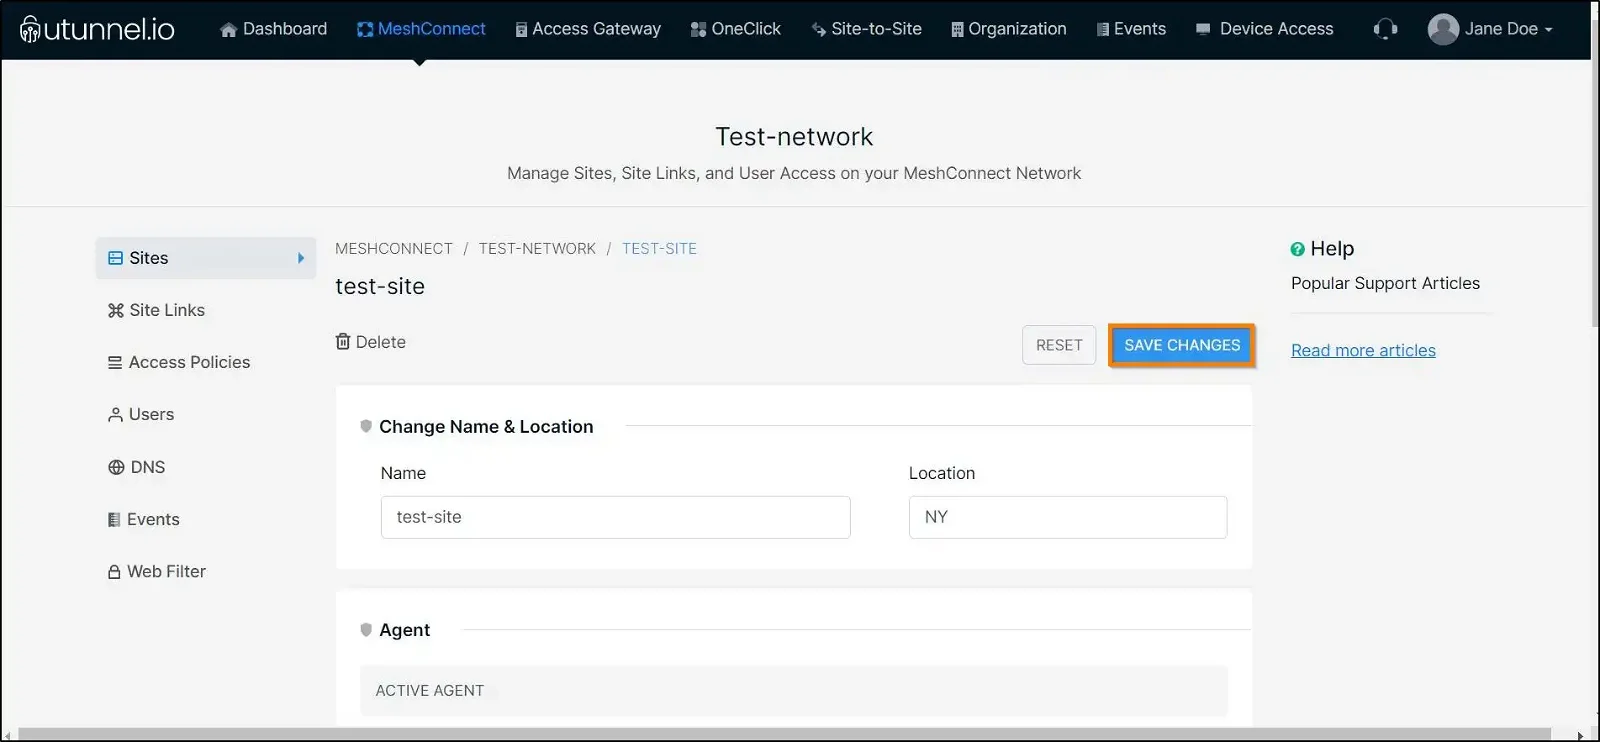
3. Navigate to the SAVE CHANGES button and click on it to reflect the changes.
1. To edit a resource, click on the edit icon in the action column of the resource.
2. An Edit Resource Name pop-up window will appear, where you can key in your new resource name. Click on the EDIT button to save the changes.
3. Proceed to navigate to the SAVE CHANGES button and click on it to reflect the edits.
1. To delete a resource, you can click on the bin icon placed next to the resource name.

2. Then navigate to the SAVE CHANGES button and click on it to save your edits.

After configuring your Site with the resources, you can go ahead and create access policies for your MeshConnect network and control remote resource access.
You can also create Site Links between sites to form a mesh network for seamless resource sharing.