This guide will help you to enable Single-Sing-On and configure Azure as identity provider for your UTunnel Organization account.
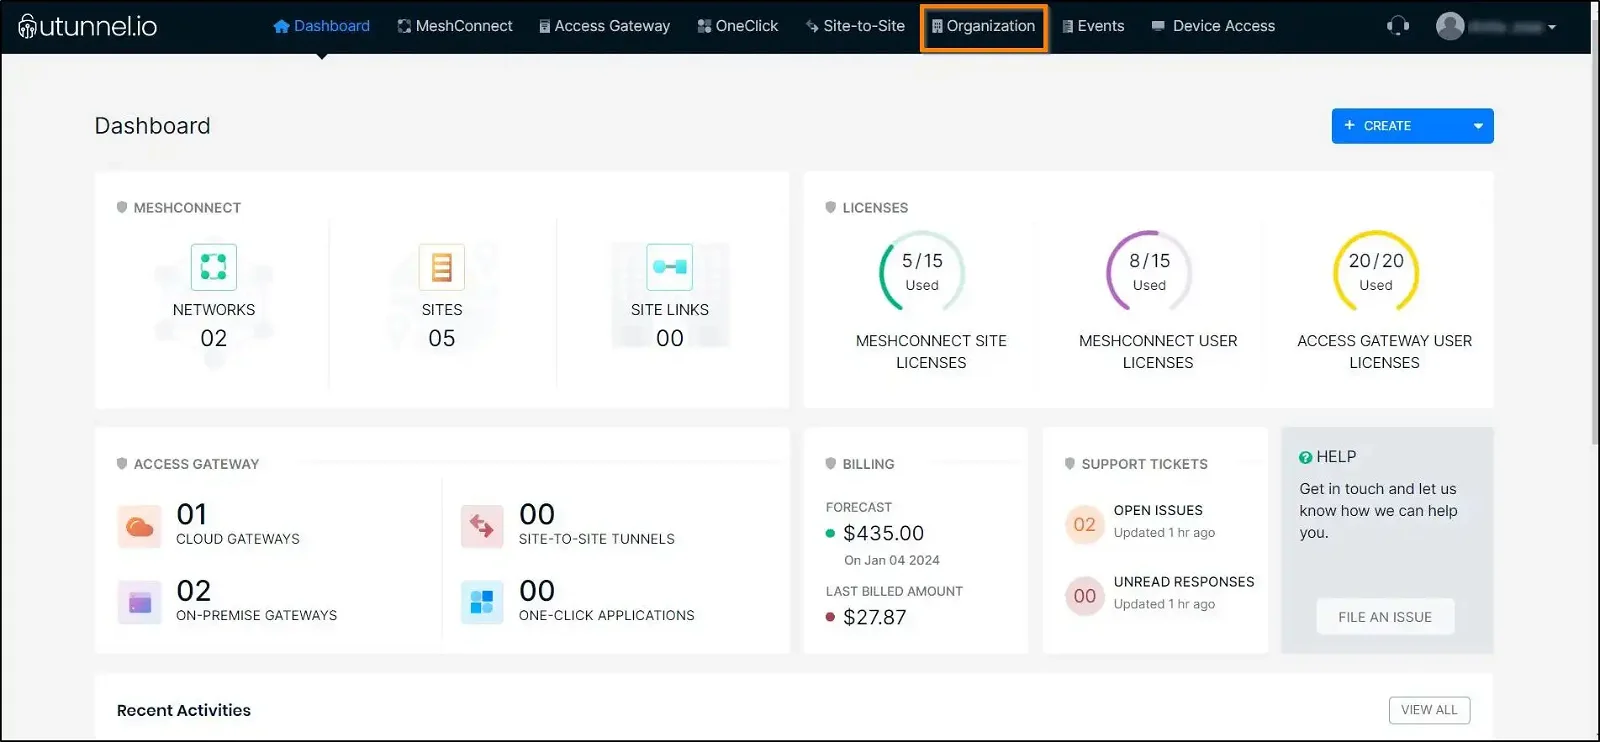
1. To activate SSO and use Azure as an identity provider on your UTunnel organization account, navigate to your Organization dashboard, and select Organization tab.
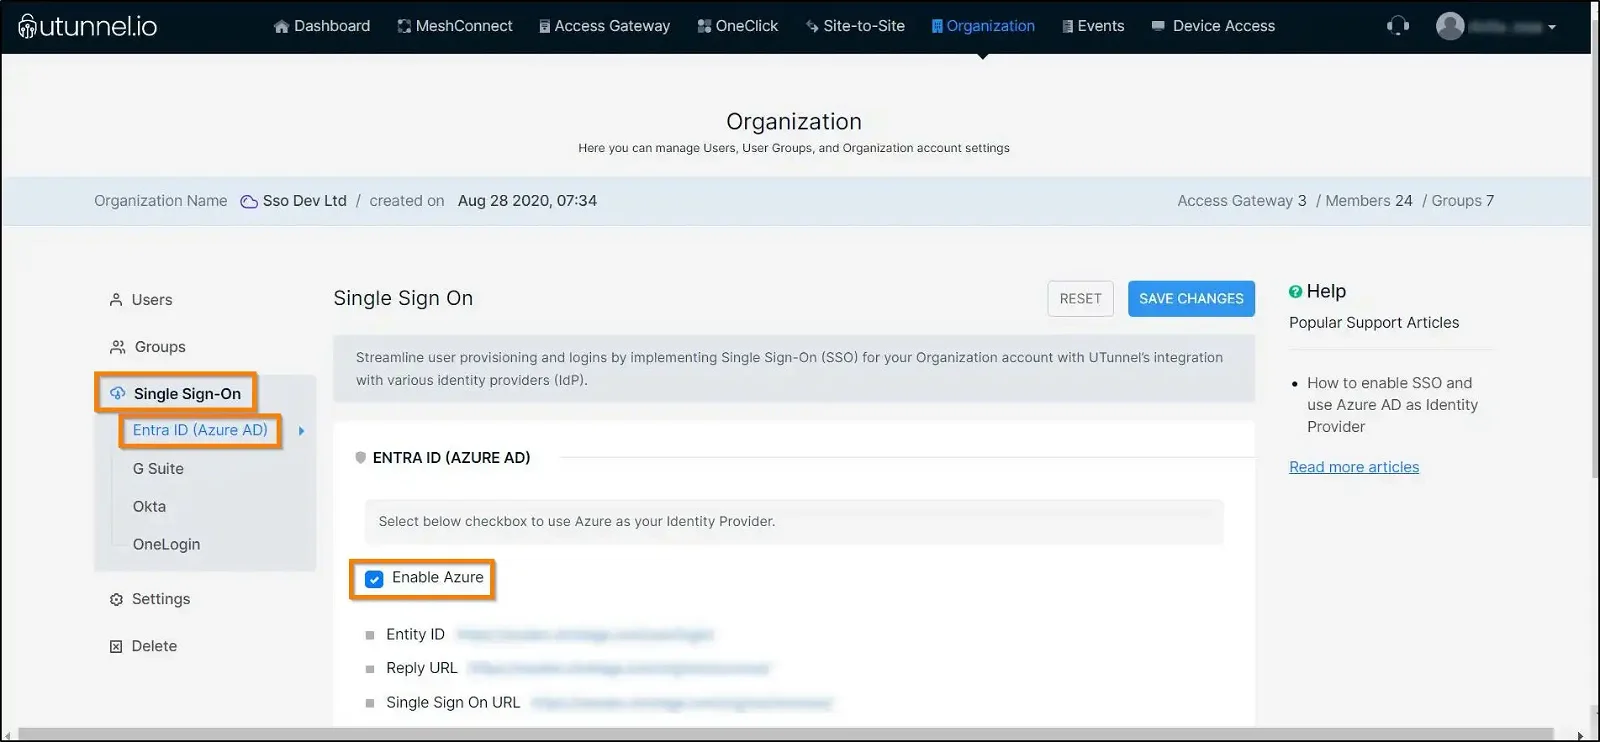
2. Navigate to the Single Sign On option in the left side menu and then click on the Azure option. Select the Enable Azure option checkbox. Keep this page handy as the details will be required in the proceeding steps.
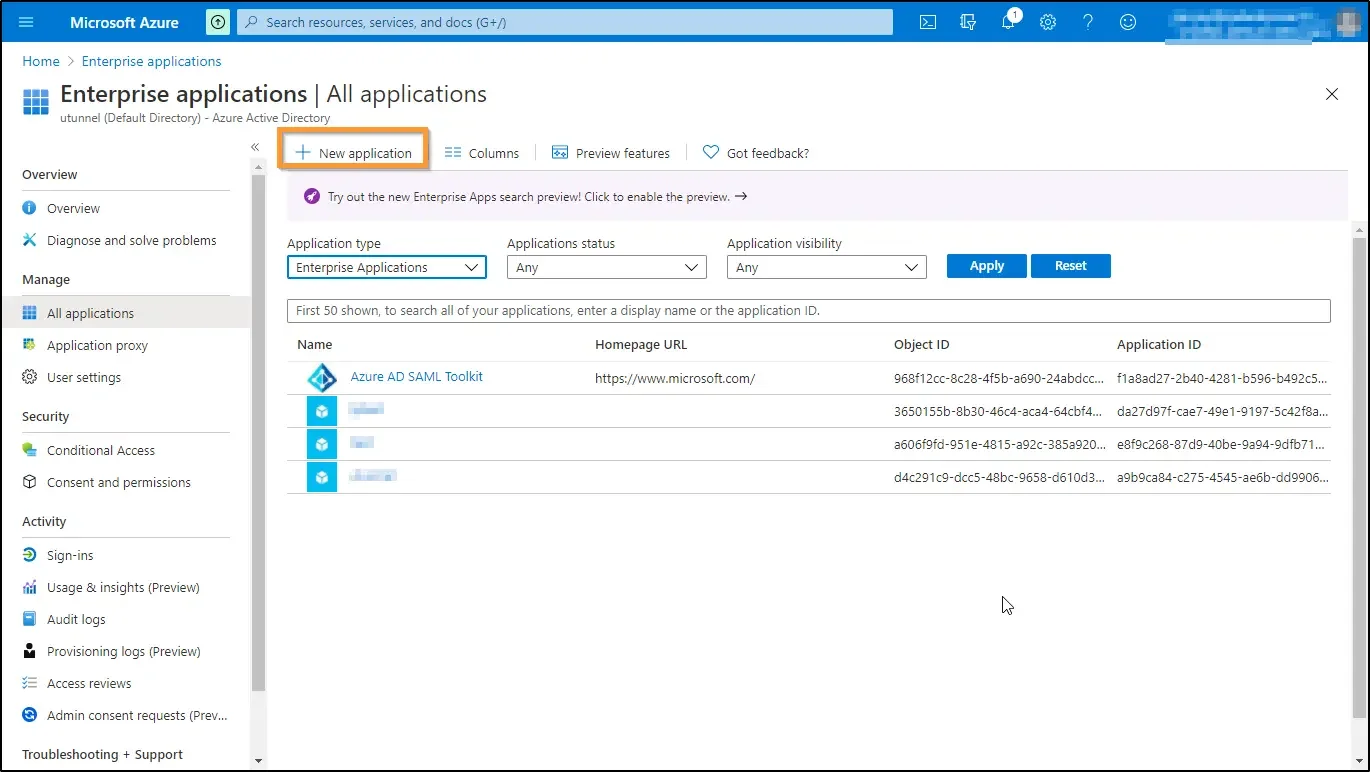
3. Now you have to perform configurations at Azure. Log in to your organization’s Azure portal and select the Enterprise Applications menu below Azure services.

4. Click on the New Application button at the top left of the screen.
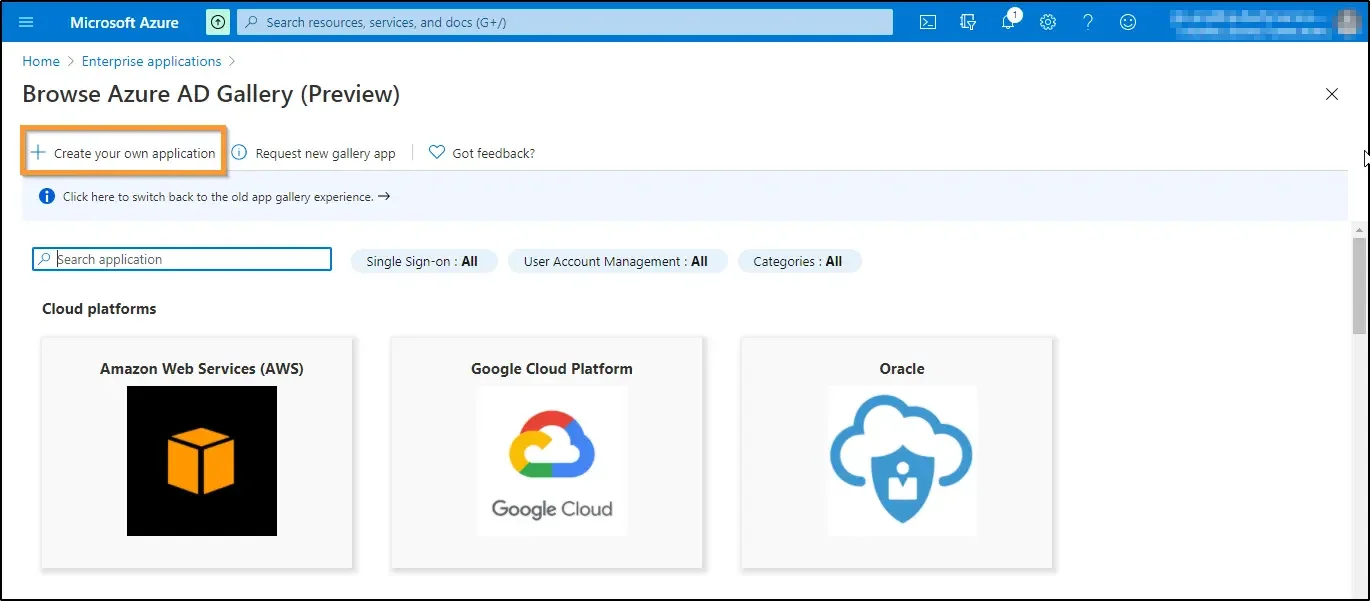
5. Select Create your own Application option.
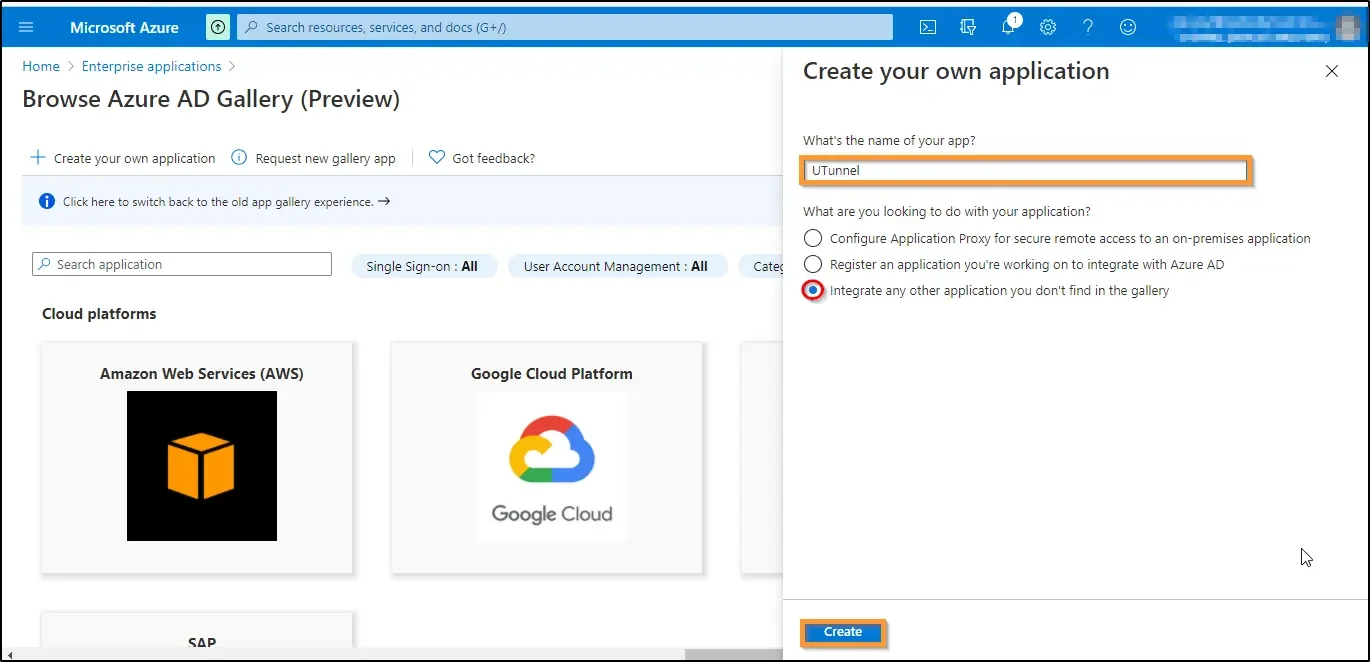
6. Enter the app name. You can give your preferred name. Here we have named it UTunnel. Select Integrate any other application you don’t find in the gallery. Click on the Create button to create your application.
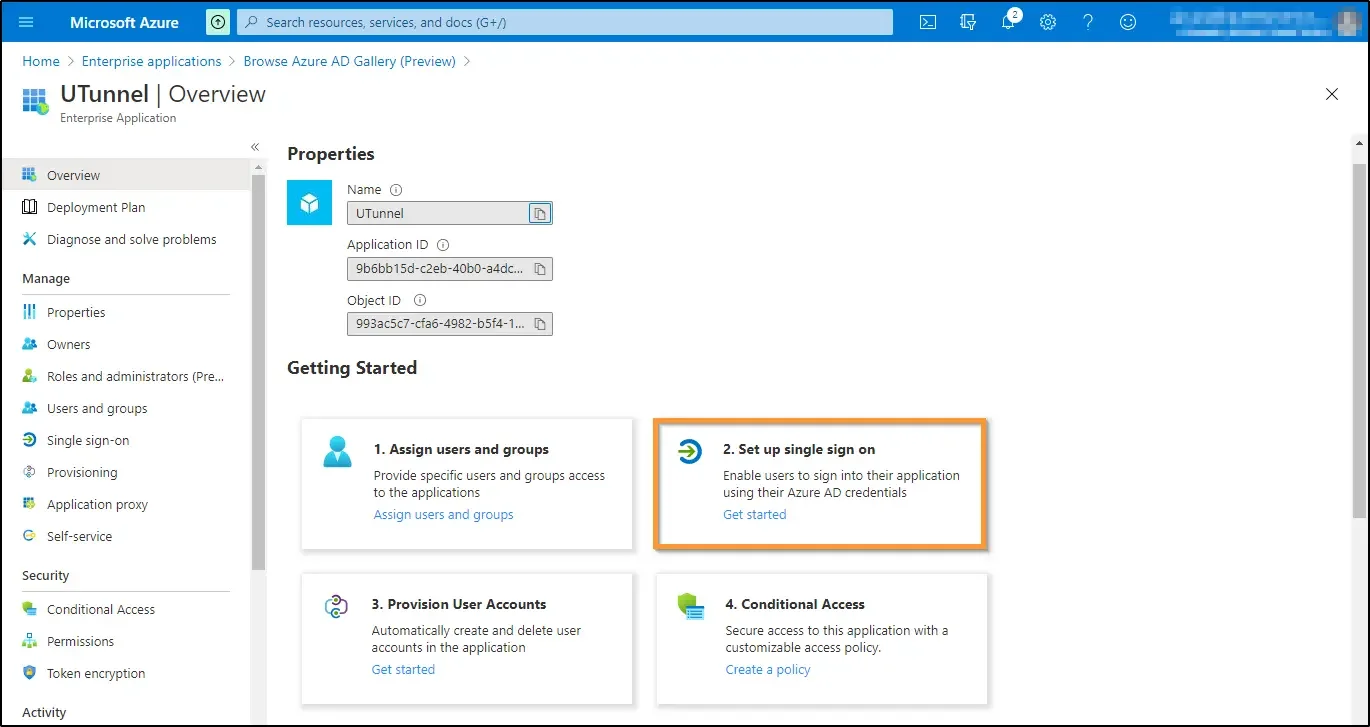
7. Now you will land on the Overview screen of the application you have created. Here it is UTunnel Overview. Click on the Set up single sign on box at the top right of the screen.
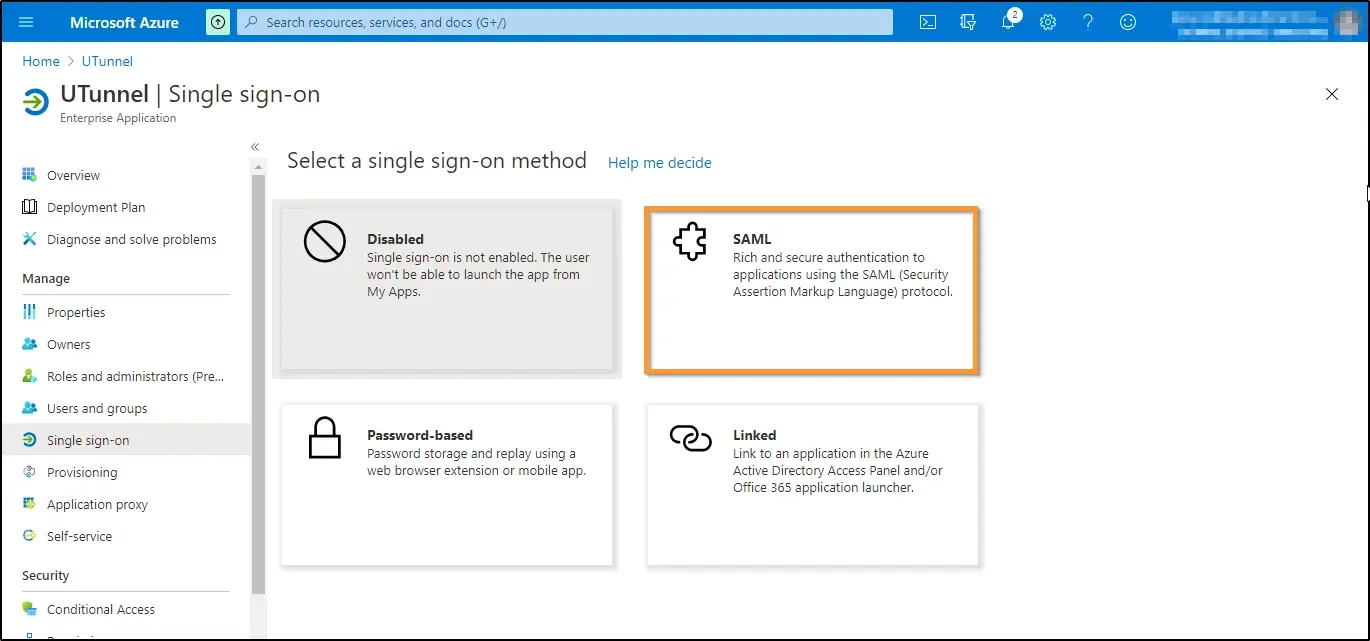
8. Select SAML.
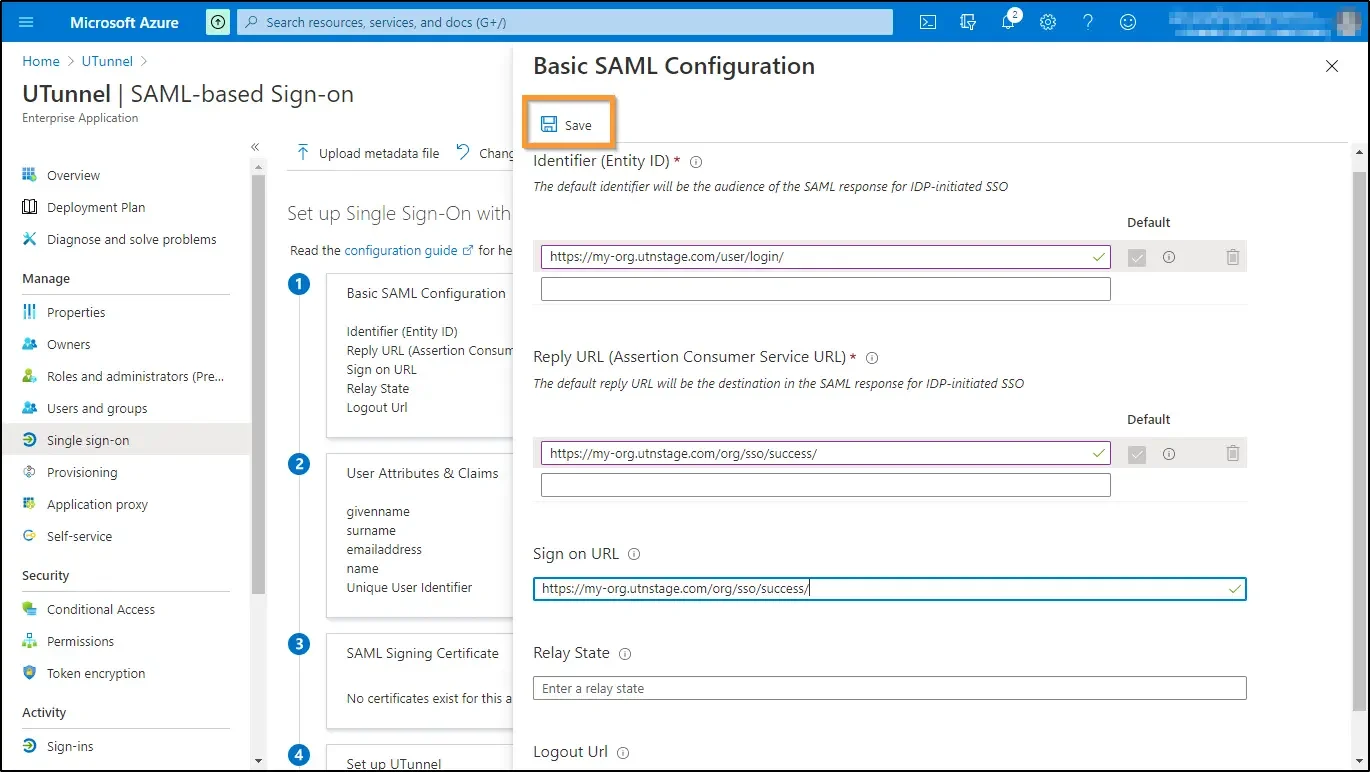
9. Click on the Edit icon on the right side to edit the Basic SAML Configuration.

10. Next, you need to configure the necessary integration URLs and SAML attributes. You will need the details obtained from step #2 here.
Click Save at the top left of the screen.
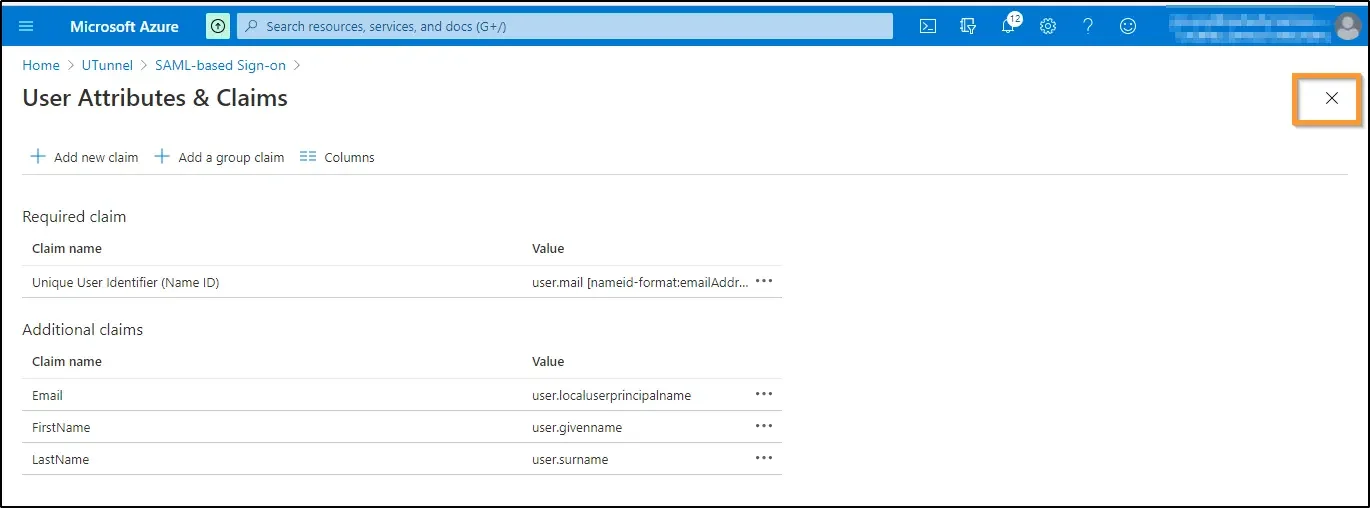
11. a. Next you need to edit User Attributes & Claims. For that, navigate to the Attributes & Claims section and click on the Edit icon.

b. Now click on each claim name to manage the claims.
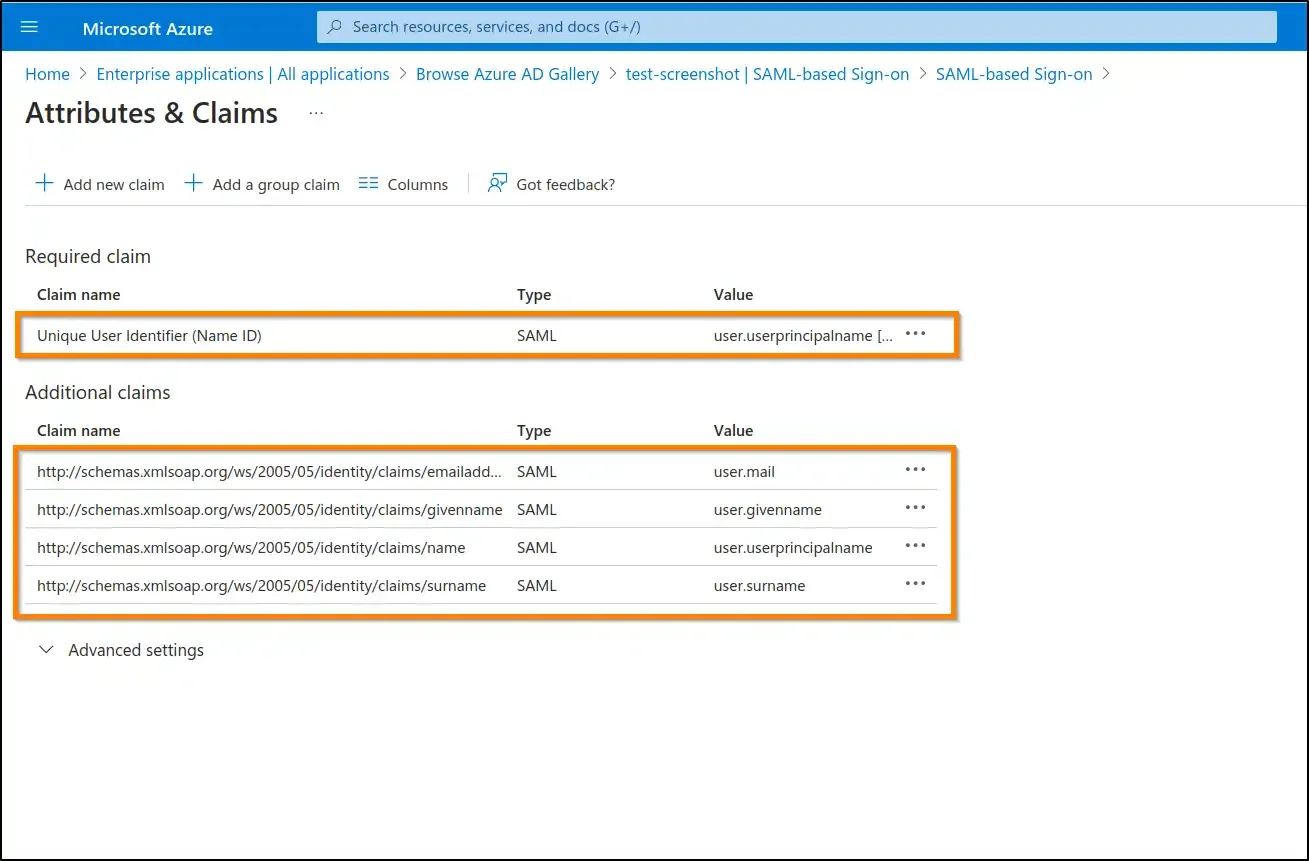
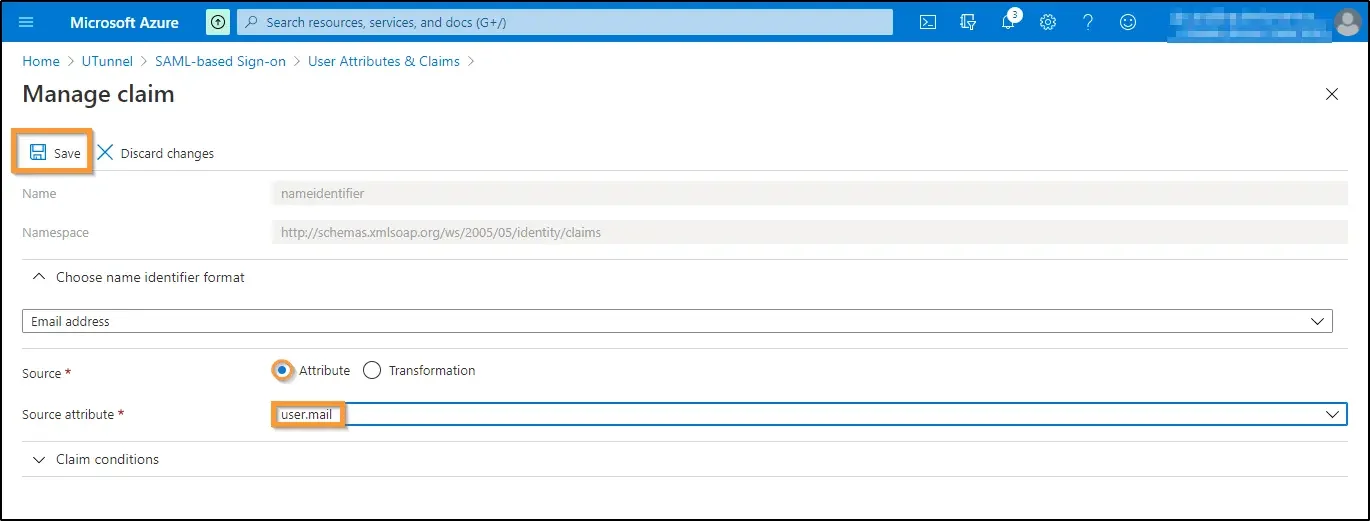
c. Unique User Identifier (Name ID)
Enter the details as follows:
Click on the Save button at the top left of the screen.
Now navigate back to Attributes & Claims.
d. Click on the first additional claim. You will be redirected to the Manage Claim screen. Edit the first claims as given below:
Click on the Save icon at the top left.
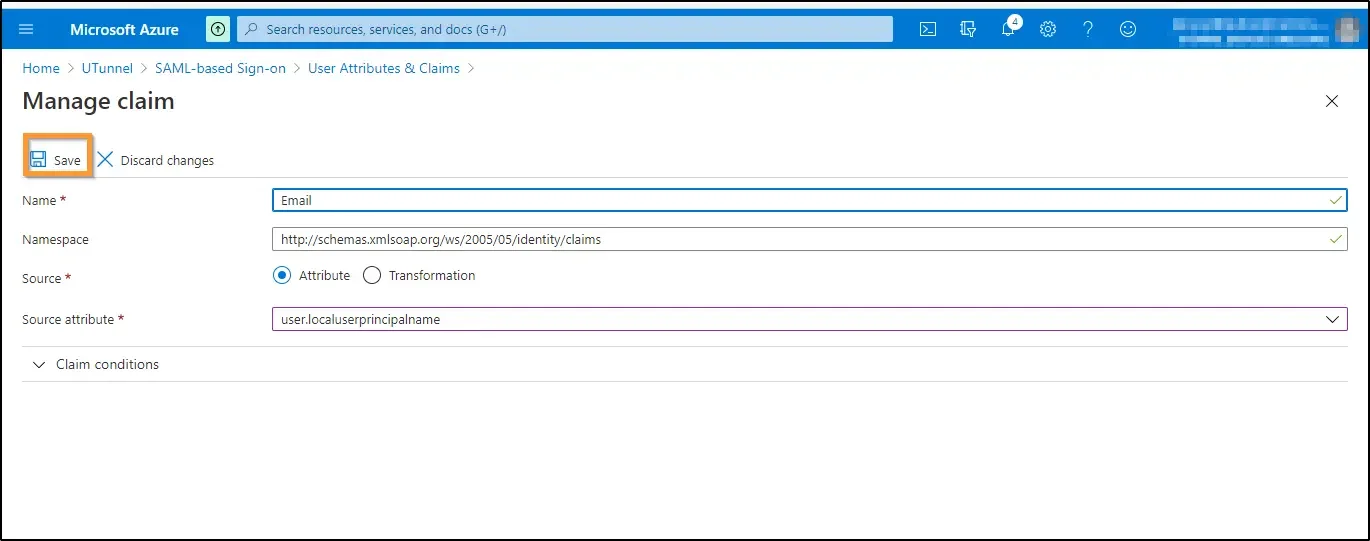
e. Click on the second additional claim. You will be redirected to the Manage Claim screen. Edit the second claims as given below:
Click on the Save icon at the top left.

f. Click on the third additional claim. You will be redirected to the Manage Claim screen. Edit the third claims as given below:
Click on the Save icon at the top left.

12. Now right-click on the fourth additional attribute and click on the Delete icon to remove it. Click on the Ok button to confirm the deletion.
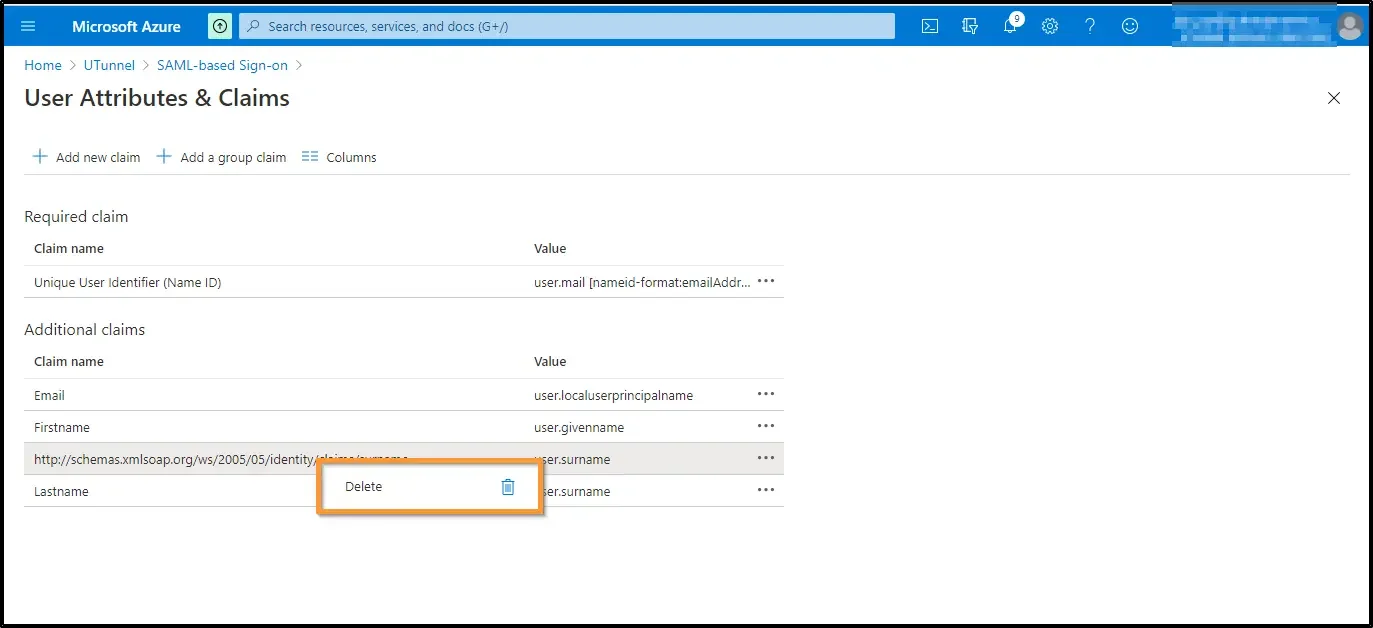
13. Now click on the Close icon at the top right.
14. Scroll down to find the SAML Signing Certificate section. Find out App Federation Metadata Url. Click on the copy icon to copy the URL.

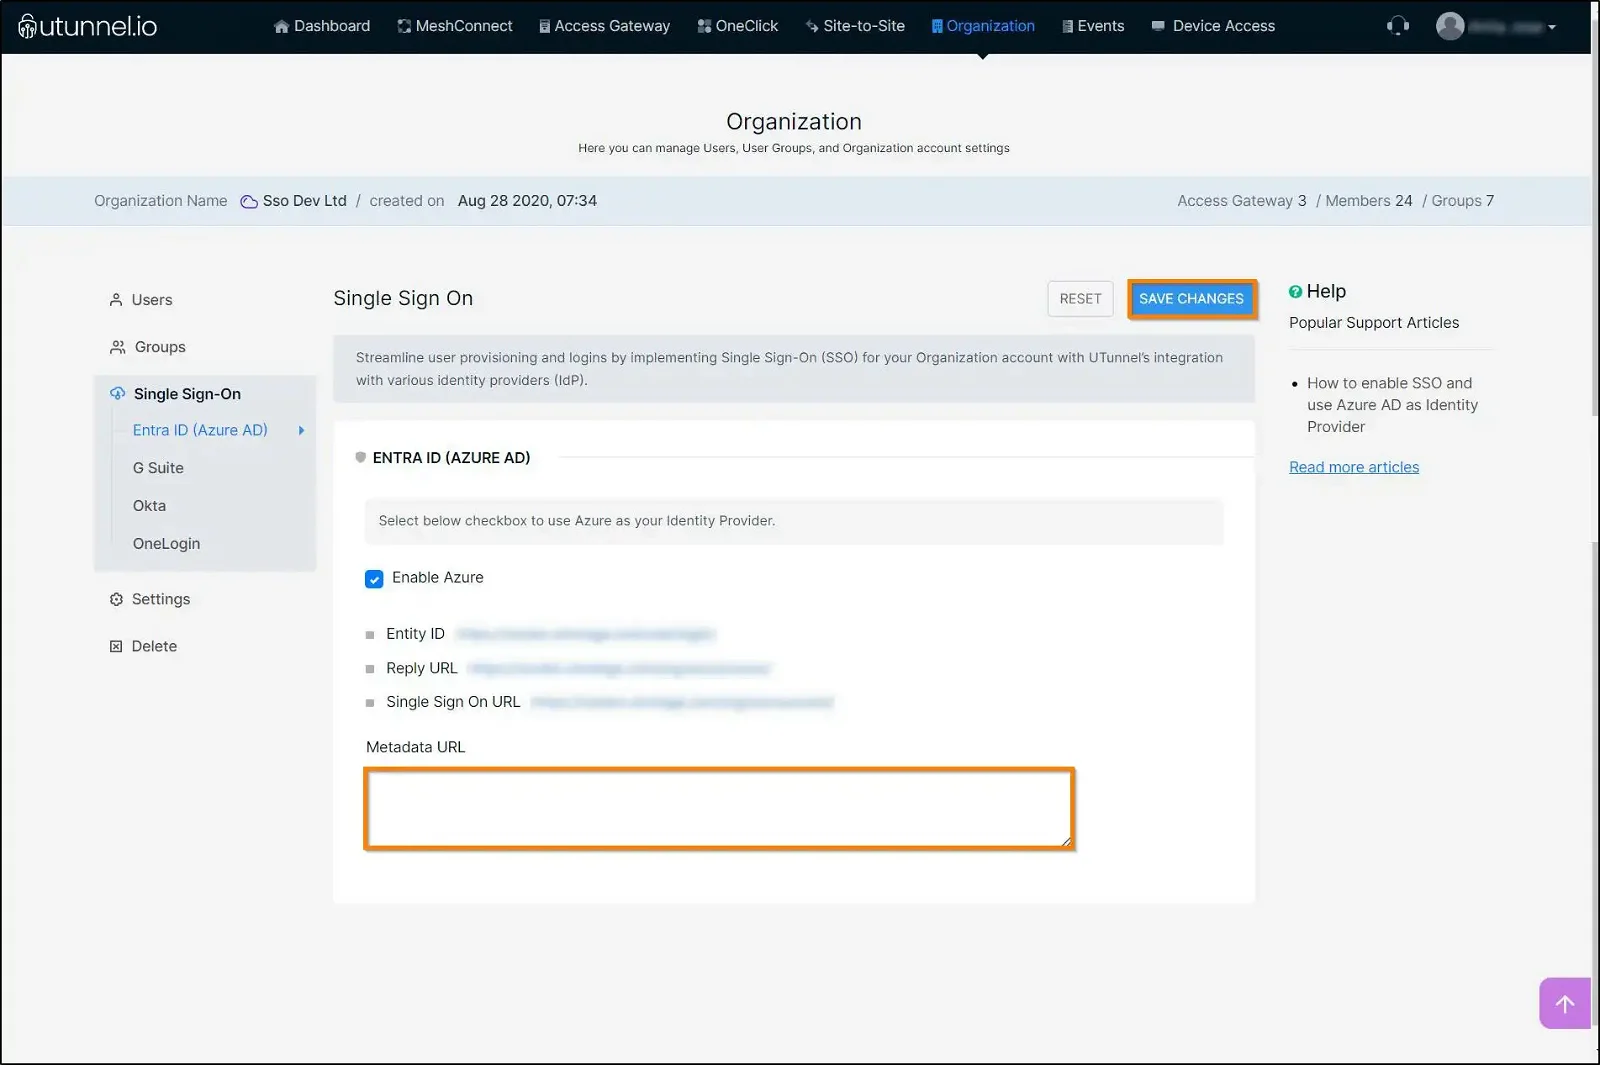
15. Now navigate to the UTunnel dashboard and paste it into Metadata URL field. Click on the SAVE CHANGES button.
Now you are good to go. Azure integration is complete now. Users with active Azure login and necessary privileges will be able to log in to your organization’s UTunnel dashboard. However, the organization owner has to log in with the registered email and password, and not with the Azure account.