Here is the step-by-step process to set up single sign-on (SSO) and configure G Suite as the identity provider for your UTunnel Organization account.
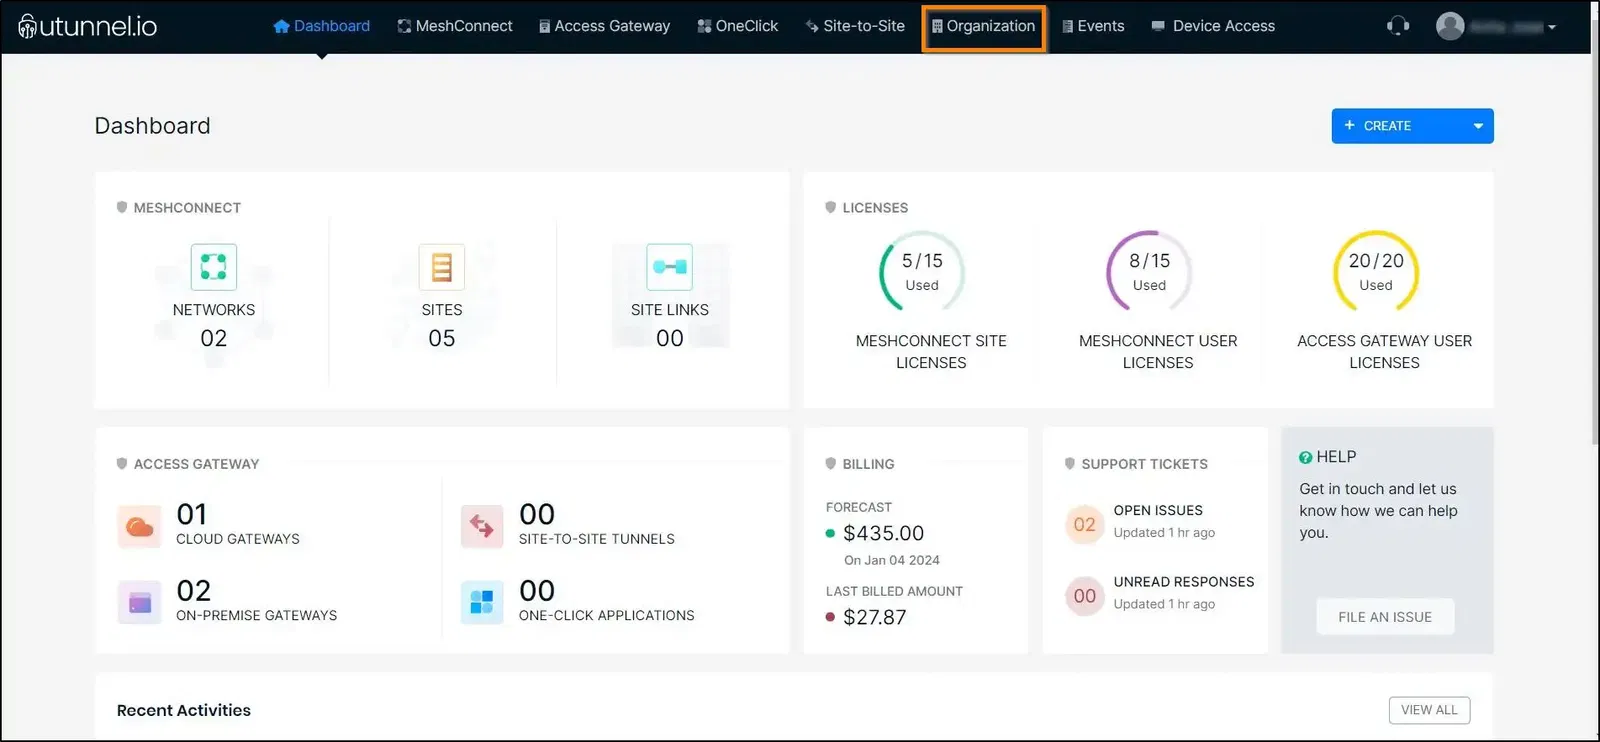
1. To activate SSO and use G Suite as the identity provider on your UTunnel organization account, navigate to your Organization dashboard, and select the Organization tab.
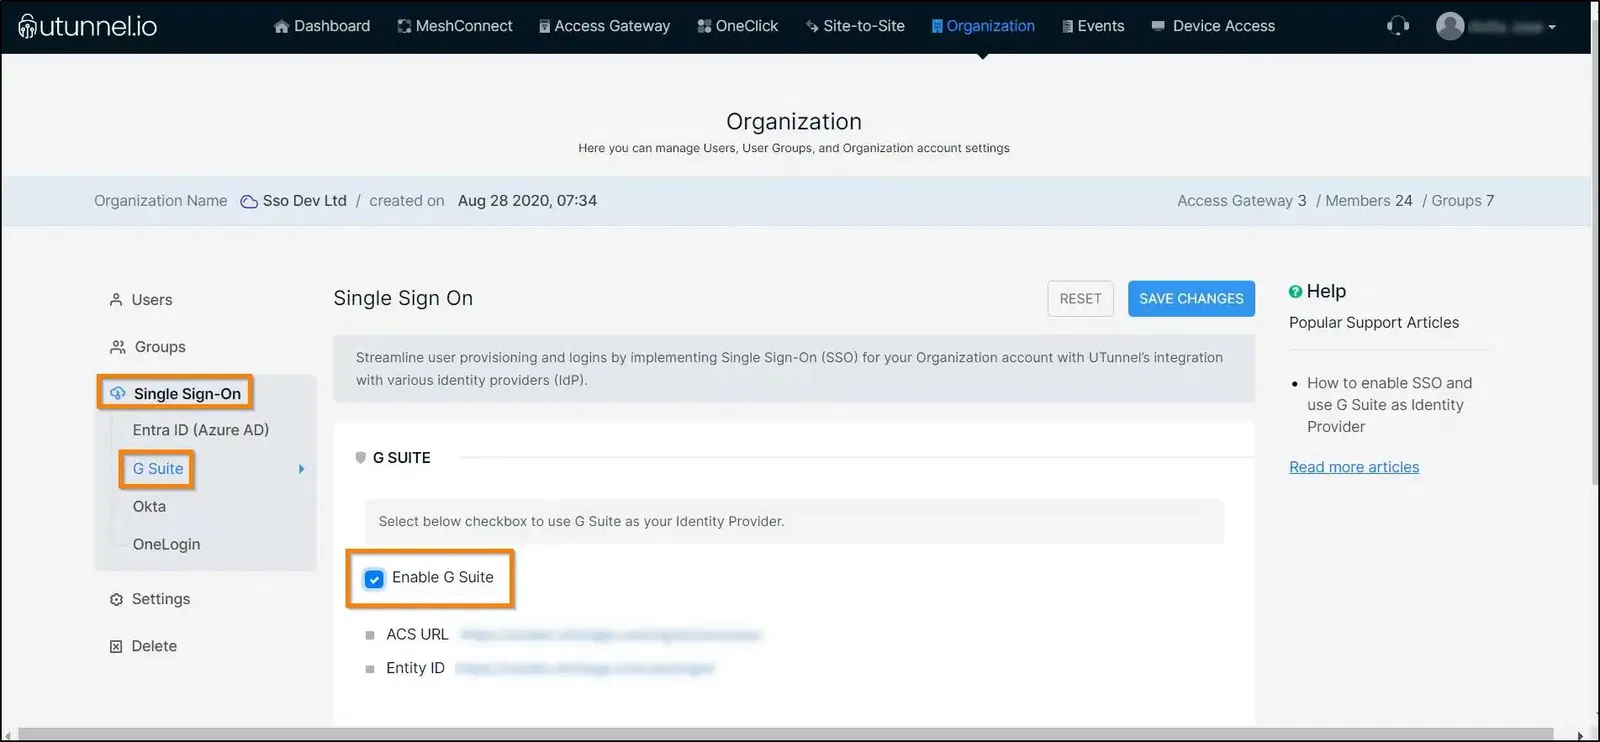
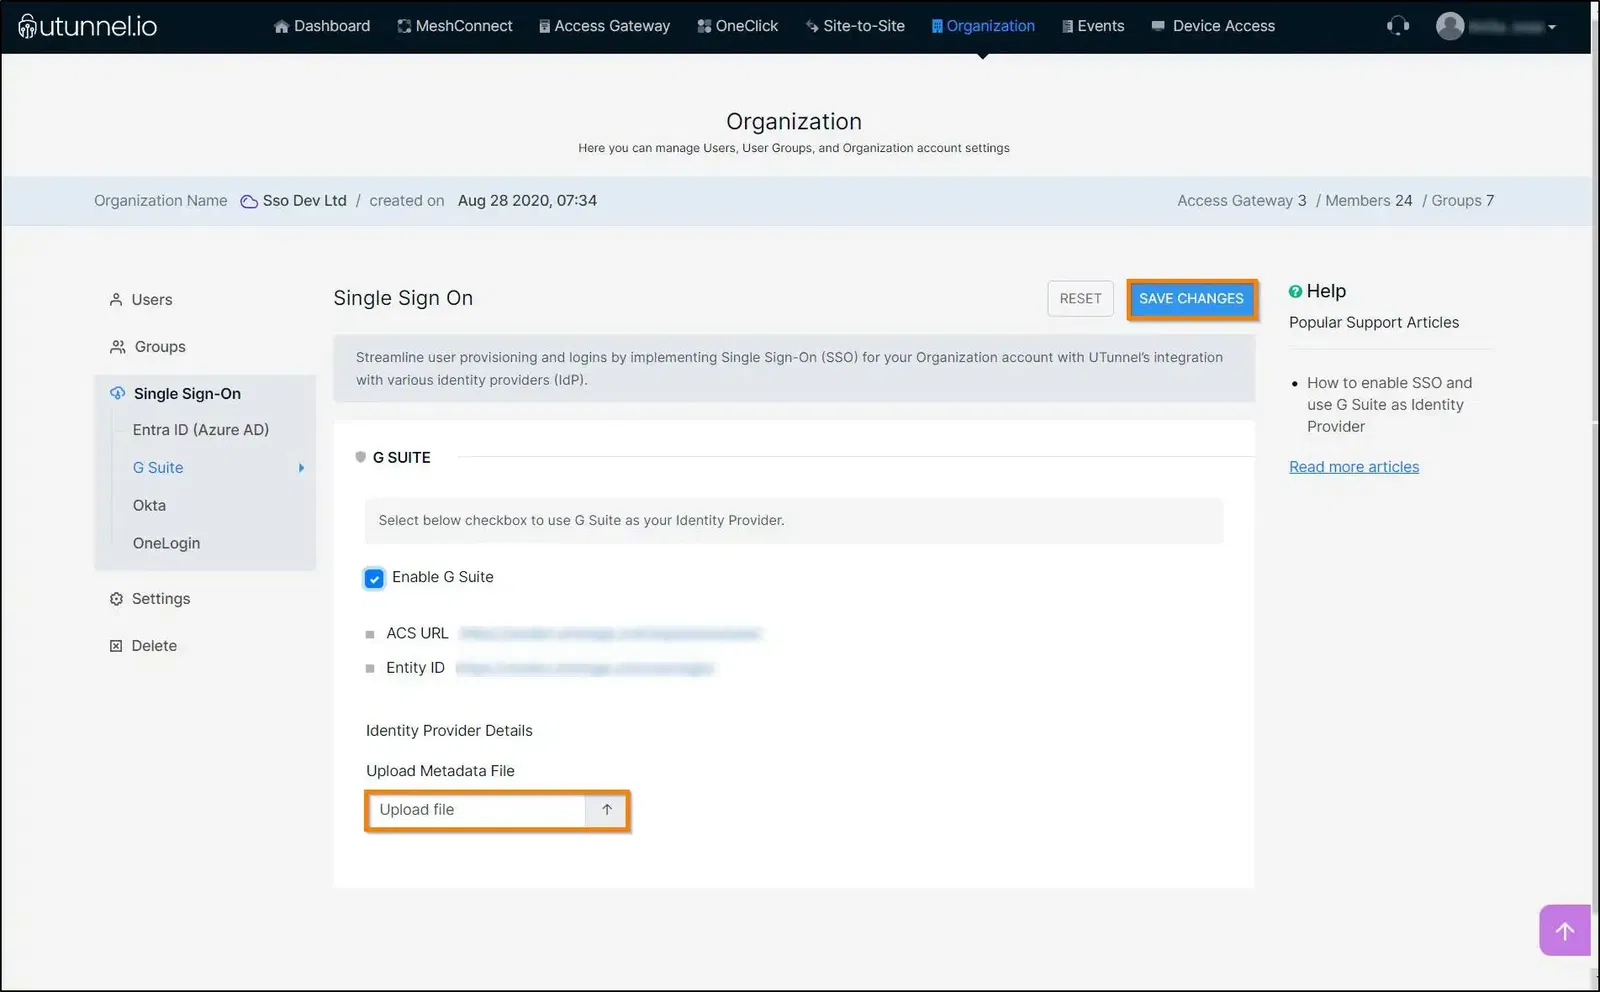
2. Navigate to the Single Sign On and then click on the G Suite option. Select the Enable G Suite checkbox to enable G Suite as your identity provider. Keep this page handy as you will need the ACS URL and Entity ID from here.
G Suite Configuration
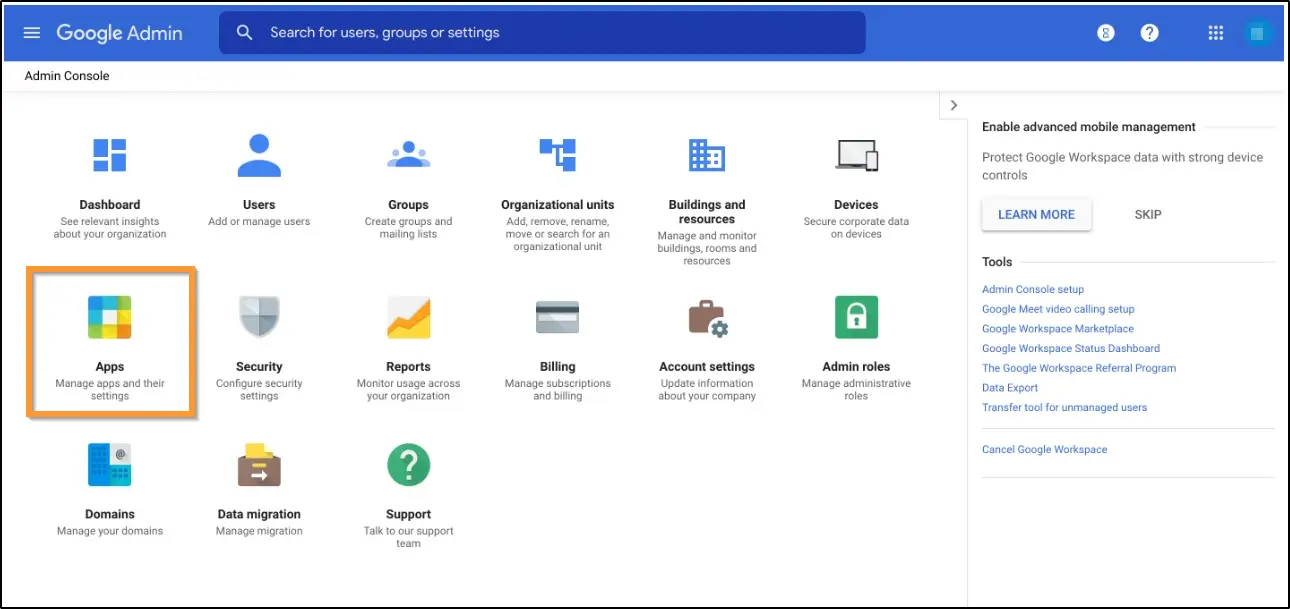
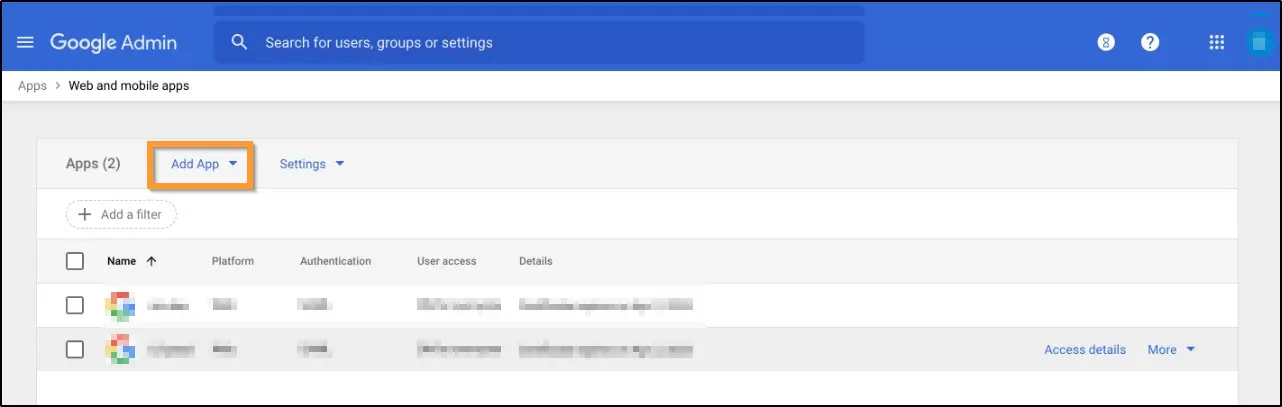
1. Now, you have to perform configurations at G Suite. Sign in to https://admin.google.com/ with your G Suite account. Navigate to the menu, and select Apps.
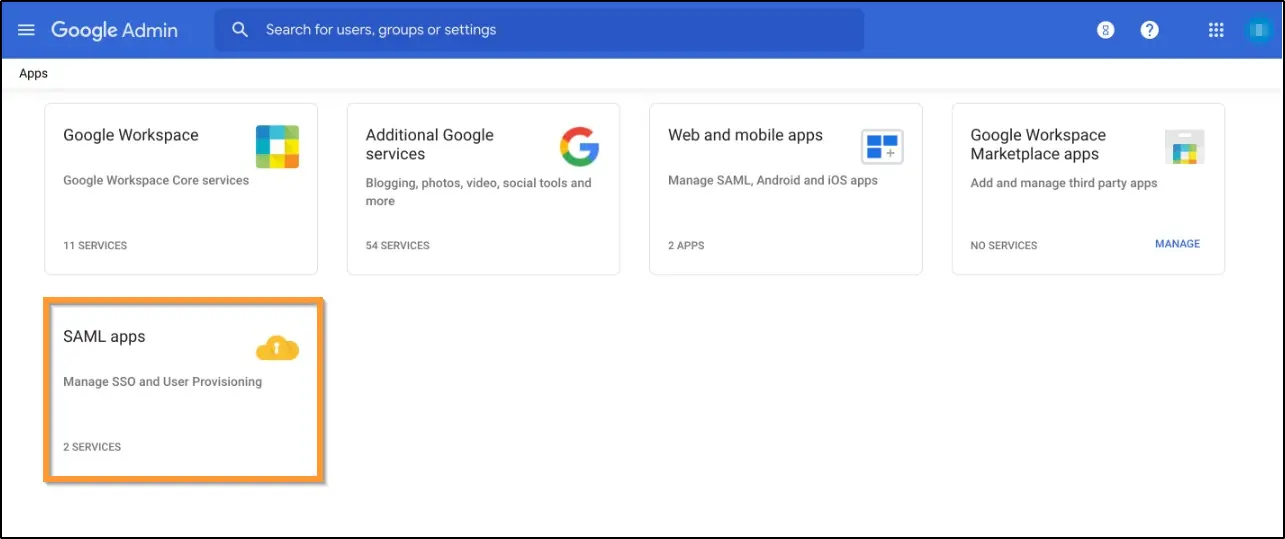
2. Select SAML Apps.
3. Click on the Add App.
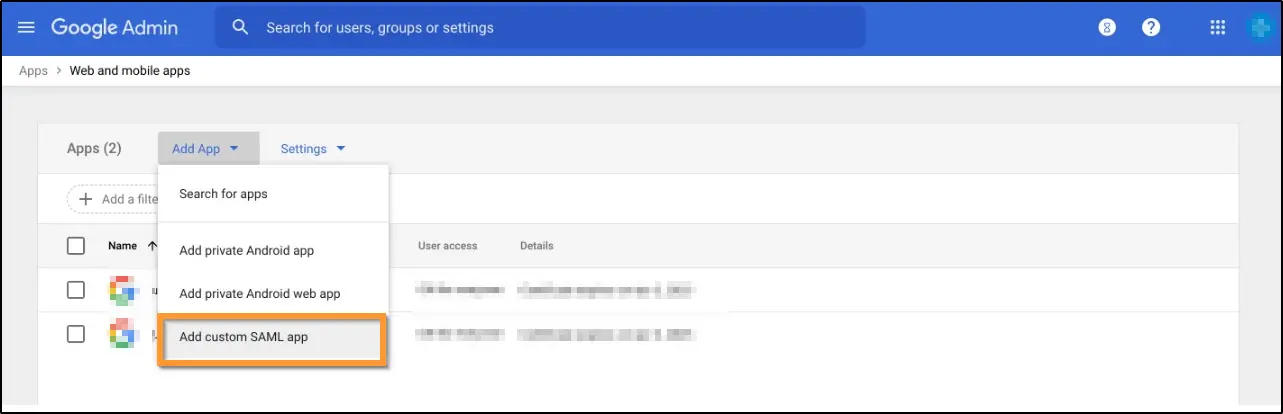
4. Select Add Custom SAML app.
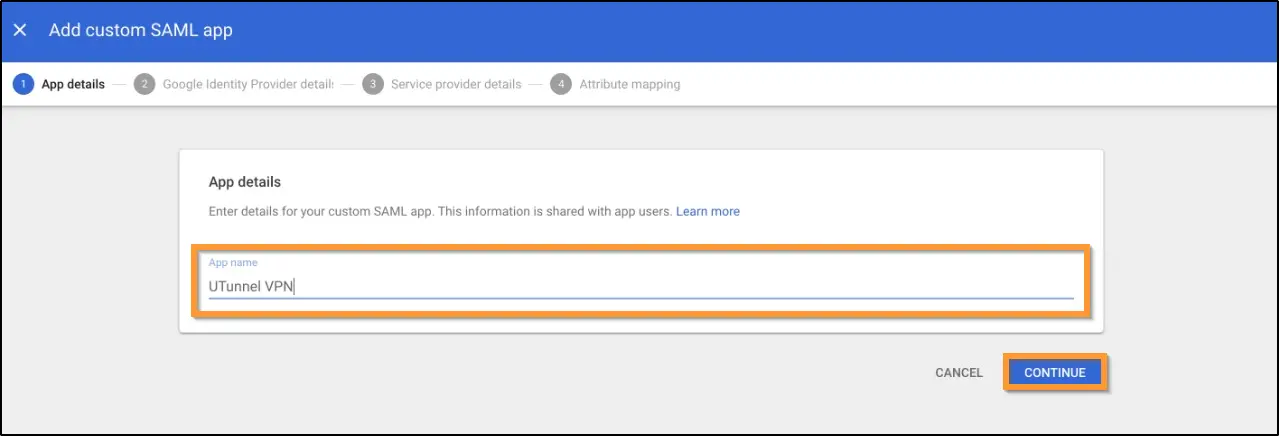
5. In the App details screen, enter your preferred name. We recommend using UTunnel VPN as the App name for easy understanding. Click on CONTINUE to proceed.
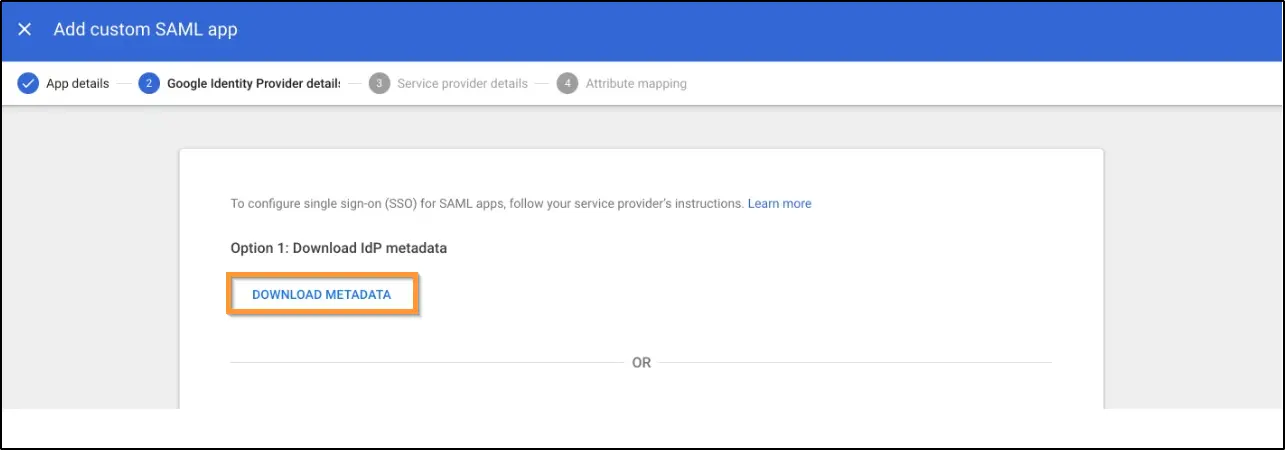
6. In the Google Identity Provider details screen, you will get two options. We recommend you to go for the first option to download the METADATA file and ignore option 2. Download the file. Click on the Continue button.
7. Proceed to your UTunnel account dashboard and upload Metadata File into the corresponding field. Then, click on SAVE CHANGES.
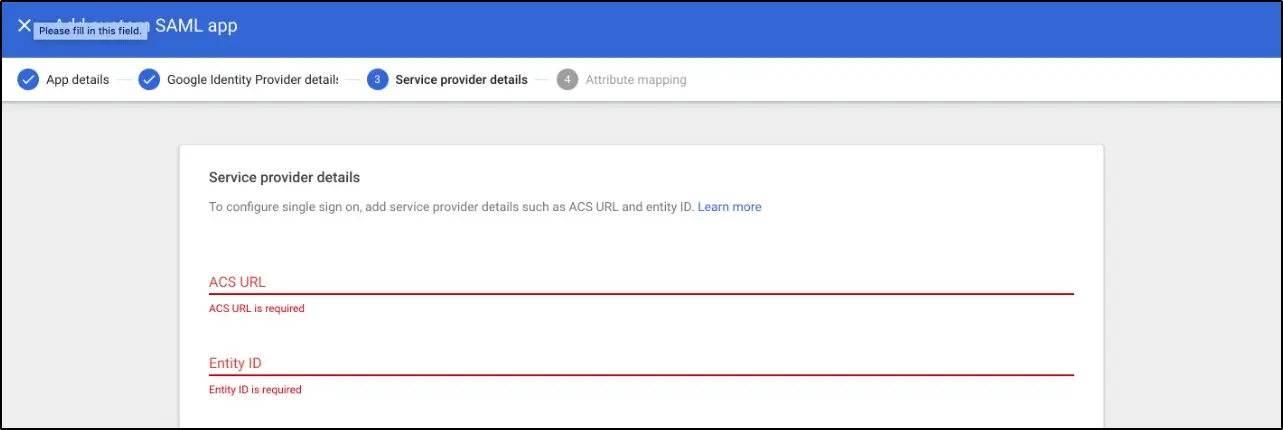
8. In the Service provider details screen, you can find two options ACS URL and Entity ID. You have to enter the details obtained in step #2 in the corresponding fields. Click on the CONTINUE button.
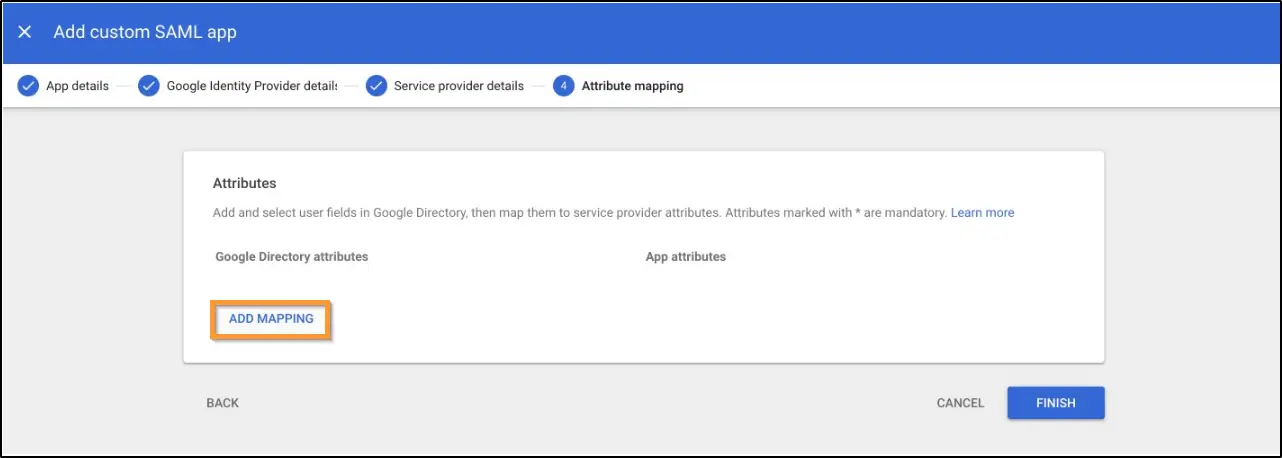
9. Next step is to configure SAML attributes. Click on ADD MAPPING button to add each field.
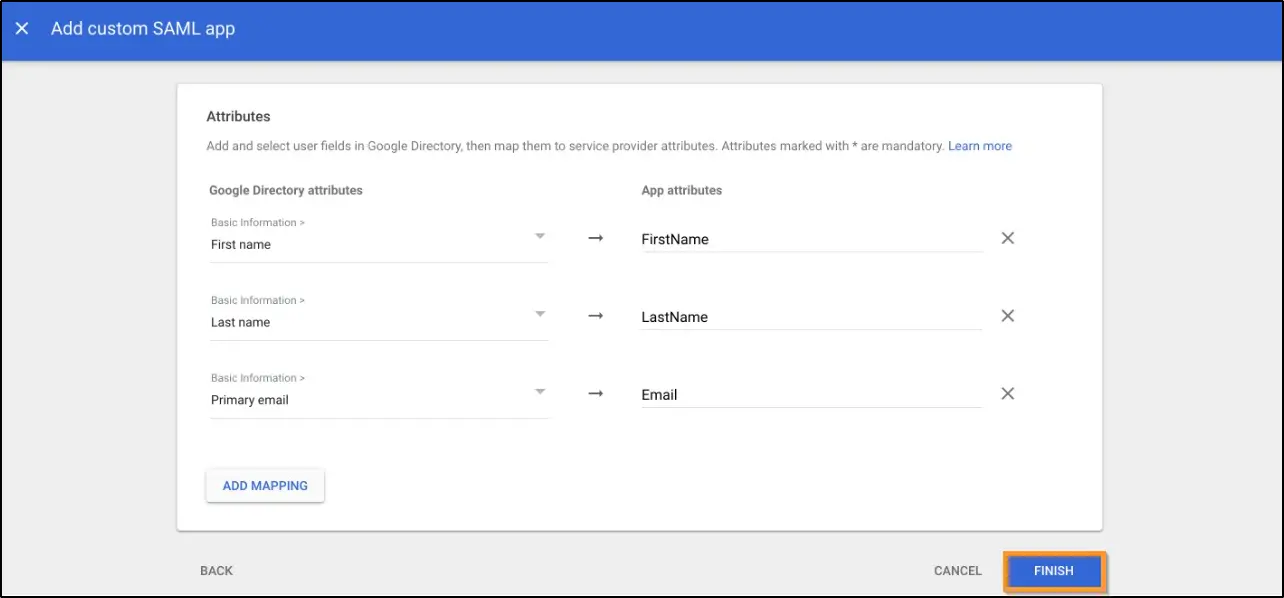
10. Set the SAML attributes as follows. Please note that these attributes are case-sensitive. Once done click Finish.
|
Google Directory Attributes |
App attributes |
|
First name |
FirstName |
|
Last name |
LastName |
|
Primary email |
|
11. That's it. G Suite integration is complete now. Users with active G Suite login and necessary privileges will be able to login to your organization's UTunnel dashboard. However, the organization owner will be required to log in with his registered email and password, and not with a G Suite account.