Updated on 26 Jul, 2023
UTunnel provides users with multi-factor authentication (MFA) for secure access to VPN servers. Server owners or admins can enforce MFA on VPN servers, allowing VPN access to MFA-enabled users only, while denying access to others.
Users without MFA enabled in their UTunnel account will need to enable it from their web dashboard before connecting to MFA-enforced servers. This additional security layer enhances protection for your VPN server.
Please note that to enforce MFA on a VPN server, authenticated VPN sessions should be enabled on the server first. Only in that case, users will undergo re-authentication when connecting to the VPN server, in addition to the initial login authentication.
This guide describes how to enforce multi-factor authentication on a VPN server from the UTunnel web console.
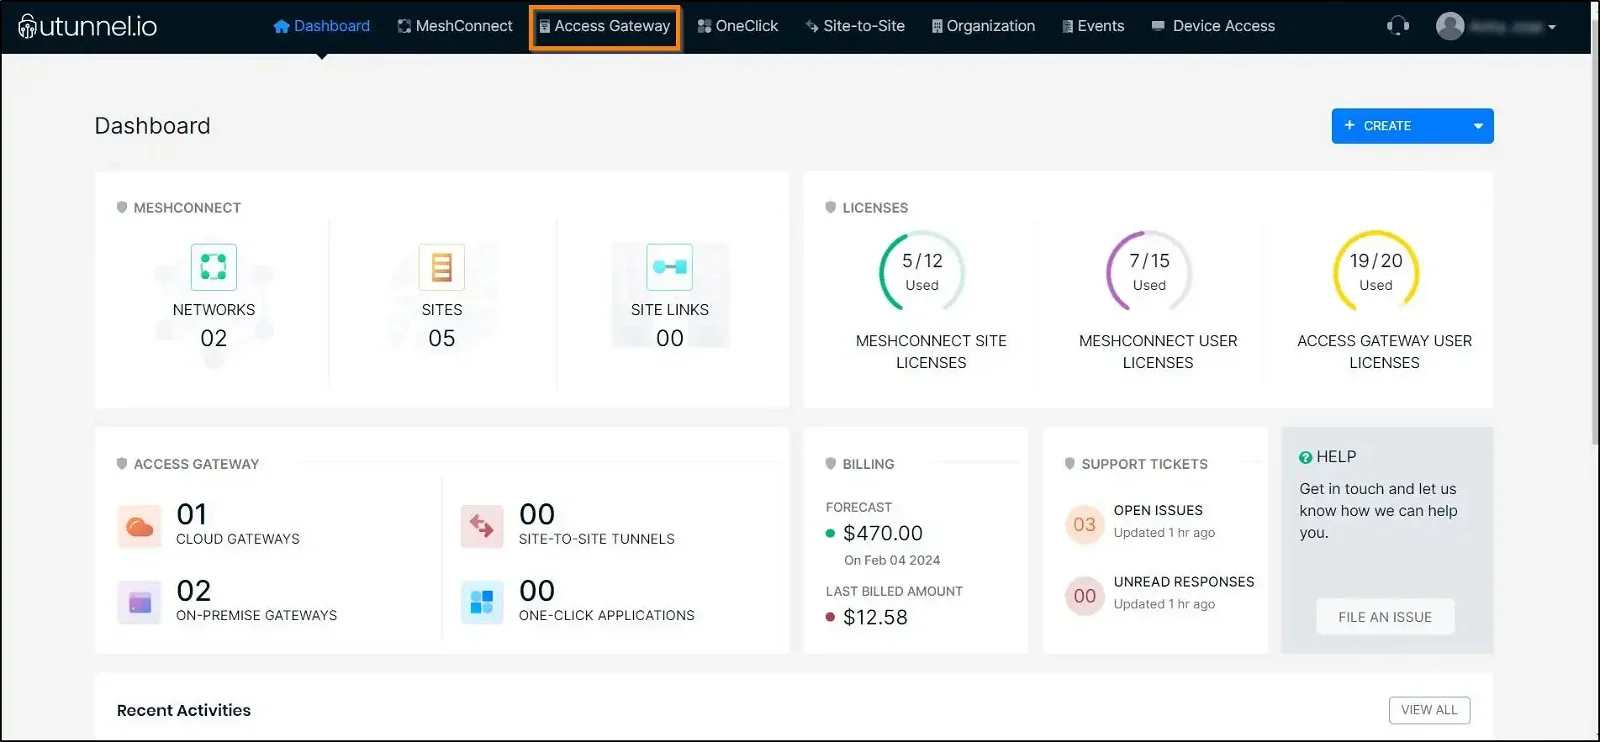
1. Log in to your UTunnel account and navigate to the Server tab.
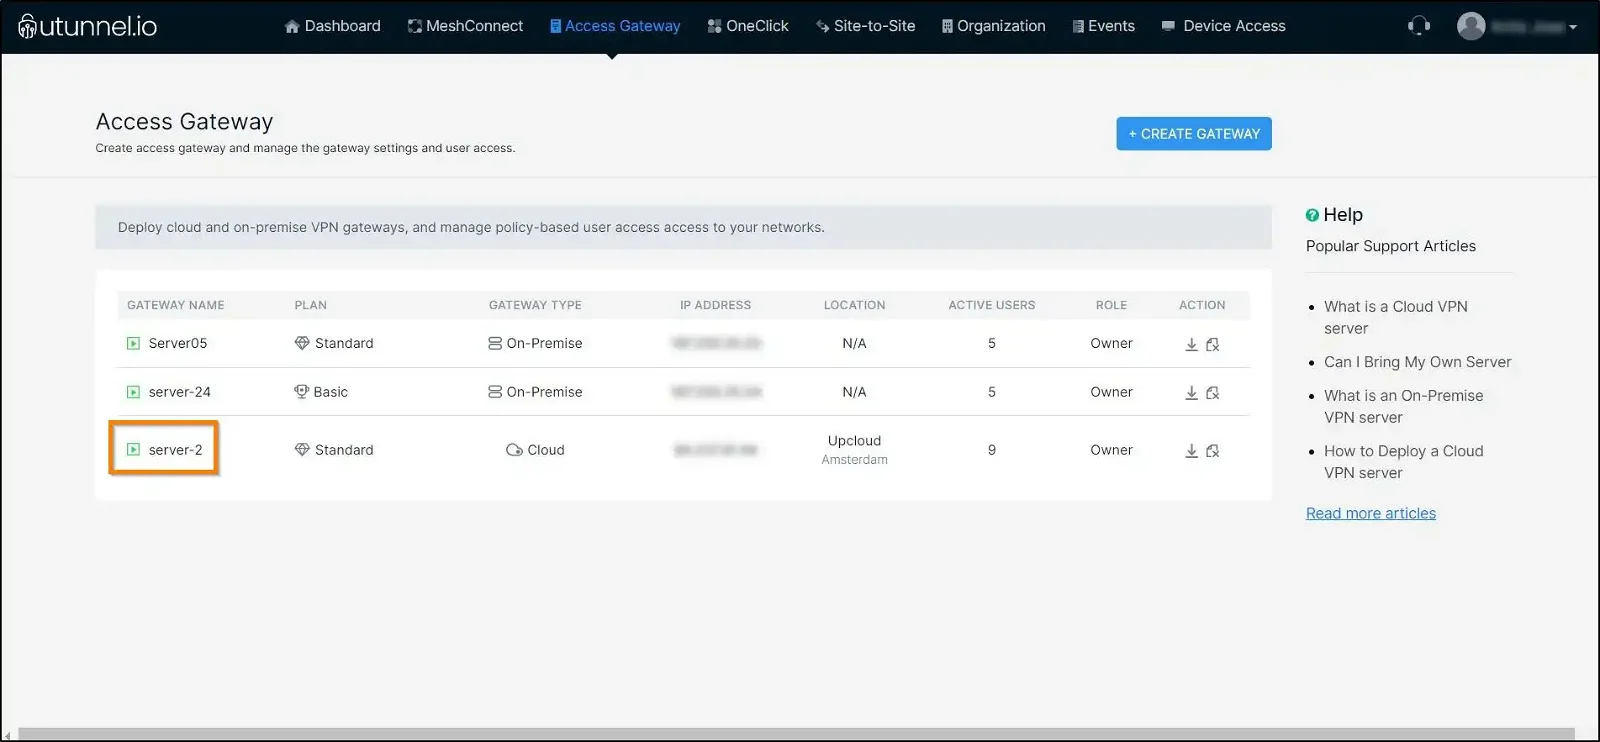
2. Click on the server on which you want to enable multi-factor authentication.
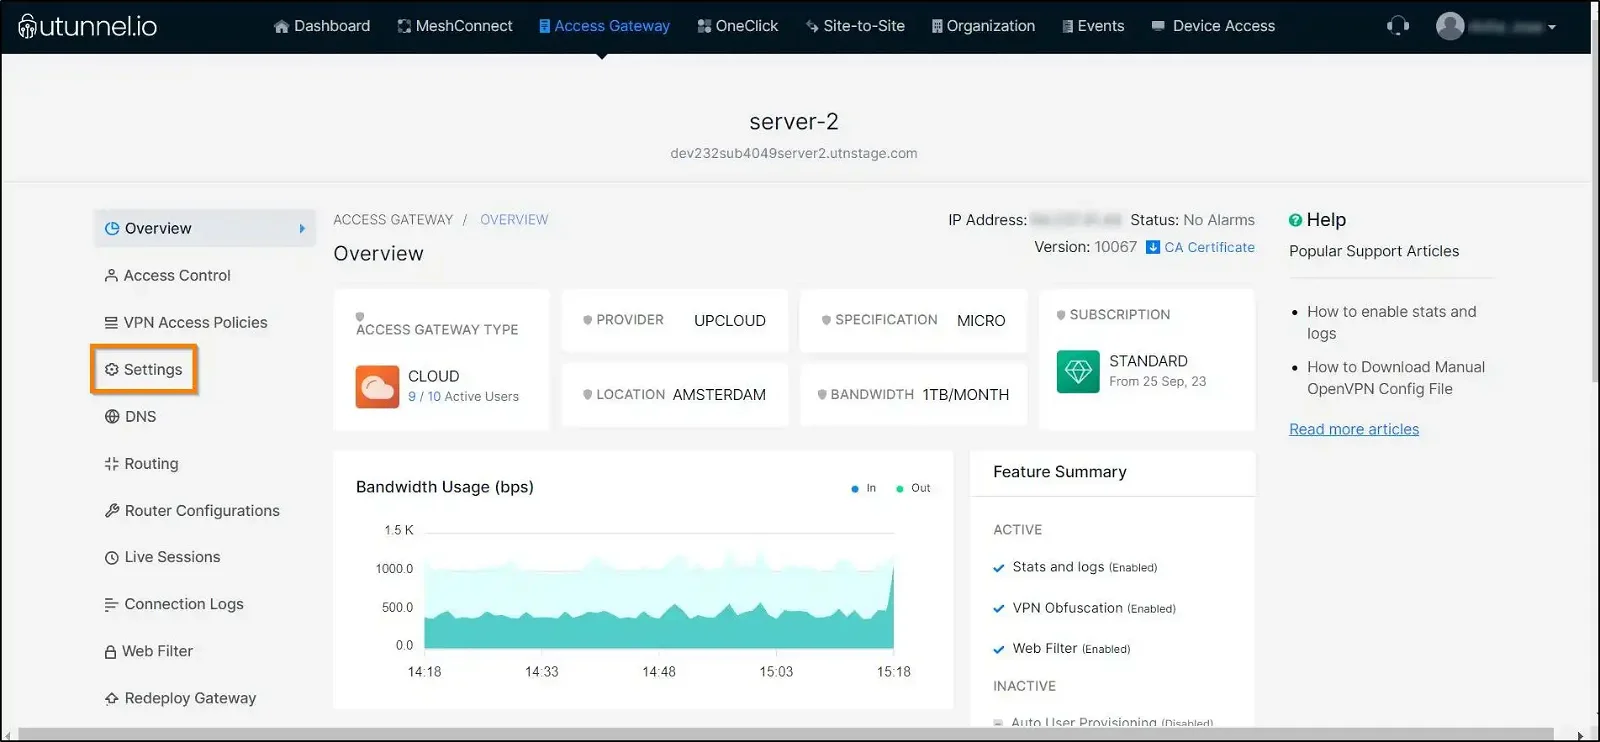
3. From the Server Overview page, navigate to the Settings section on the left side menu.
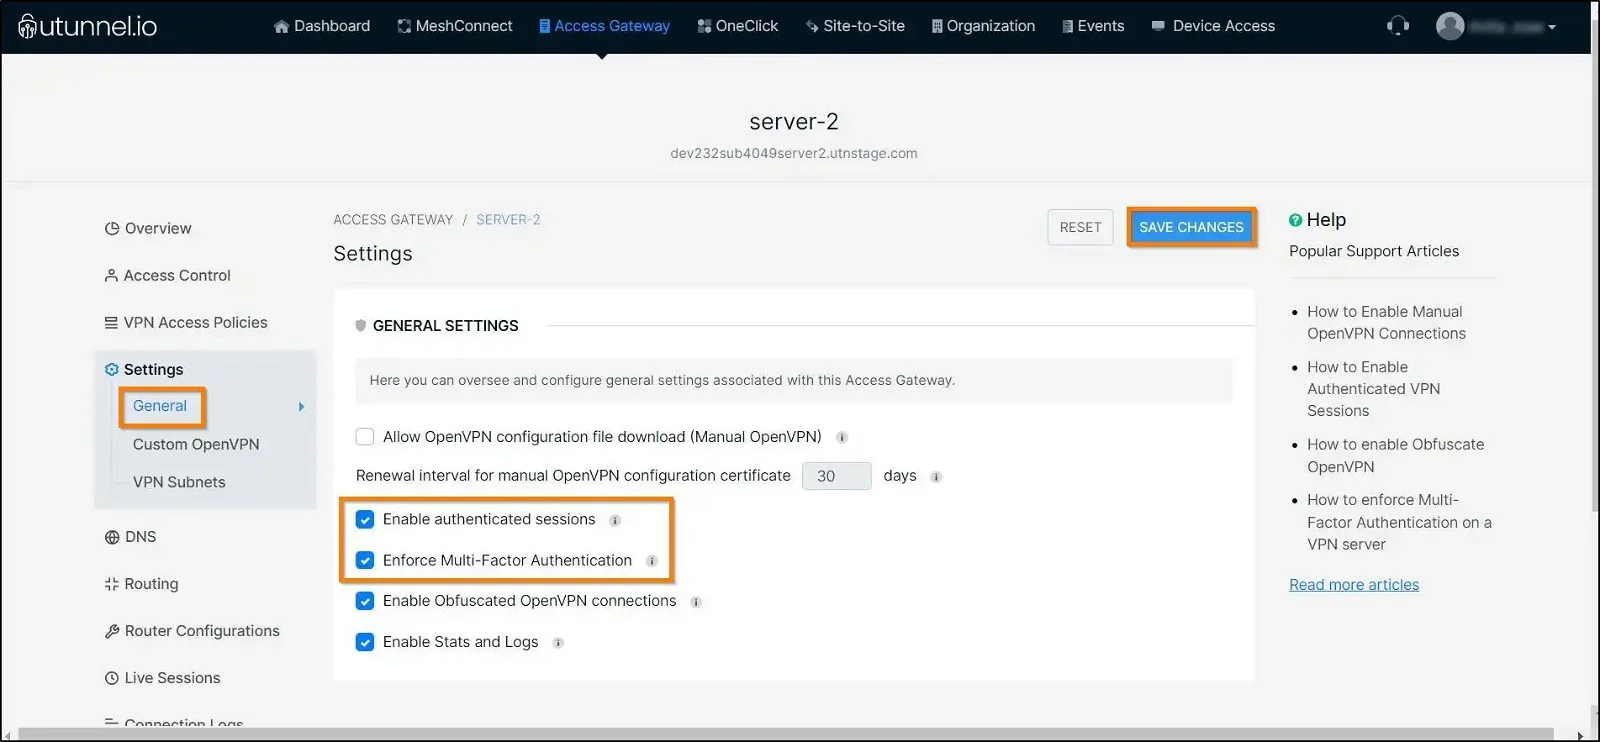
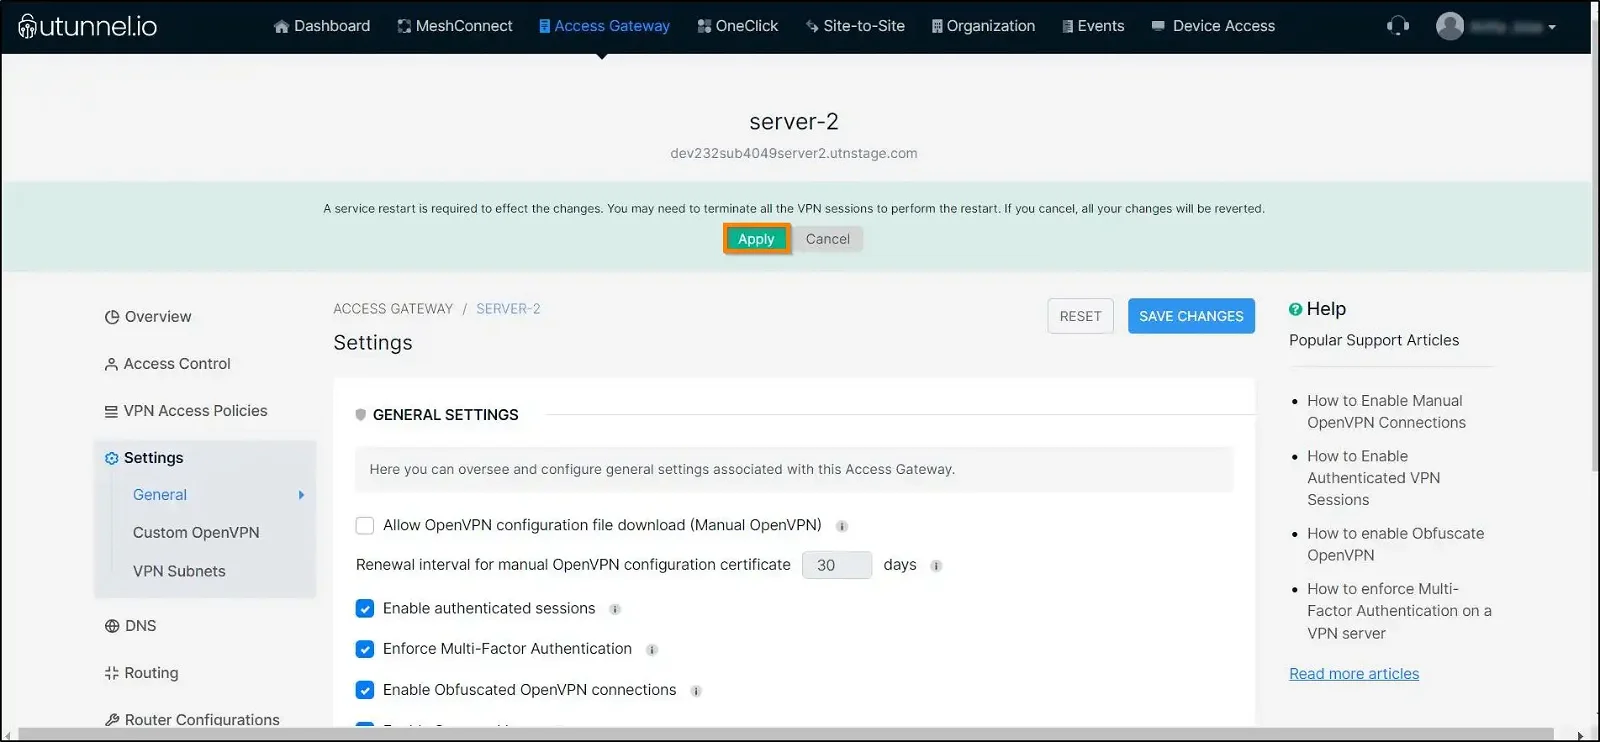
4. Navigate to the General section on the left side menu and tick on the Enable authenticated sessions if it’s not already enabled, and then on the Enforce Multi-Factor Authentication option. Then click on the SAVE CHANGES button to save the changes.
5. As changes are made to server settings, the UTunnel service needs to be restarted to reflect these changes. Click on the APPLY button to initiate service restart.
If you are using an integrated cloud VPN server, the service restart process will automatically get initiated. In the case of an on-premise server, you have to restart the service manually.
After the service restart is finished, the user attempting to connect to the said VPN server from a client device will be granted access only upon entering the MFA OTP (One-Time Password).