This guide will help you set up an Oracle Cloud VPN gateway using UTunnel's Cloud VPN as a Service.
Log in to your Oracle Cloud account and create a server. UTunnel requires a server with Ubuntu20.04 installed.
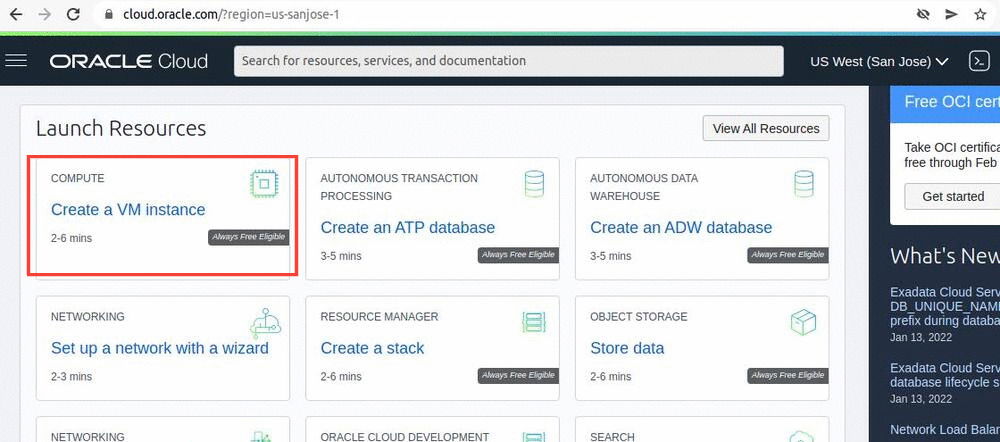
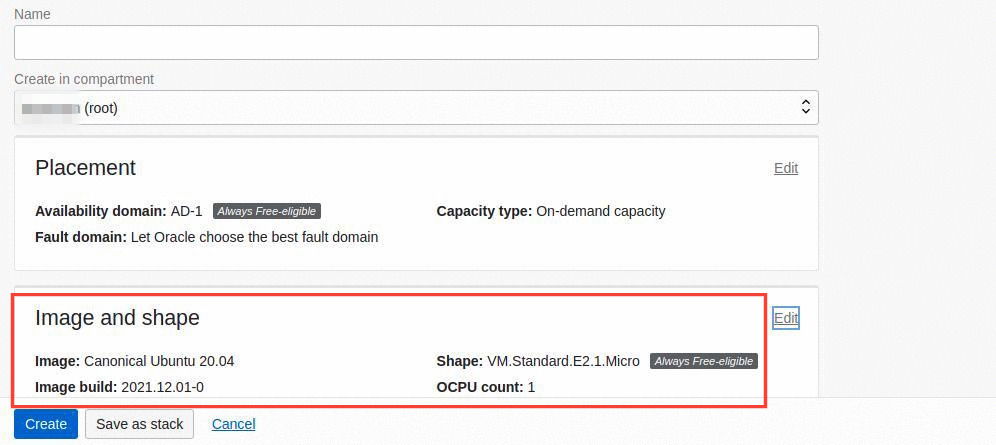
Give a desired name for the Oracle Cloud server. Select the OS image for Ubuntu20.04 and the instance type.
Once the server is created, you will need to edit the security policy and allow access to the necessary network ports. By default, UTunnel services are configured to listen on the ports TCP:443 and UDP:53, 443, 500, and 4500.
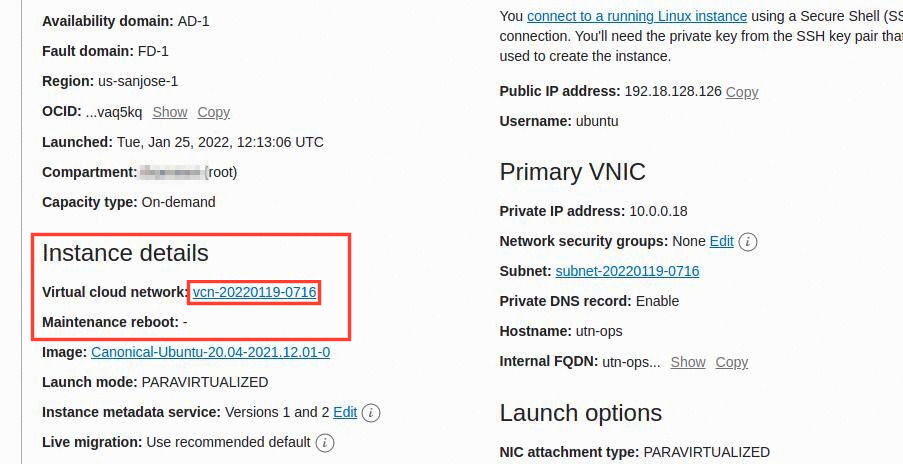
For that, navigate to Compute > Instances > Instance details. Then click on Virtual cloud network name.
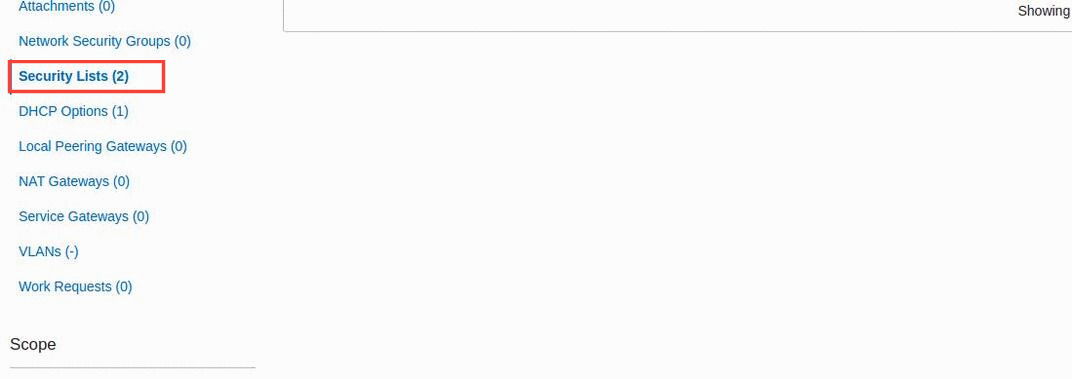
Now, add rules for the above mentioned ports.
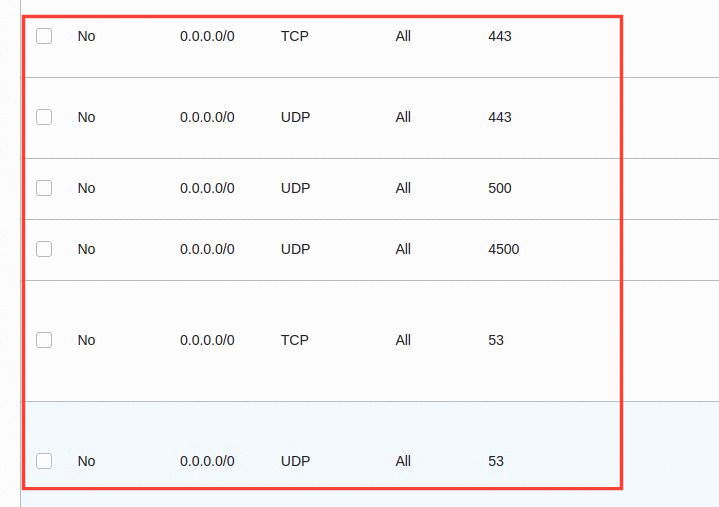
Also add the port TCP 38081 for managing services like live sessions, firewalls, and site-to-site tunneling.
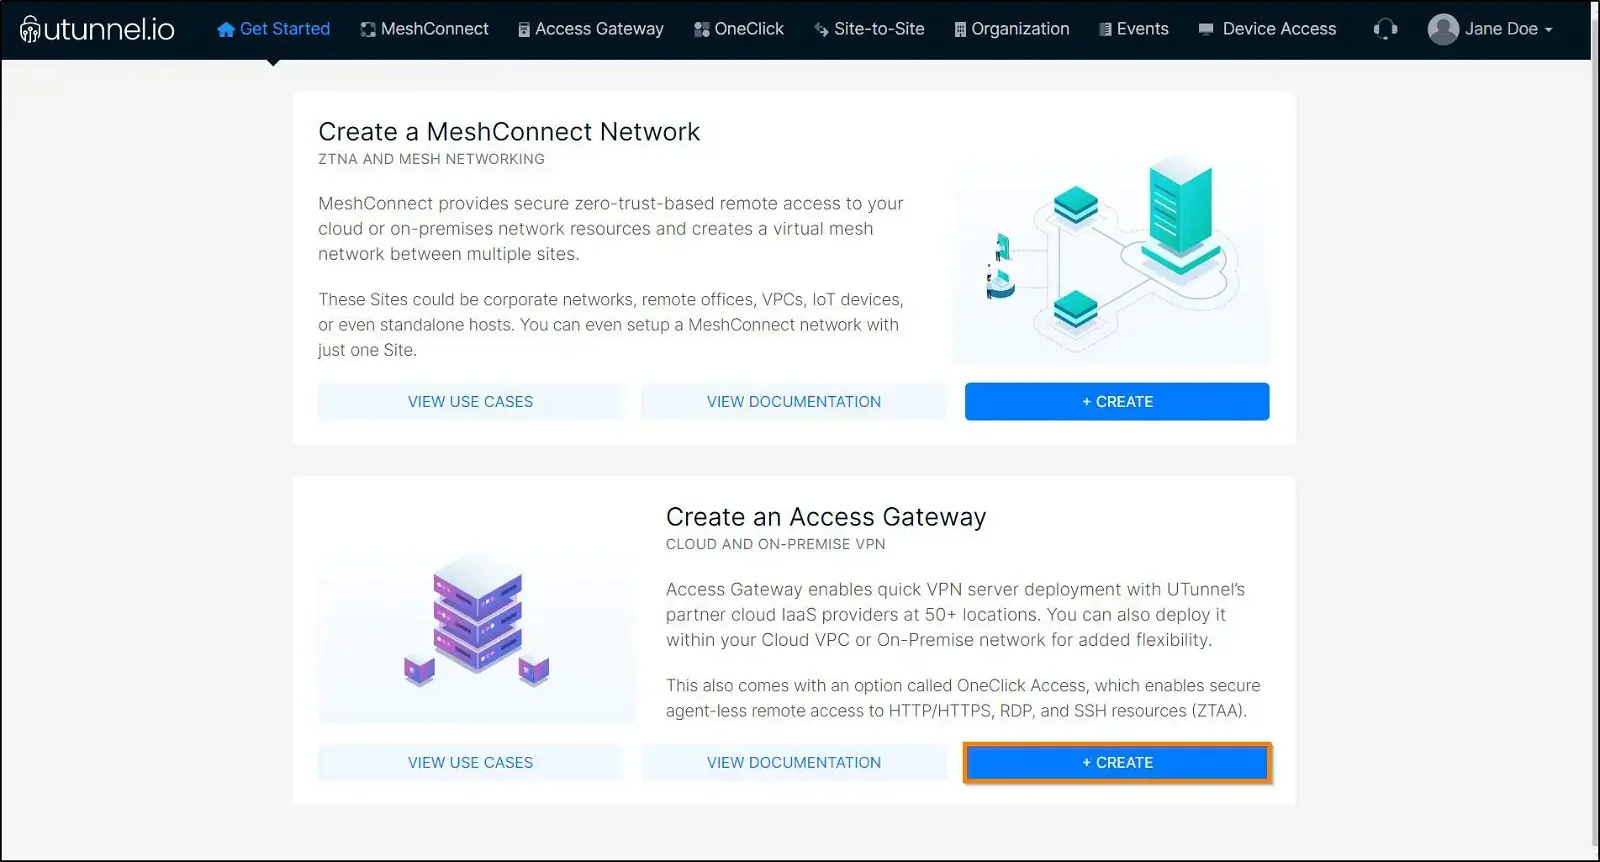
Now that the server has been created, you will need to add the newly created server to your UTunnel account and deploy UTunnel services. For that, login to the UTunnel dashboard and click on the Create button under the Create an Access Gateway section.
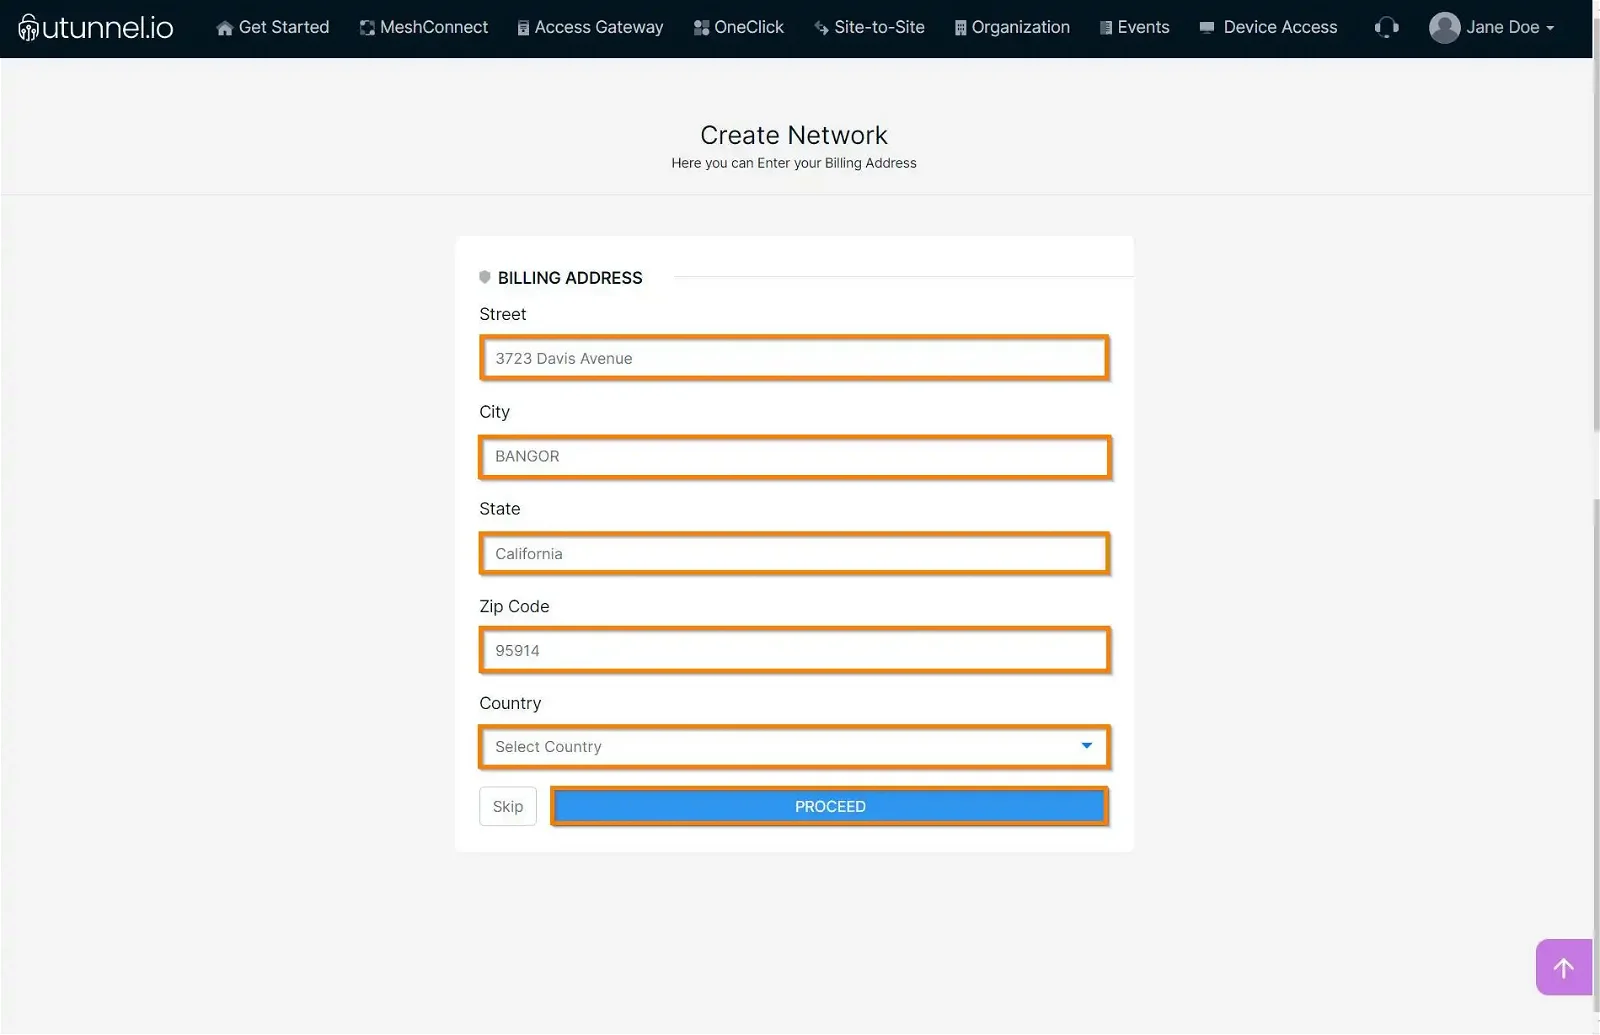
You will land on the Create Access Gateway page. Here, you can provide your billing address details. This step is optional; you can either provide the details and click on the Proceed button or select the Skip button to do it later from the Billing tab on your dashboard.
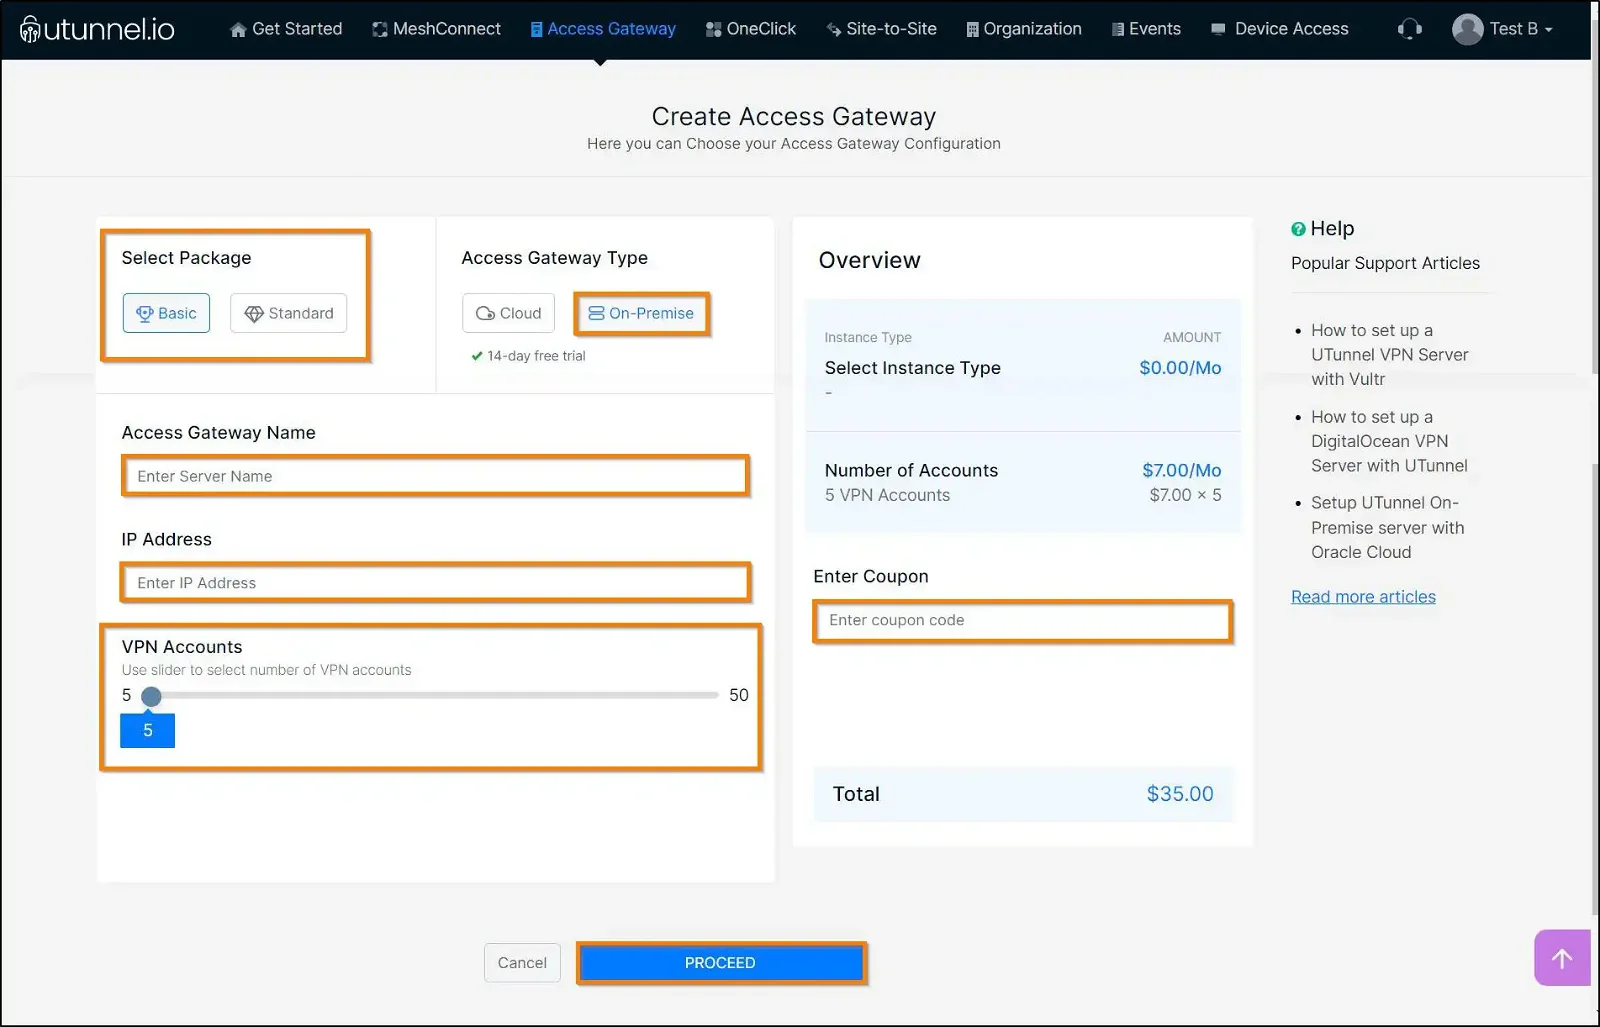
The next step is to select the On-Premise option and enter the Access Gateway details as given below:
After configuring your Access Gateway specifications, continue to click on the Proceed button.
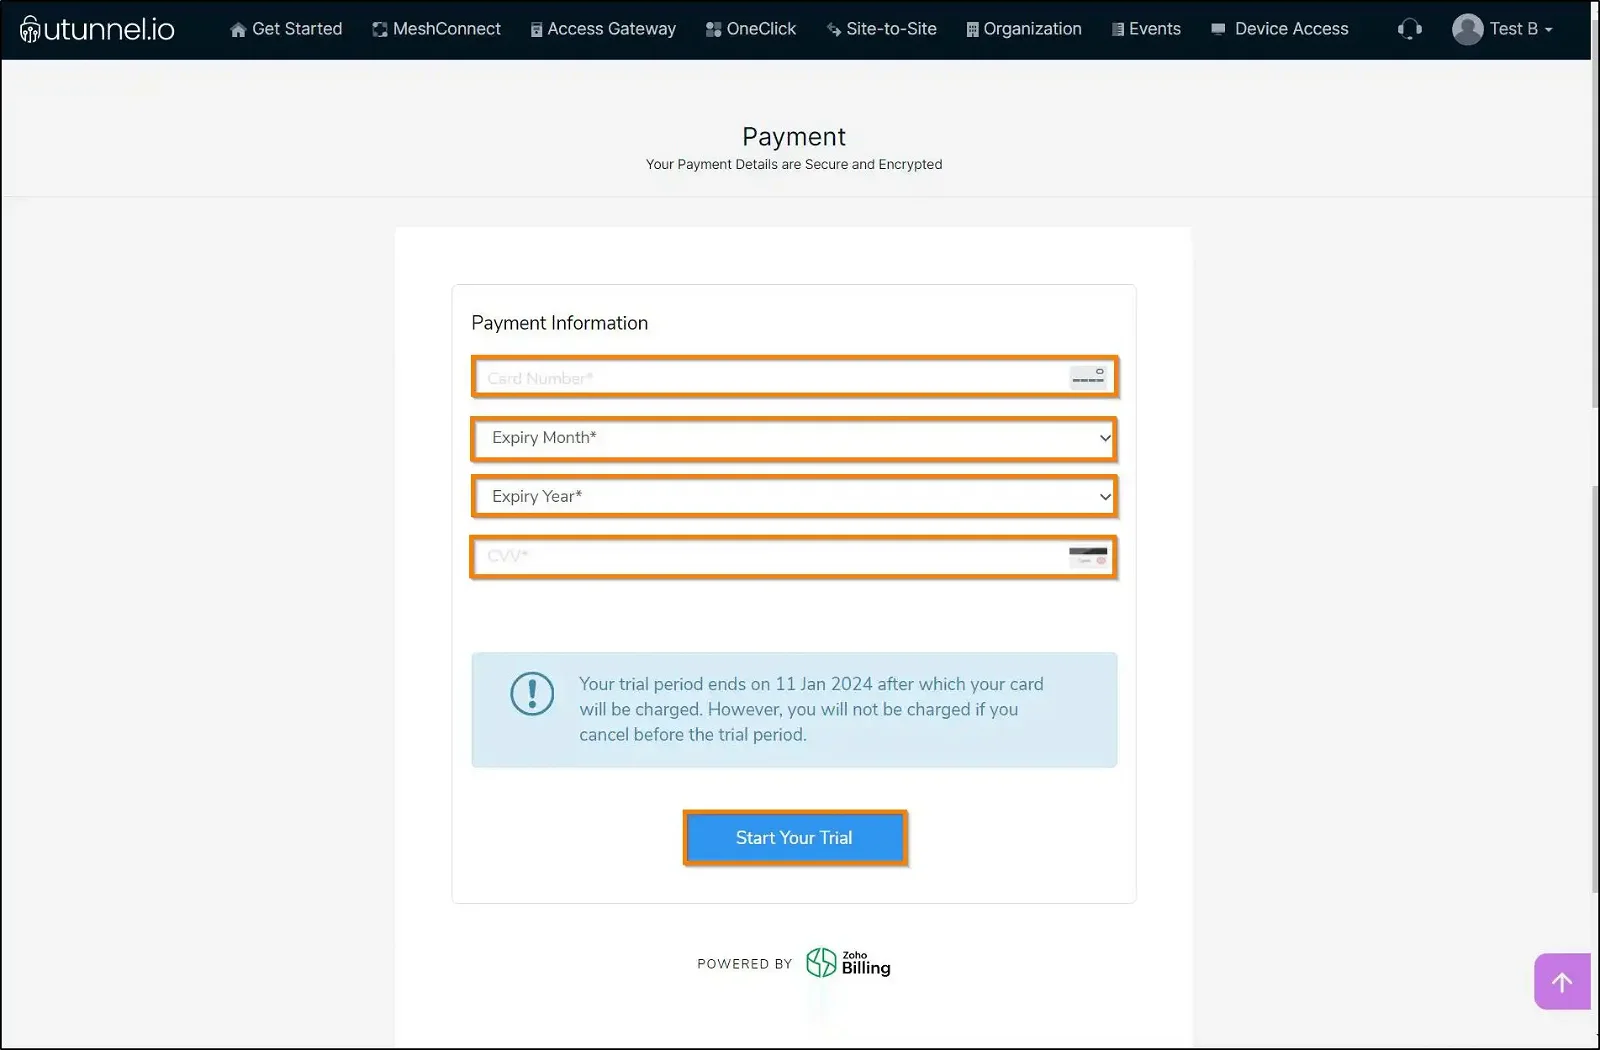
You will reach the Order Summary page, which displays the details of the Access Gateway configuration, the billing amount, and payment options. Click on the Proceed button to make the payment.

Now enter your credit card details as required on the screen and click on the Start Your Trial button.
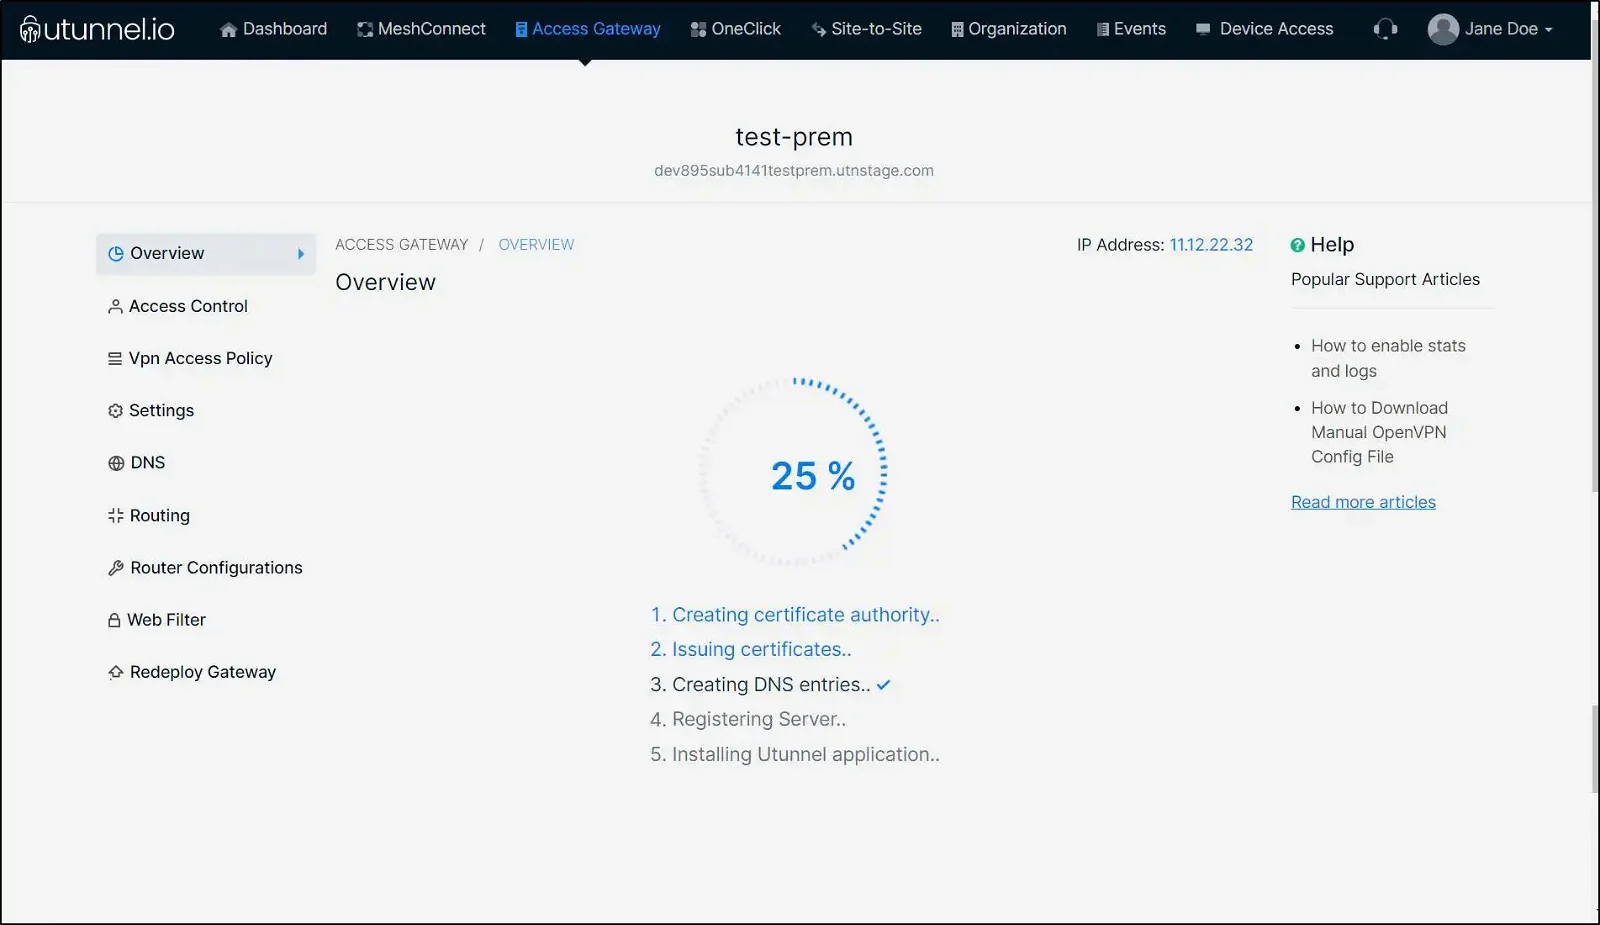
You will be directed to the Access Gateway Overview page, where you can check the Access Gateway creation status.
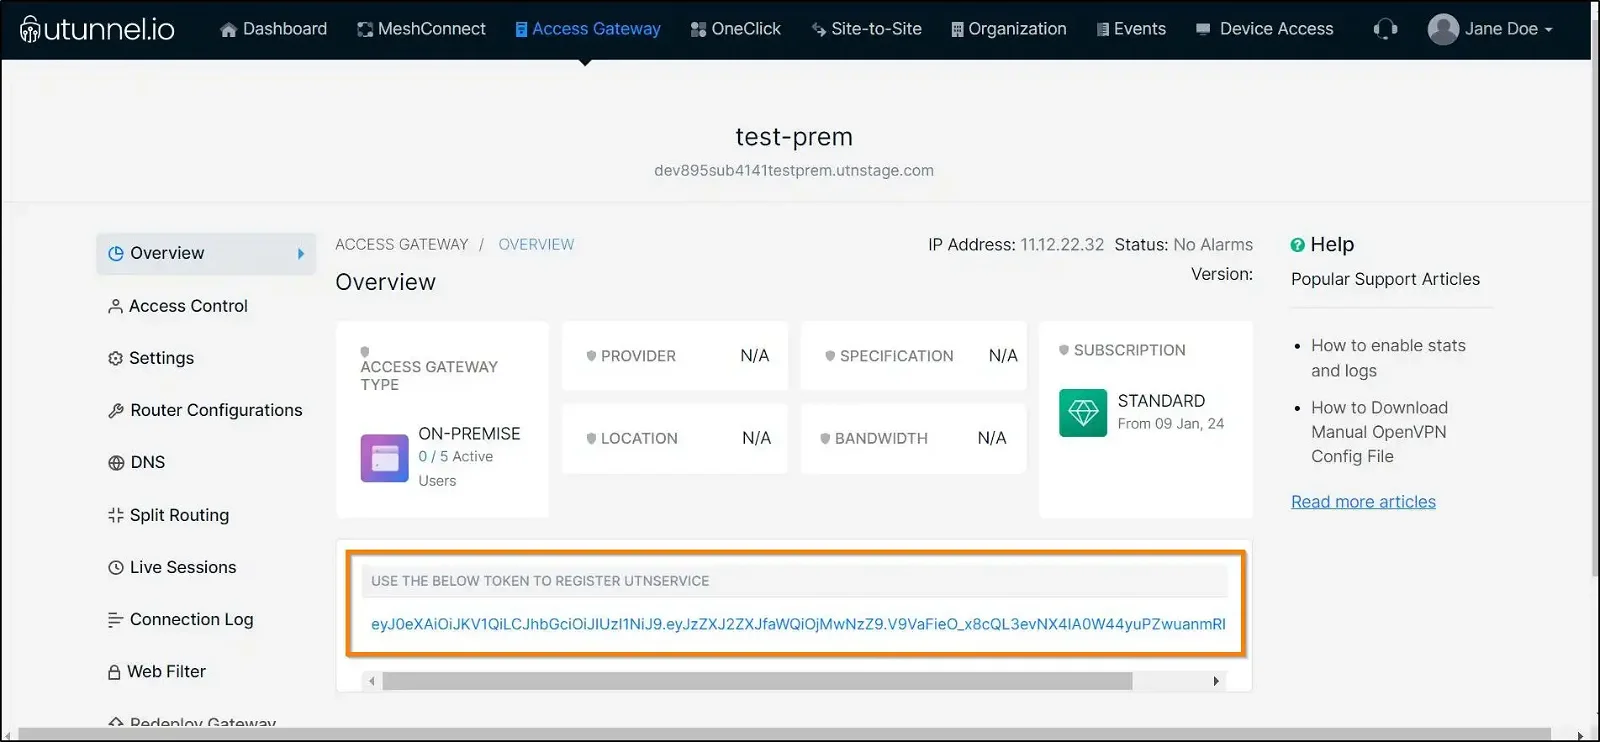
Once the Access Gateway is created, the registration token will be displayed on the Access Gateway overview page. Please copy the registration token, as it is required to register and deploy the Access Gateway.
Now, connect to your Oracle cloud server via SSH. You will need sudo access to complete the following steps. After a successful login, execute the commands given below. Replace the string 'REG_TOKEN' in the first command with the token you obtained in the above step.
sudo mkdir /utunnel && cd /utunnel
sudo wget https://files.utunnel.io/production/deploy/install_bundle_20.tar
sudo tar -xf install_bundle_20.tar
You need to register the server with UTunnel now. You need to replace YOUR_REGISTRATION_TOKEN with the registration token you obtained from the UTunnel dashboard.
sudo /utunnel/bin/utnservice register YOUR_REGISTRATION_TOKEN
To start UTunnel Service on your server, run the following command:.
sudo /utunnel/bin/utnservice start
Now your Access Gateway will be ready to accept VPN connections. Invite users to your Access Gateway and start using VPN services