UTunnel’s Access Gateway solution simplifies deploying cloud VPN servers for your business. Its fully automated setup process allows you to create a dedicated cloud VPN server in minutes with one of UTunnel’s Cloud Infrastructure as a Service (IaaS) partners.
With a few clicks, you can configure your VPN gateway at your preferred cloud provider, select the location that best suits your needs, and effortlessly manage the VPN gateway settings through UTunnel’s web dashboard.
Follow the steps below to set up a cloud VPN server with UTunnel Access Gateway:
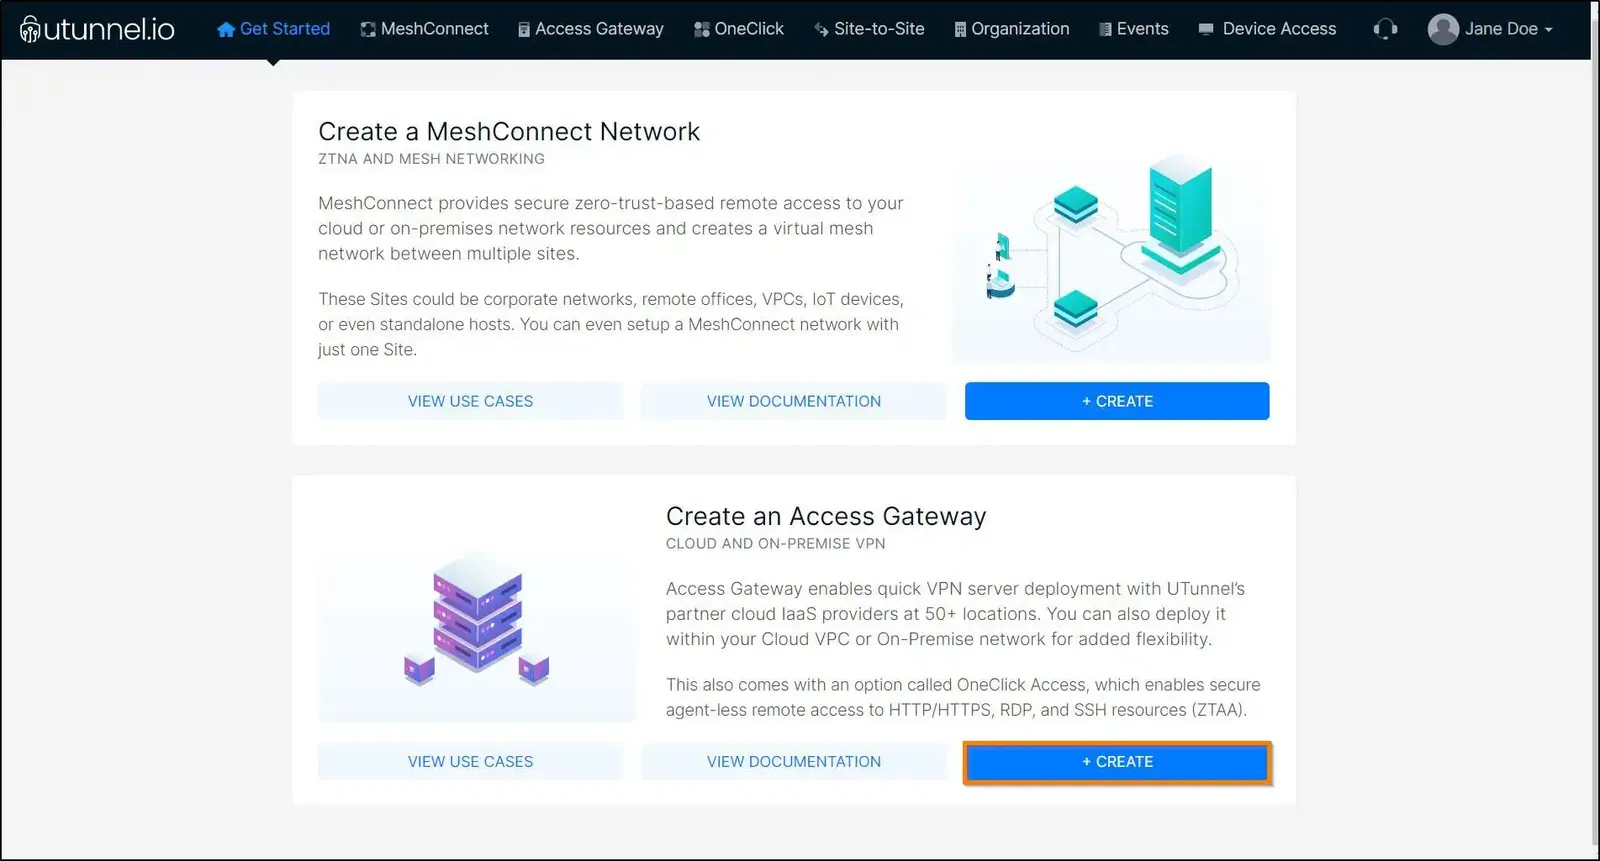
1. Log in to your UTunnel account (Organization/Personal) and navigate to the CREATE button in the Create an Access Gateway section.
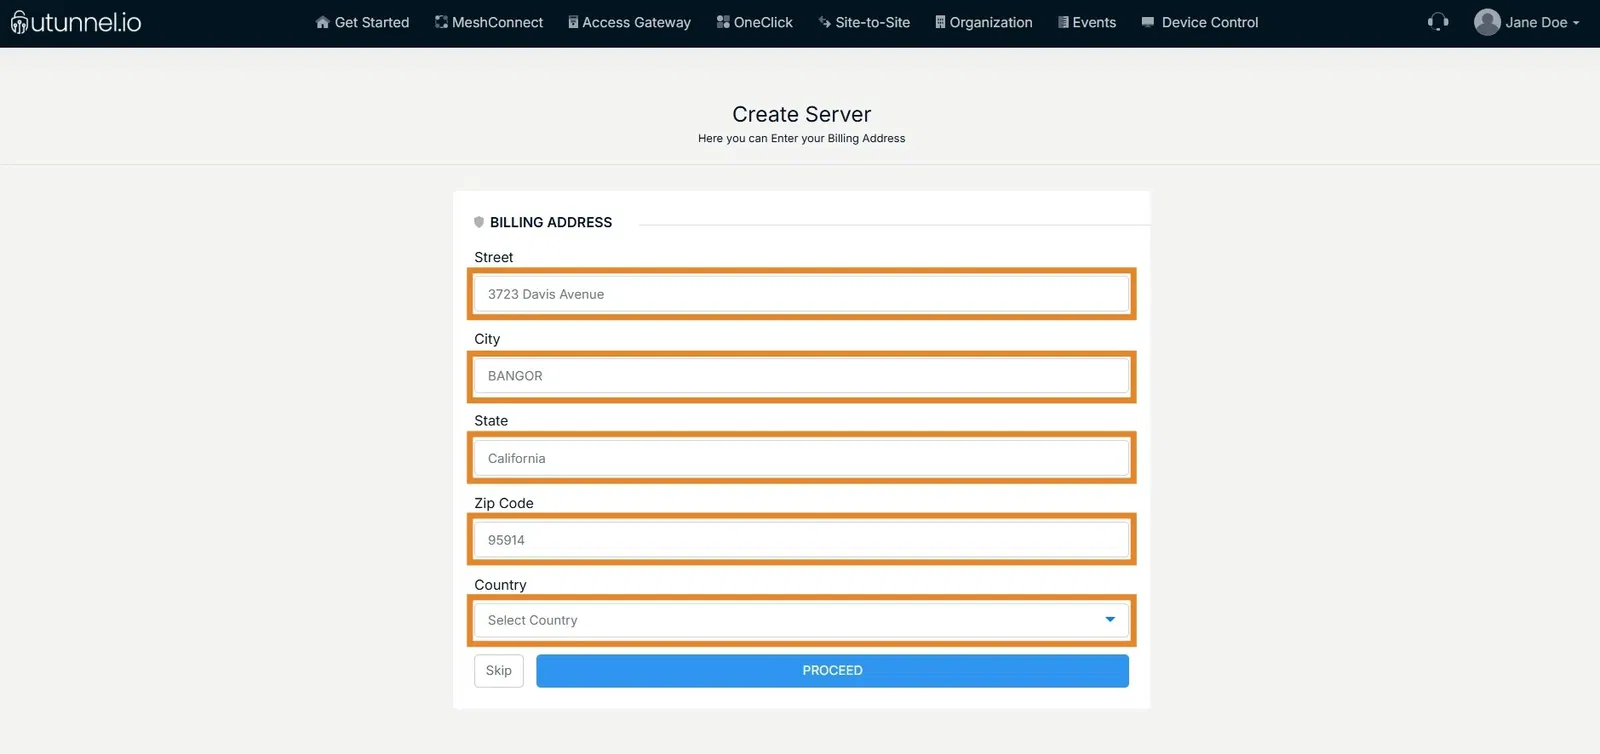
2. If your billing address details aren’t already saved in your account, you’ll be prompted to provide them. This step is optional - you can either enter the details and click Proceed, or choose Skip to add them later from the Billing tab in your dashboard.
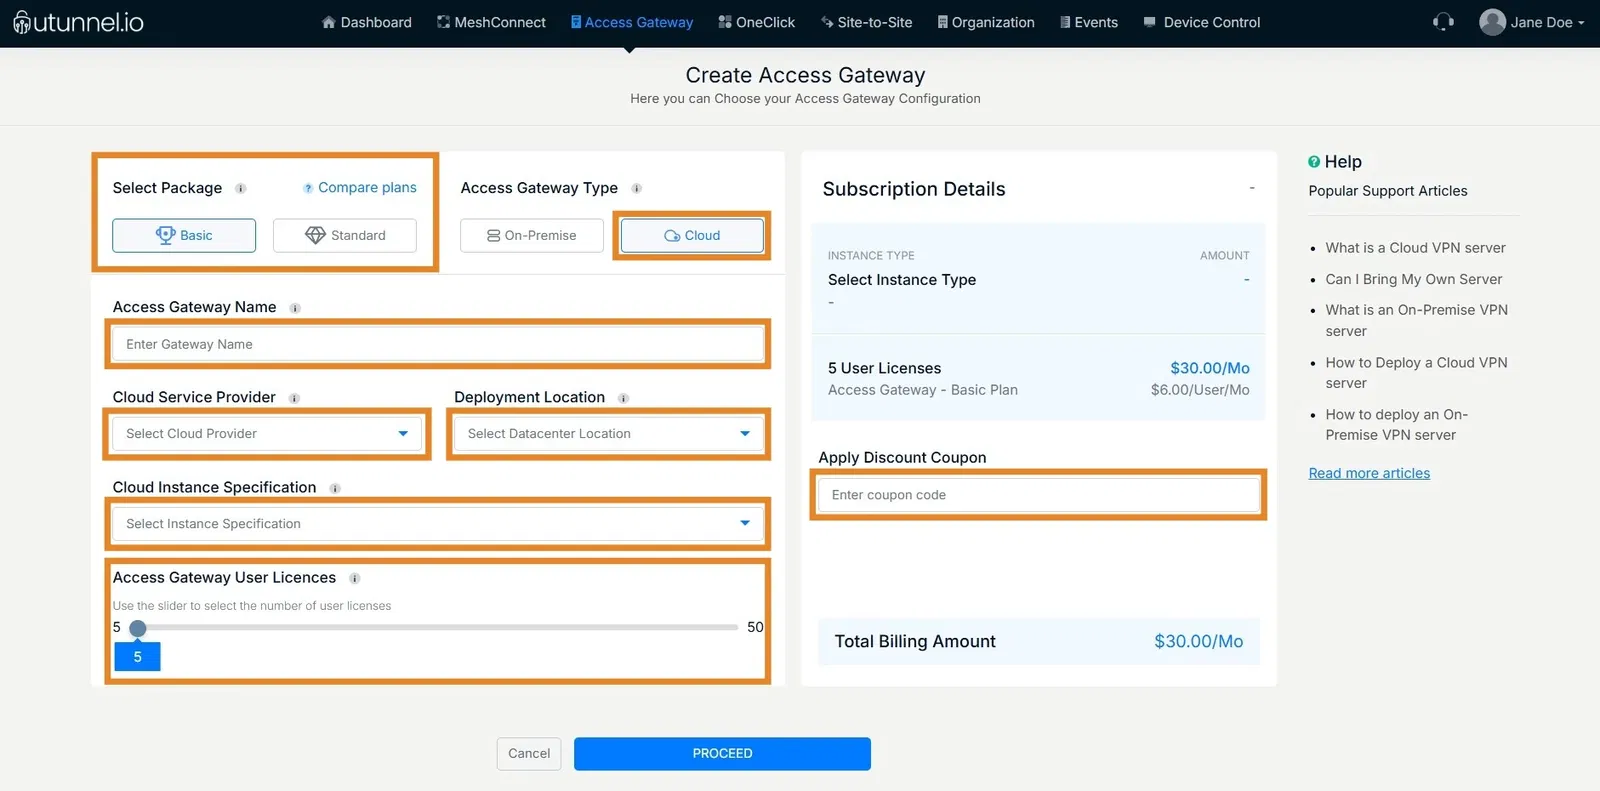
3. Next, you’ll set up your cloud VPN server. You can customize your VPN gateway by selecting or entering the required information in the fields below:
After configuring your Access Gateway specifications, continue to click on the Proceed button.
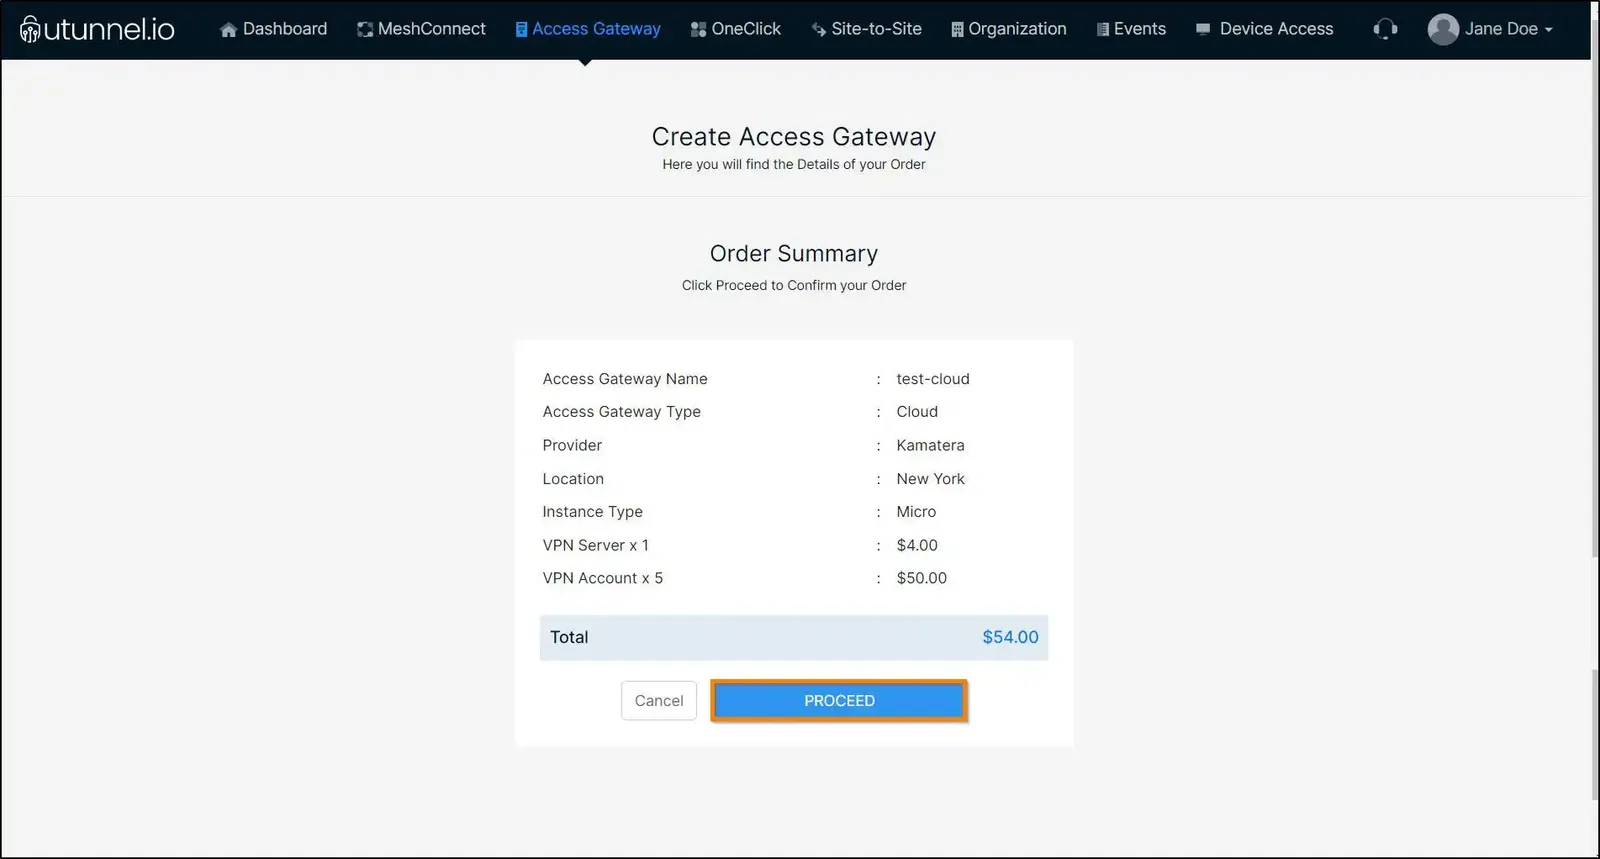
4. You will reach the Order Summary page, which displays the details of the Access Gateway configuration, the billing amount, and payment options. Click 'Proceed' to make the payment.
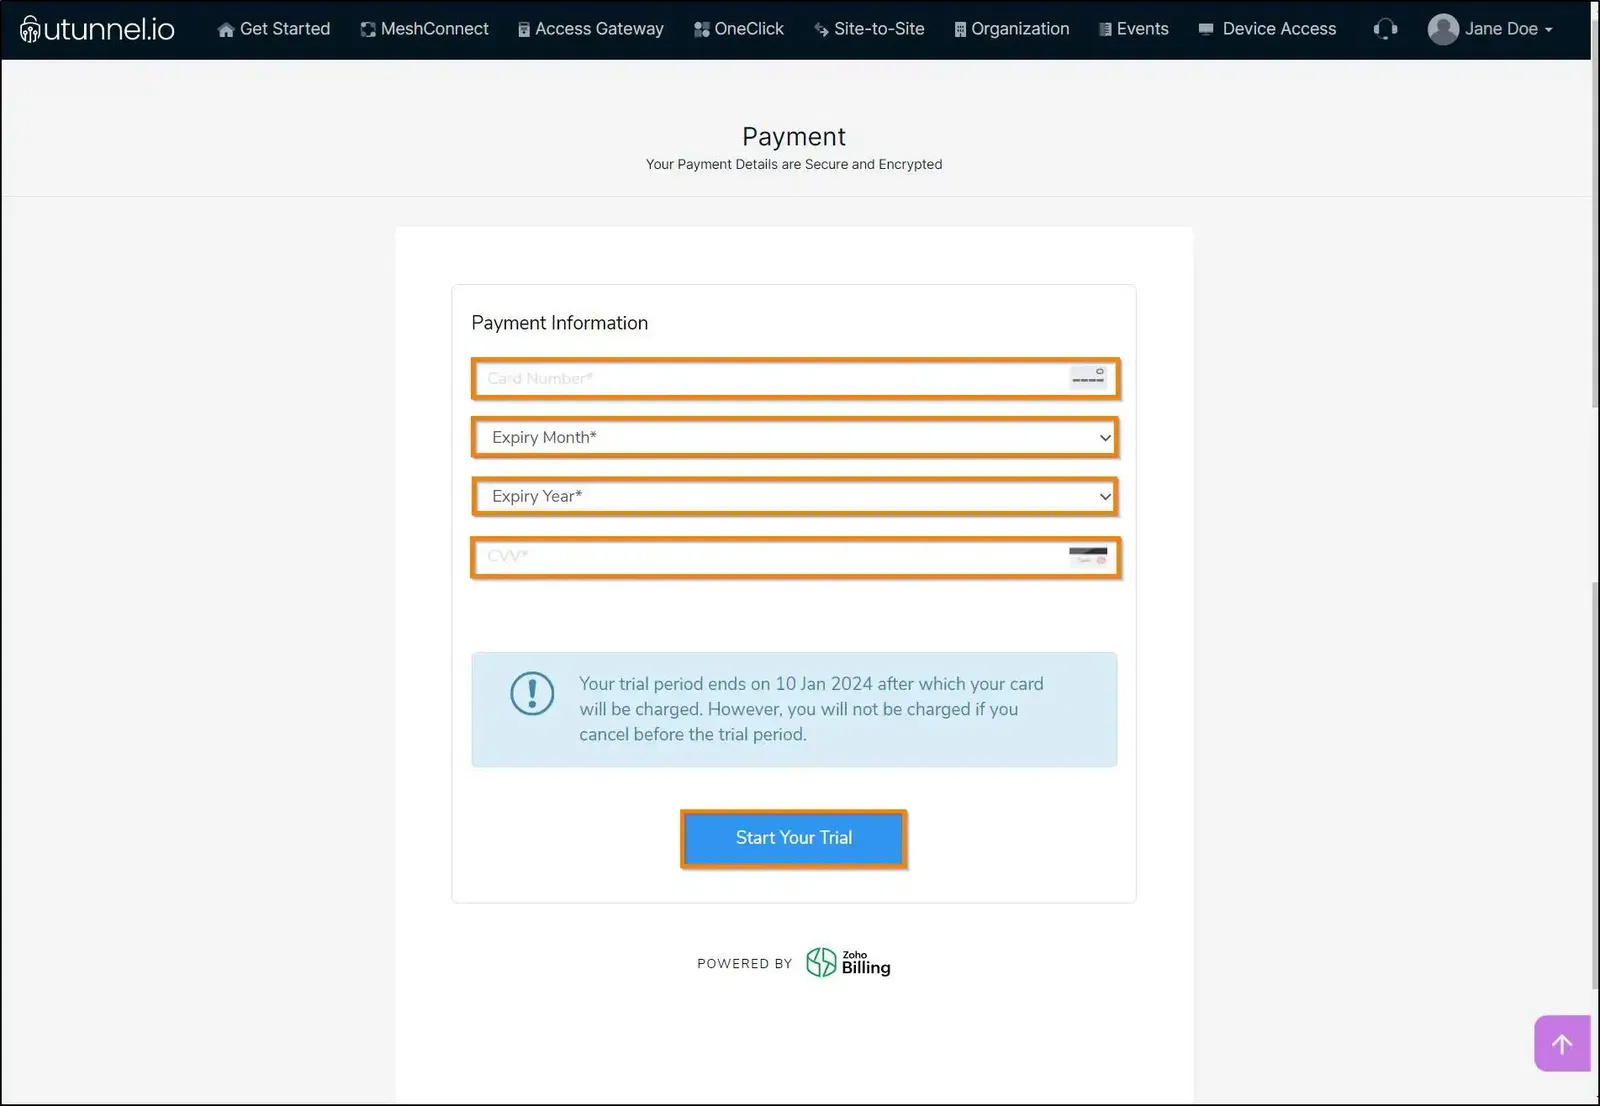
5. Enter the payment details as required, and click on the Start Your Trial button.
6. You will be directed to the Access Gateway Overview page to check the cloud VPN server creation status.
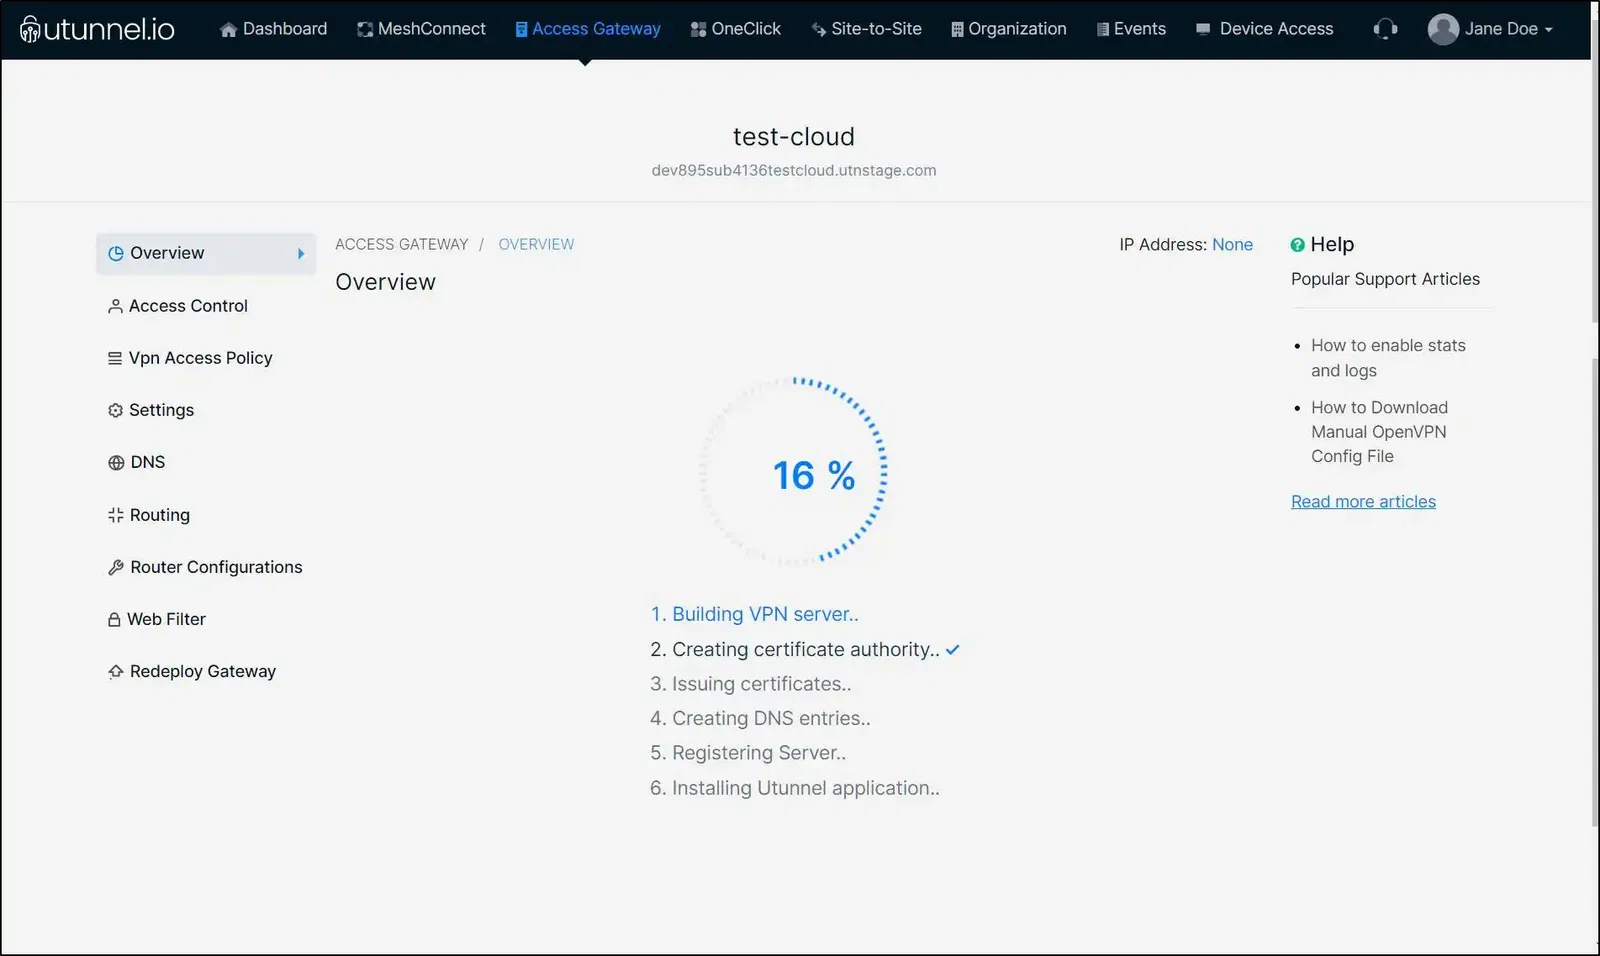
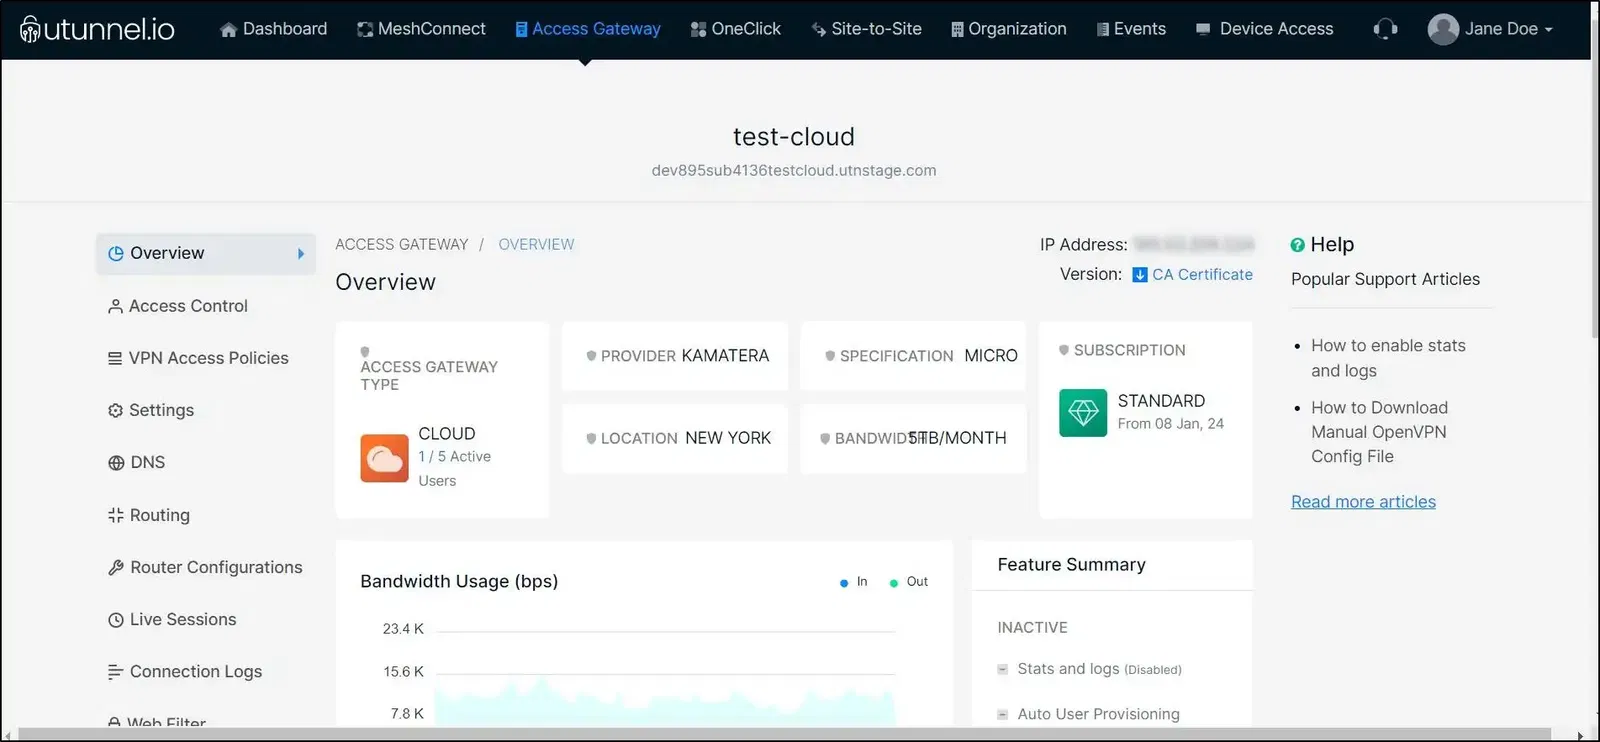
7. Once the access gateway creation is completed, you will get a status message displaying the successful creation of the VPN gateway. The Access Gateway Overview page will display the details of your cloud VPN gateway, including IP address, overview, bandwidth usage, VPN sessions, CPU, memory, and data usage.
8. Now you can connect to your dedicated cloud VPN server. The newly created VPN Access Gateway will be listed in the UTunnel client applications.
You can now manage user access to your newly created VPN gateway through the Access Control section in the UTunnel Access Gateway.
If you have any questions or need assistance with your Access Gateway deployment or VPN access control, feel free to contact our customer support team.