By Jijo Joy
Updated on 29 Jan, 2024
This document will help you to configure a site-to-site tunnel between UTunnel VPN Server and Fortinet Firewall. Make sure that you have administrator access to both the UTunnel Organization account and Fortinet Firewall.
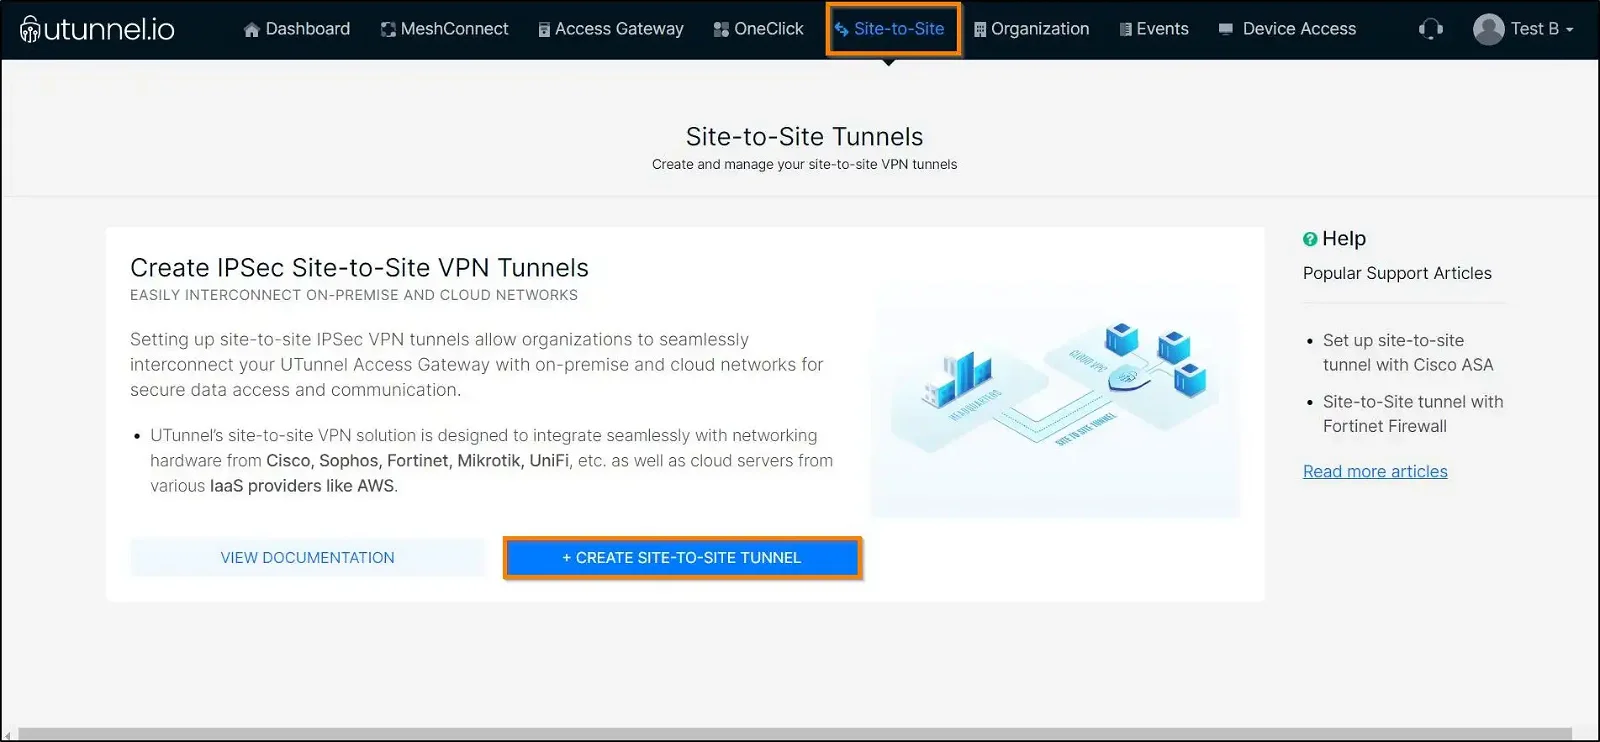
Login to your UTunnel dashboard. Then navigate to the Site-to-Site tab and click on CREATE TUNNEL button.
Now, select Tunnel with non UTunnel server option and key in the tunnel details.
Tunnel Name: Give a desired name for the tunnel.
Local Server: Select the UTunnel server from the dropdown.
Left ID : This is an optional field. By default, UTunnel uses the server IP address as the Left ID. Use this field to change the default behavior.
Remote IP: Enter the Fortinet endpoint IP address.
Right ID: Enter Fortinet firewall's hostname as Right ID.
PSK: Enter or generate a pre-shared key for authentication.
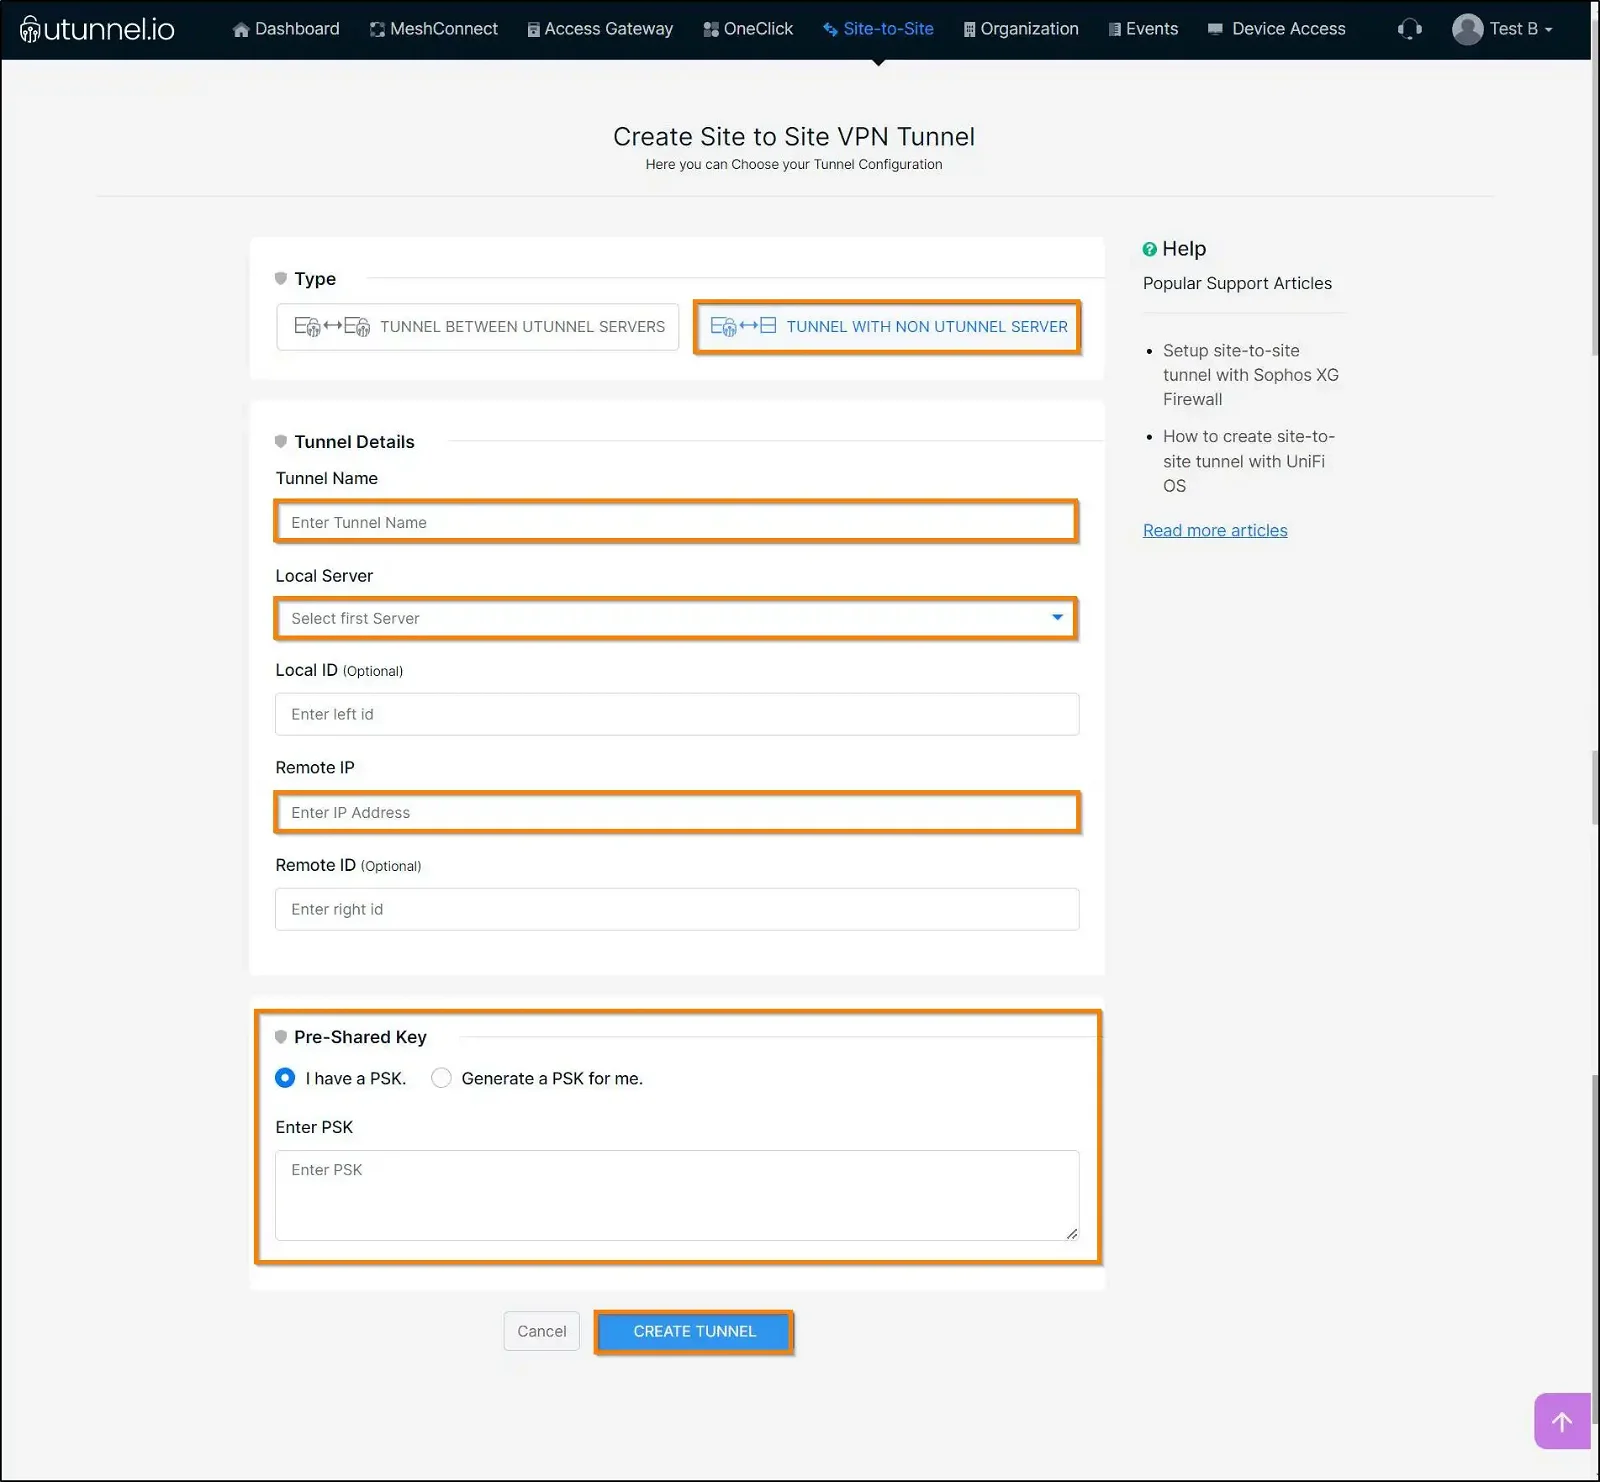
Once the tunnel is created, you will need to define local and remote encryption domains. Click on the ‘+’ icon and add the remote and local subnets.
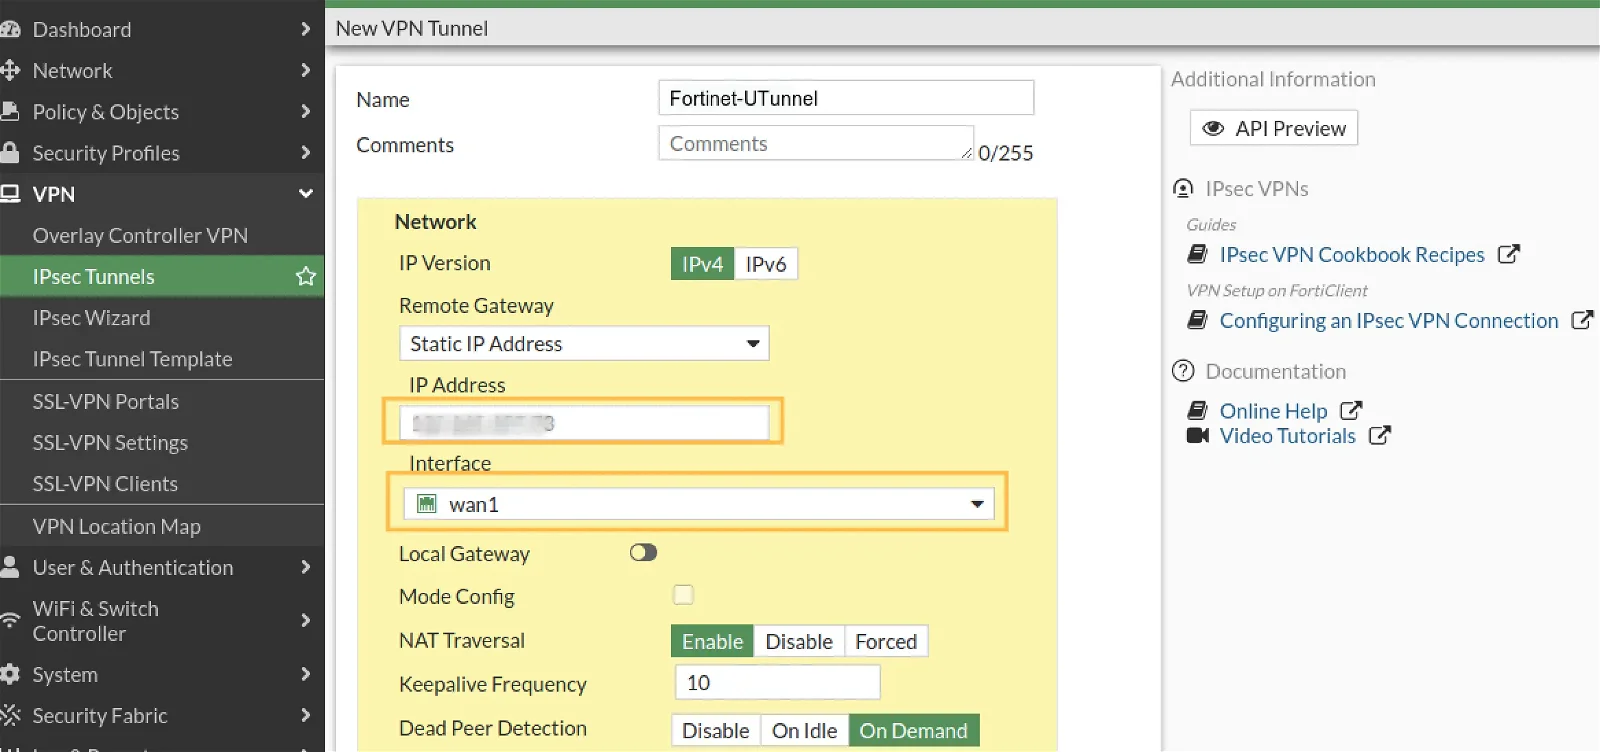
Next, login to Fortinet with your admin privileged user. Navigate to VPN > IPsec Wizard and Choose the Custom option.
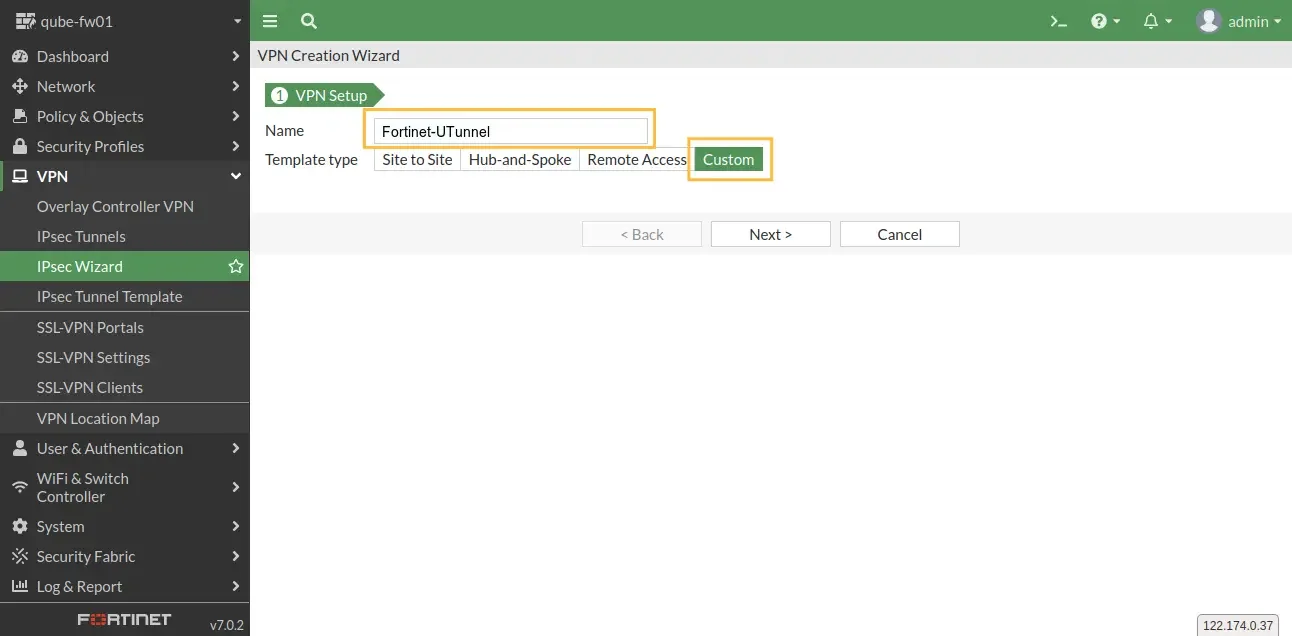
Then configure the tunnel properties as follows,
Name: Give a desired name for the tunnel.
IP Version: IPv4
Remote Gateway: Select Static IP Address from the dropdown.
IP Address: Key-in the UTunnel server IP address.
Interface: Select the respective Interface from the dropdown, most likely this will be your WAN interface.
NAT Traversal: Set to Enable.
Dead Peer Detection: Set to On Demand.
Configure Authentication
Method: Select Pre-shared Key from the dropdown.
Pre-shared key: Key-in the pre-shared key that set up on UTunnel side.
IKE version: 2

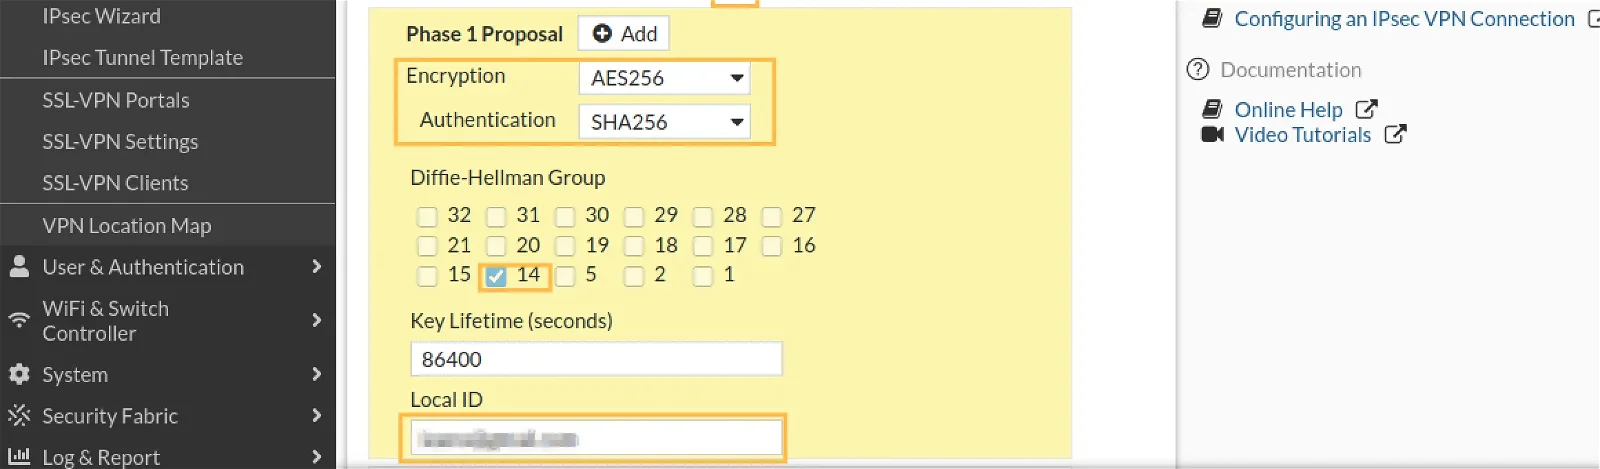
Phase-1 Proposal configuration
Encryption : AES256
Authentication : SHA256
Diffe-Hellman Group (DH Group): 14
Local ID: Enter Fortinet Firewall’s host name as Local ID.
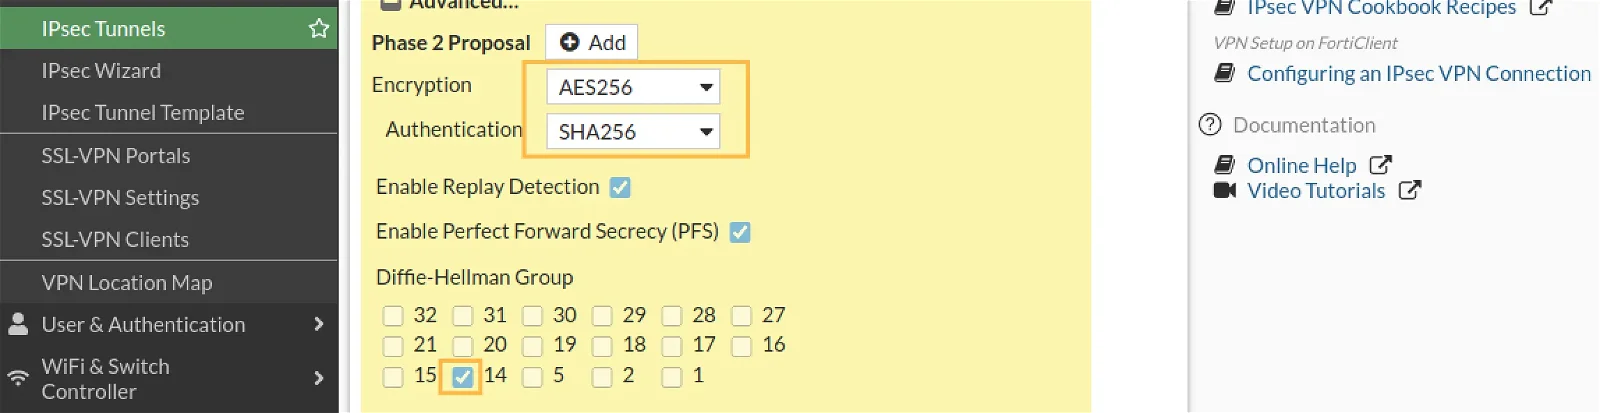
Configure Phase-2 Selectors
Local Address: Select Named Address from the dropdown and select the Fortinet Local network. You may need to add Address alias if it doesn’t exist.
Remote Address: Select Named Address from the dropdown and select the UTunnel local network. You may need to add Address alias if it doesn’t exist.

Phase-2 Proposal configuration
Encryption : AES256
Authentication: SHA256
DH Group: 14
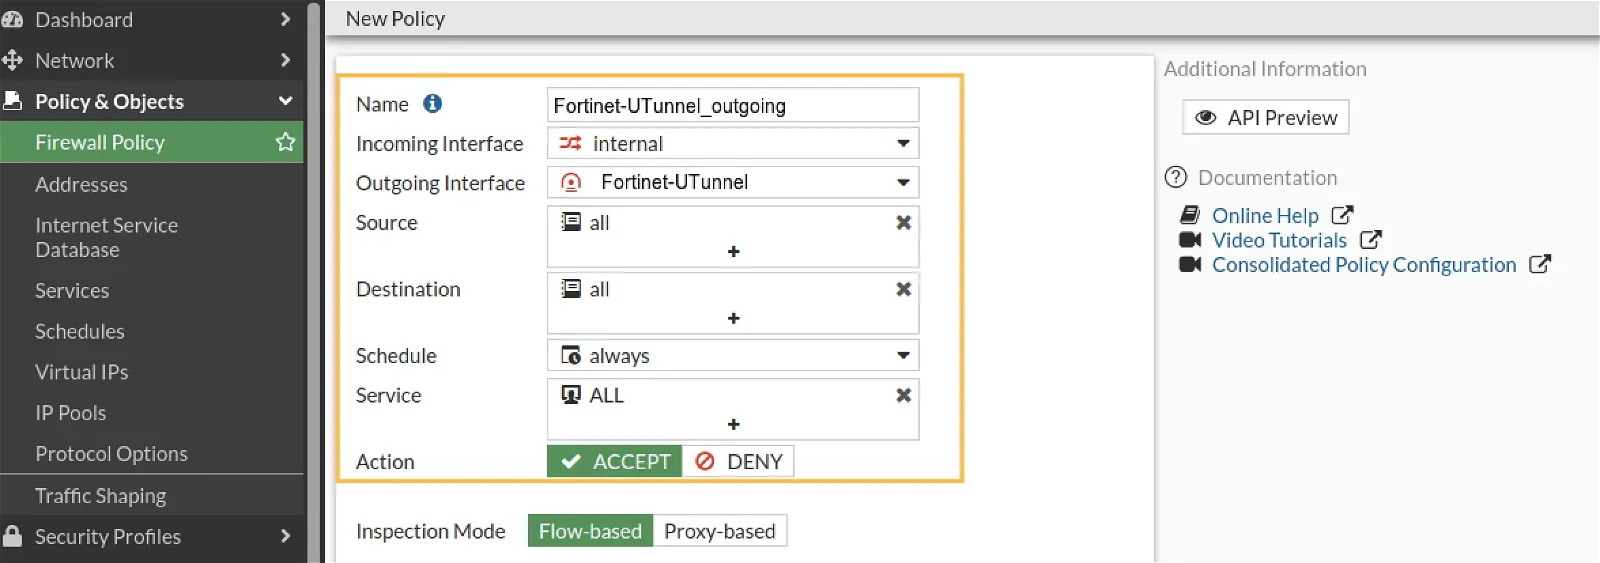
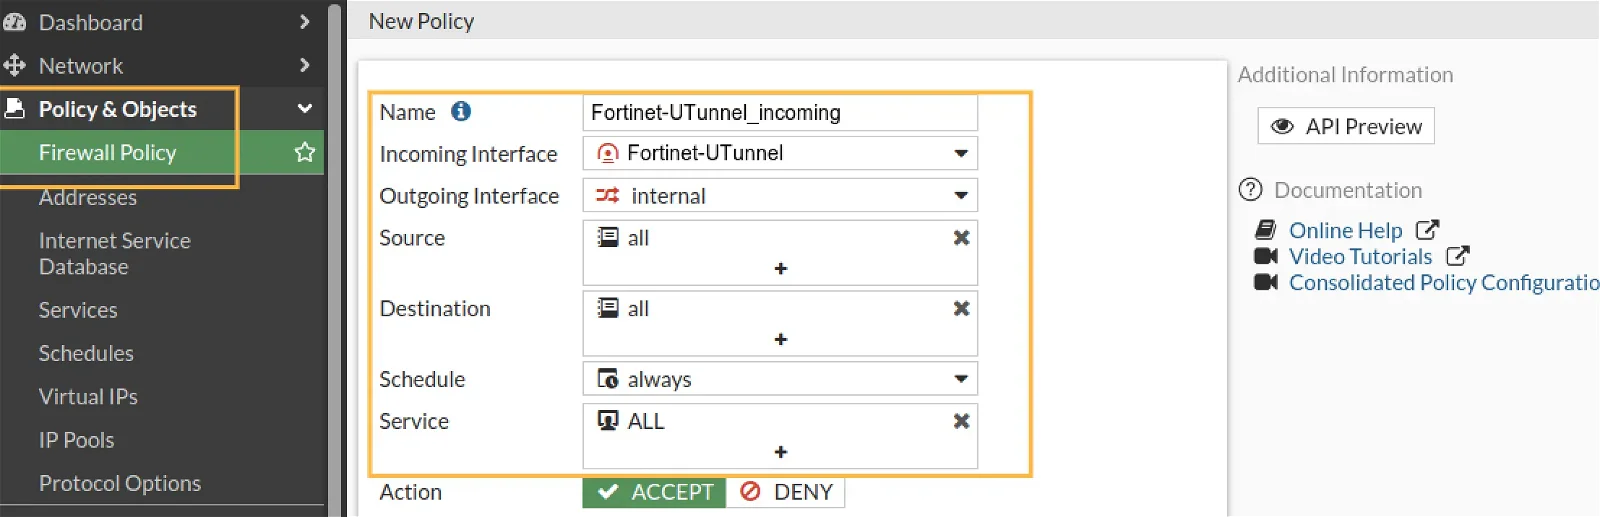
Next, create inbound and outbound firewall rules for the tunnel interface as seen in the below screenshots.
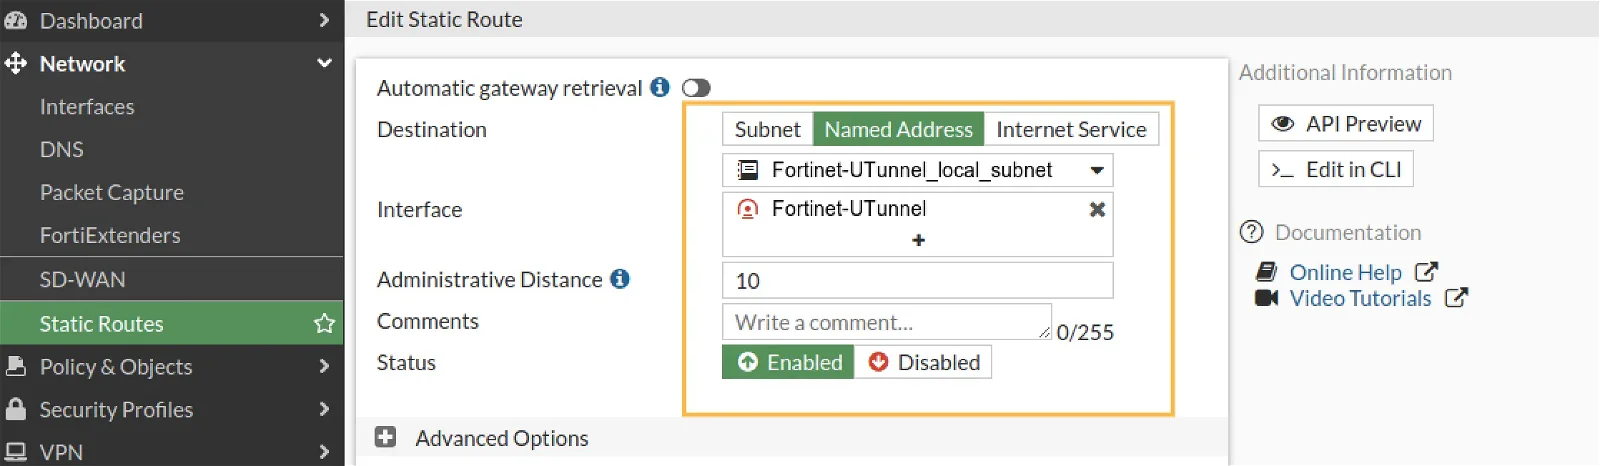
Create a static route to send packets to the remote encryption domain through the tunnel.
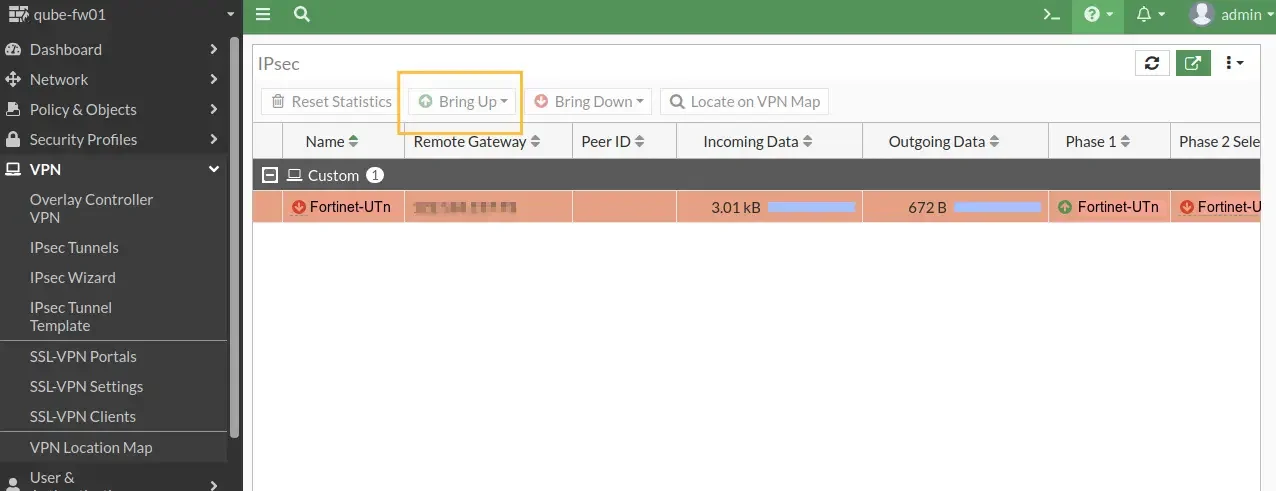
Now the tunnel is set up but it will be in the inactive state. Select the tunnel and click on ‘Bring Up’ to start the tunnel.