This guide discusses how to configure your Asus RT Router to connect to a VPN server using a .OVPN file with detailed discussions.
Please note that to download the OVPN file you have to enable manual OpenVPN Connections within the server settings.
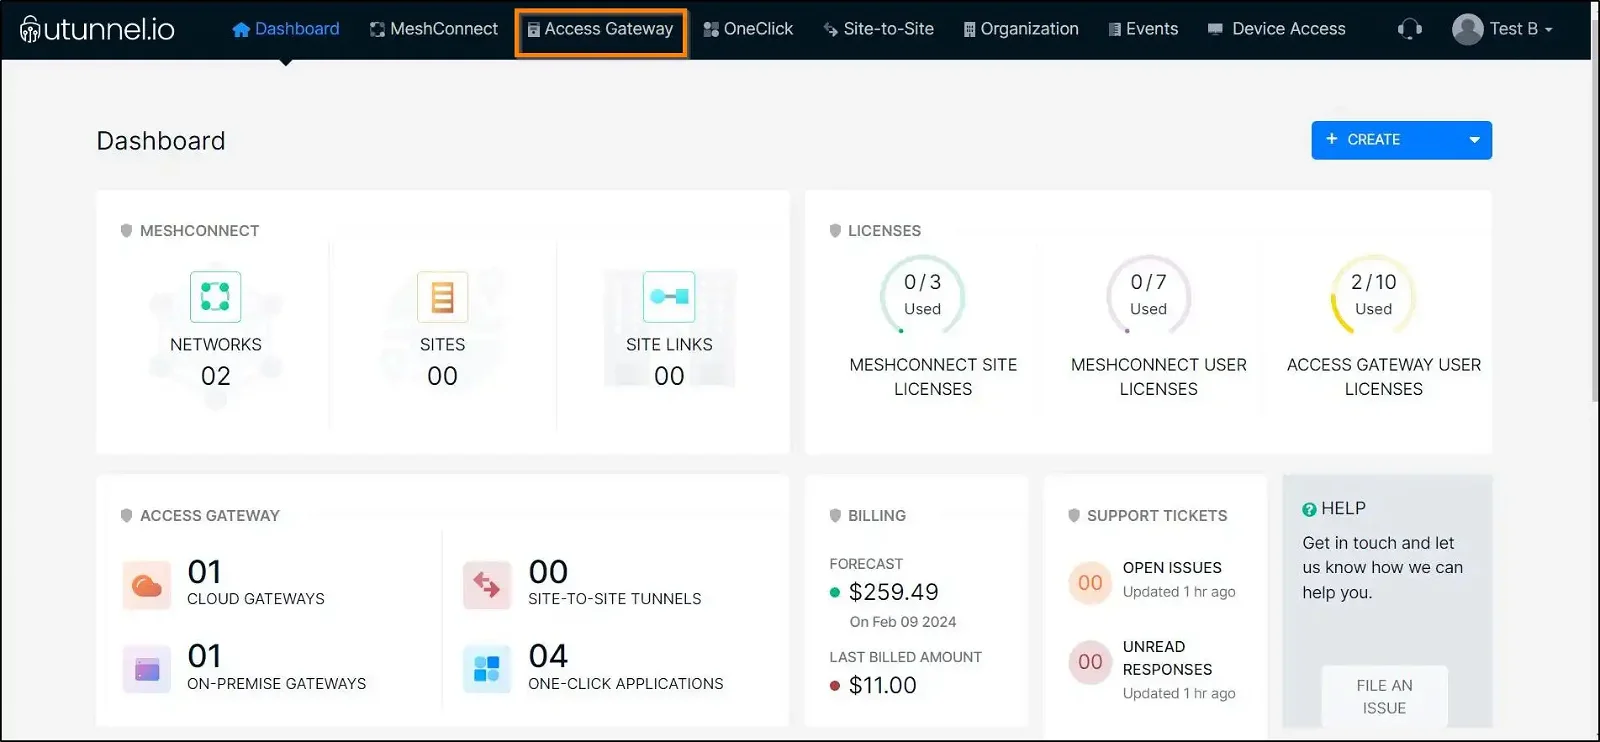
1. Log in to your UTunnel account (Personal/Organization) and navigate to the Server tab.
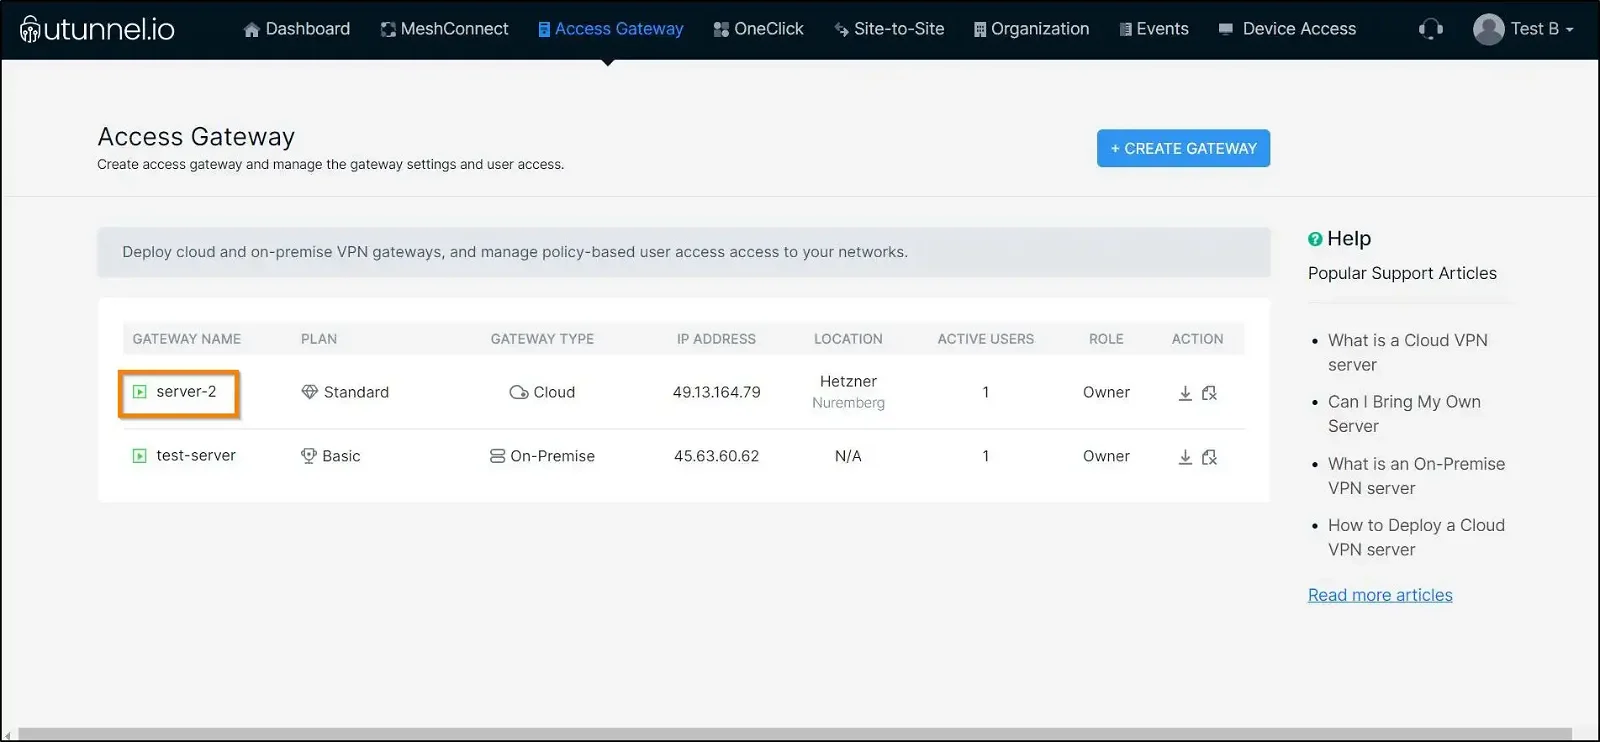
2. Click on the server name to navigate to its settings page.
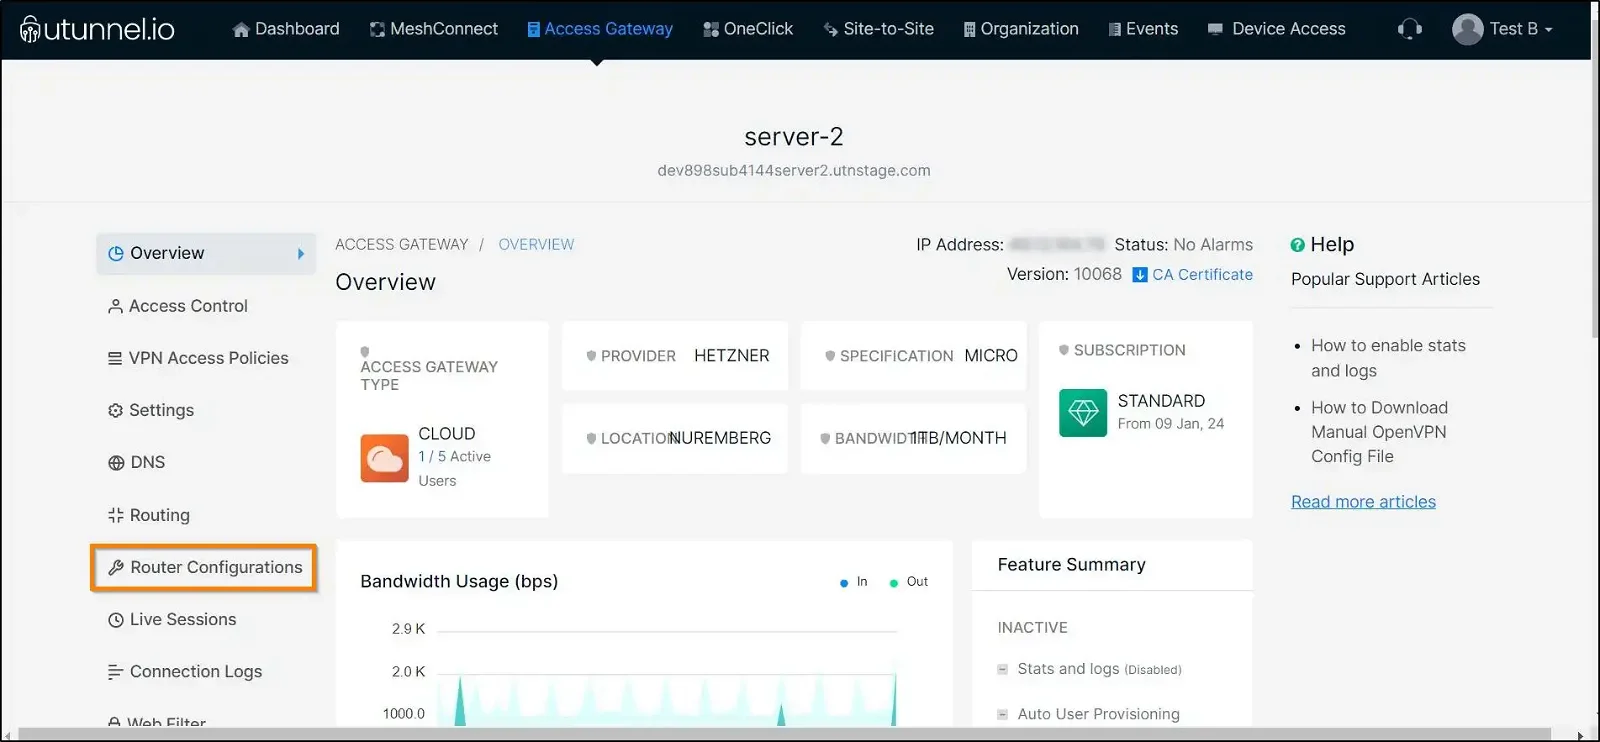
3. From the Server Overview page navigate to the Router Configuration tab.
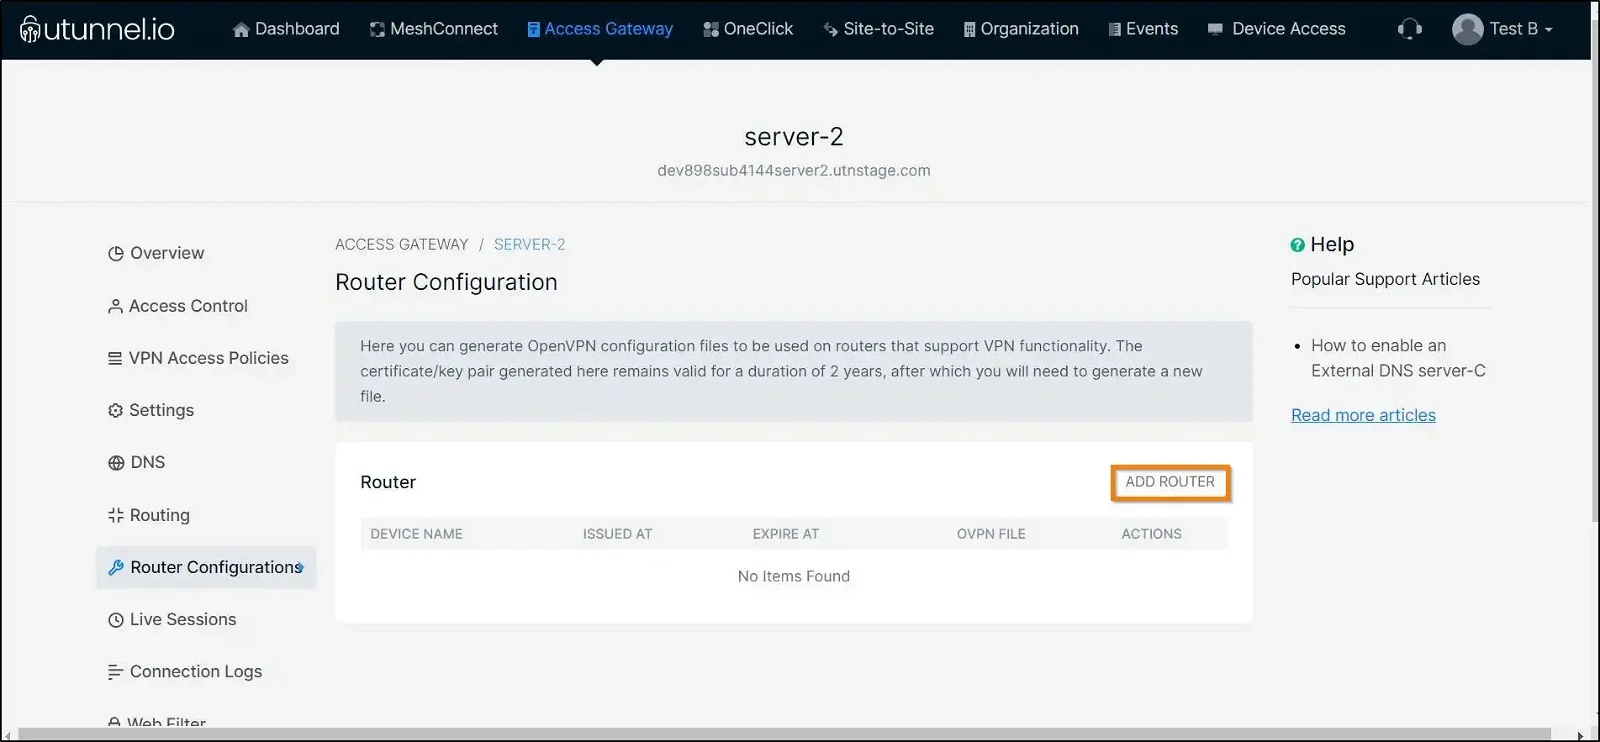
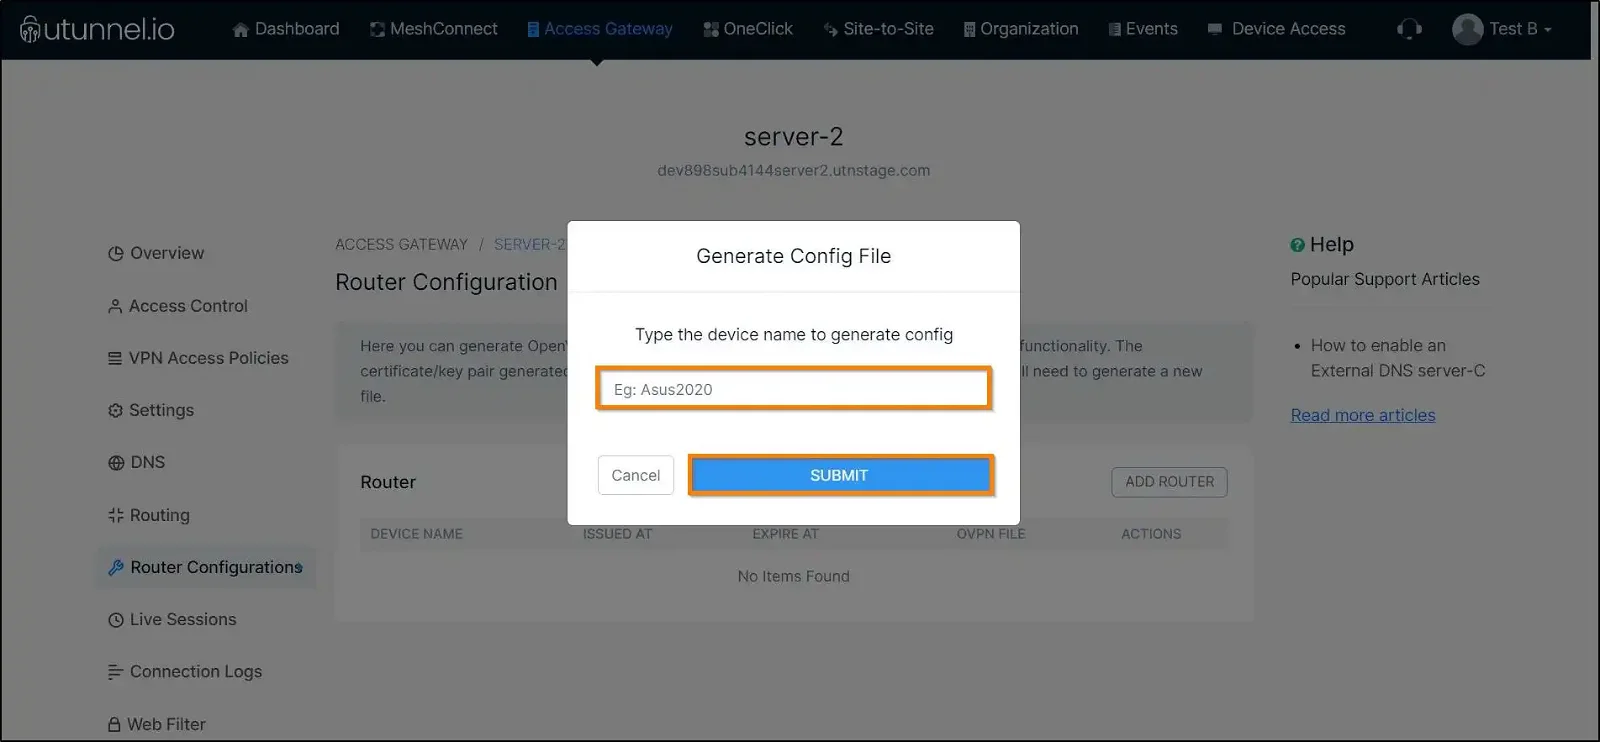
4. Click on the ADD ROUTER button to generate the router config file.
5. Give an easily recognizable name (Eg. Router Name) for the config file and click on the SUBMIT button.
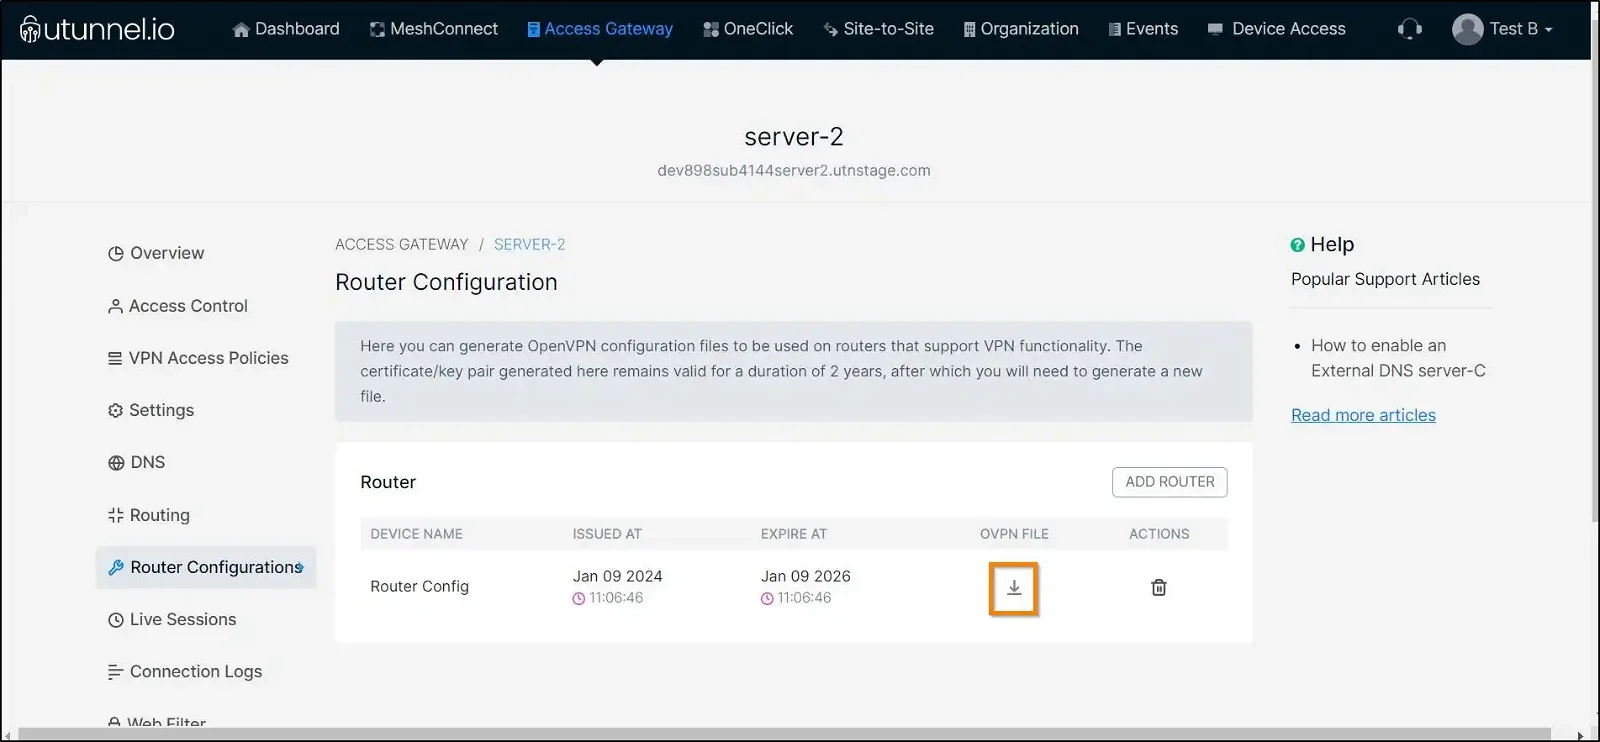
6. Click on the download icon to download the router config (.OVPN) file to your device.
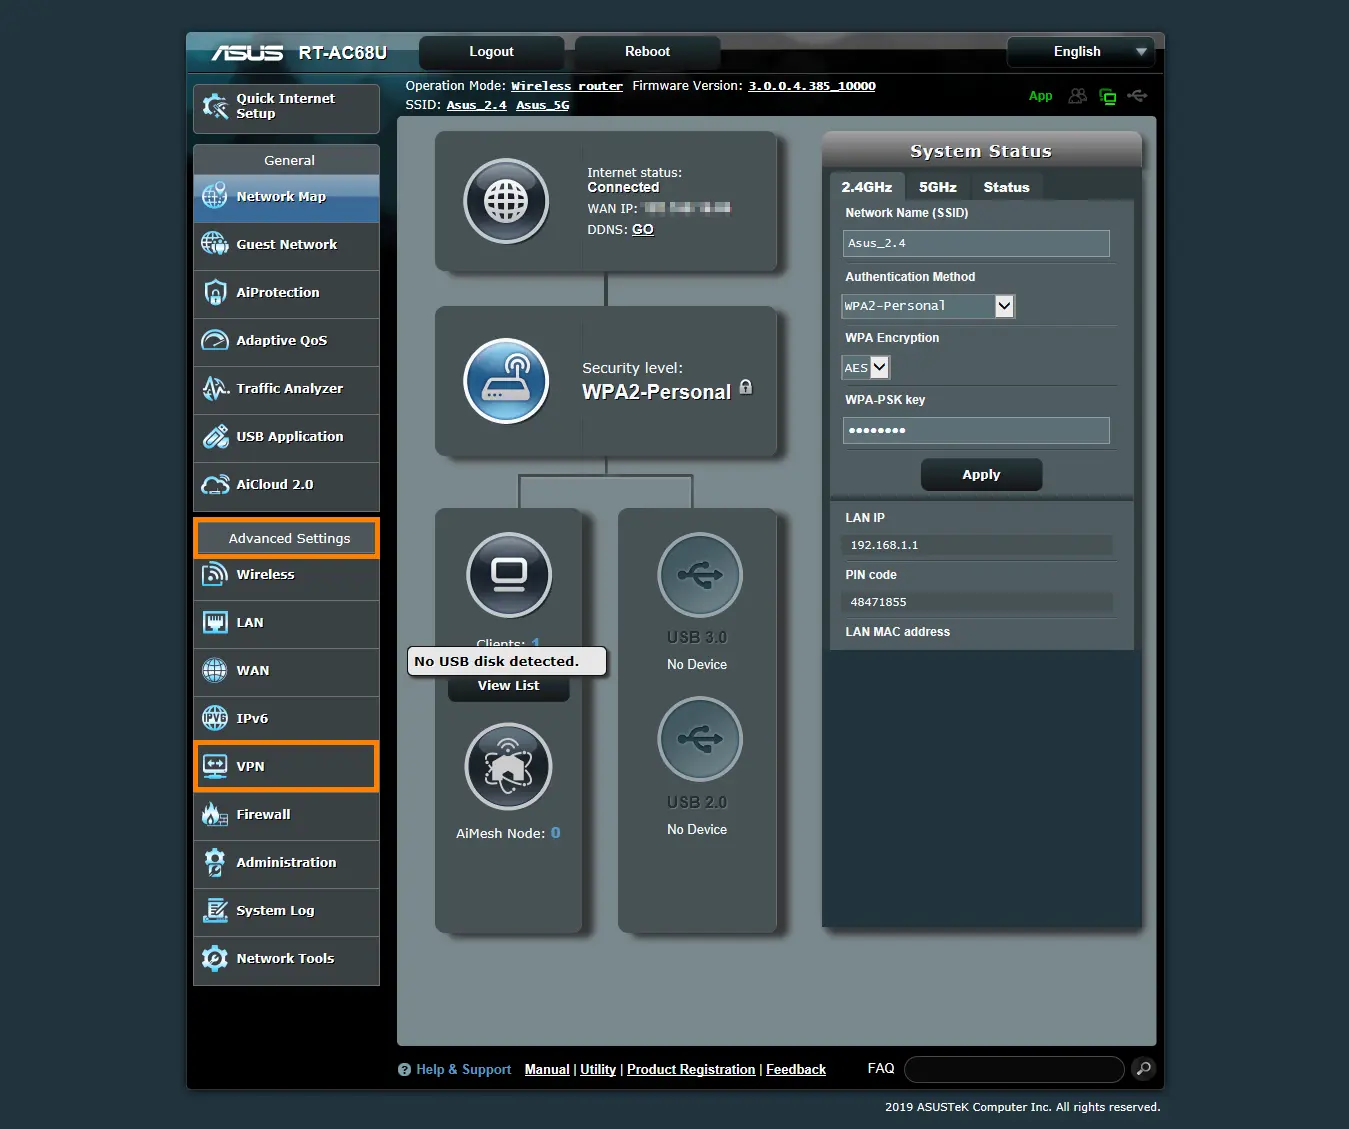
7. Type your ASUS router’s default IP address or router.asus.com in your browser’s address bar to access the router control panel. If you have changed the IP address, enter that to continue. Sign in with your ASUS router account. You will land on the router’s default settings. Find Advanced Settings from the left side menu and select VPN.
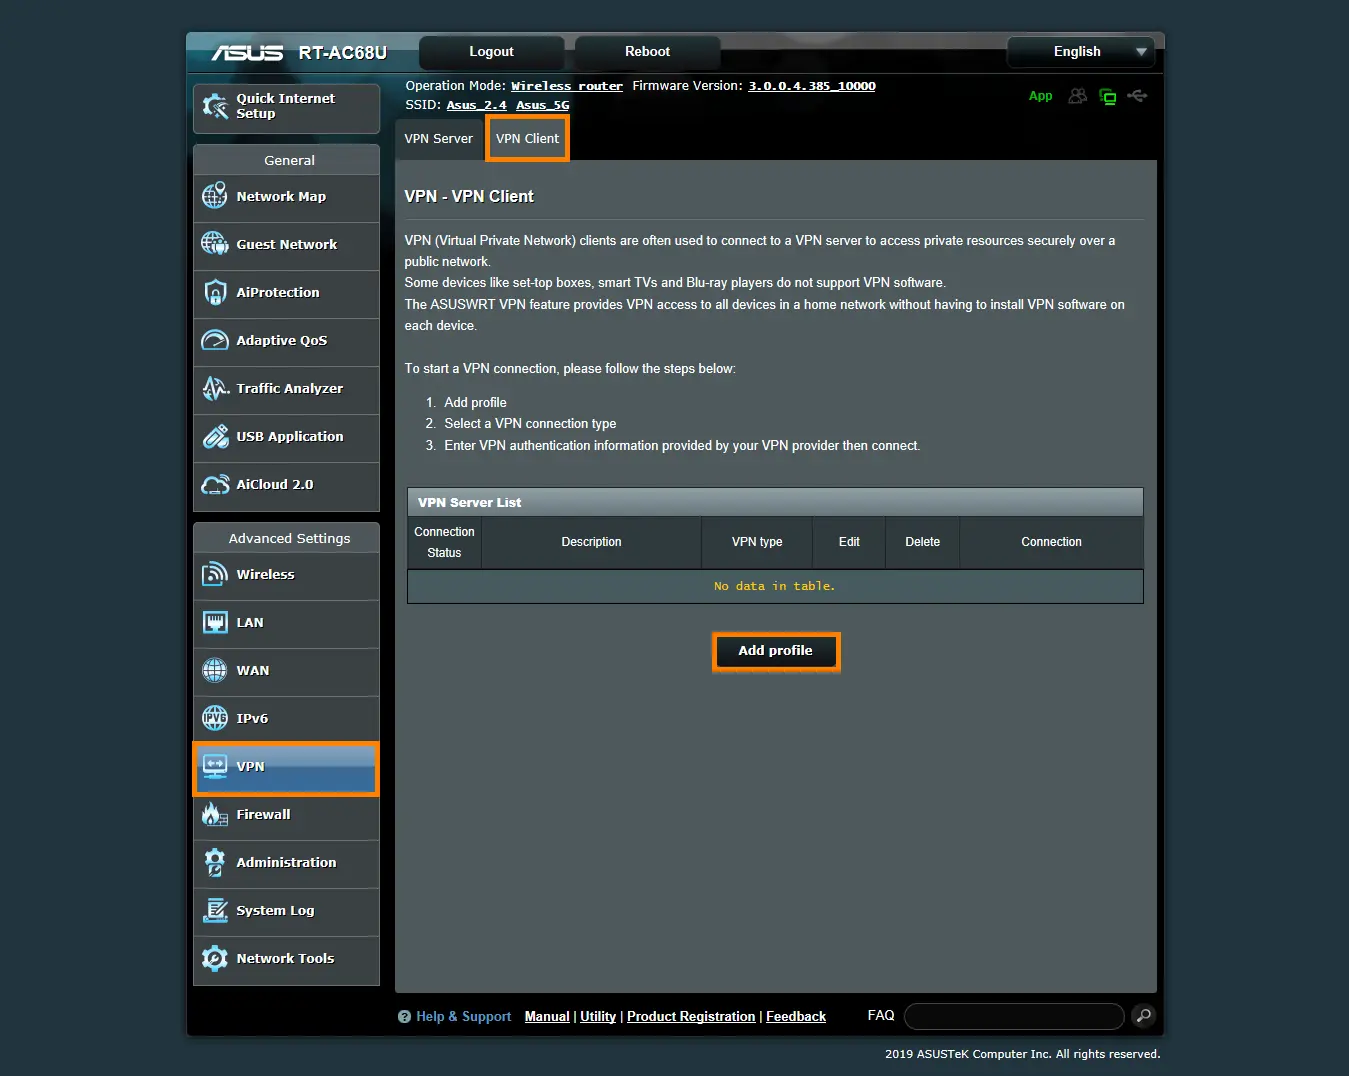
8. Select the VPN Client tab. Click on Add profile button.
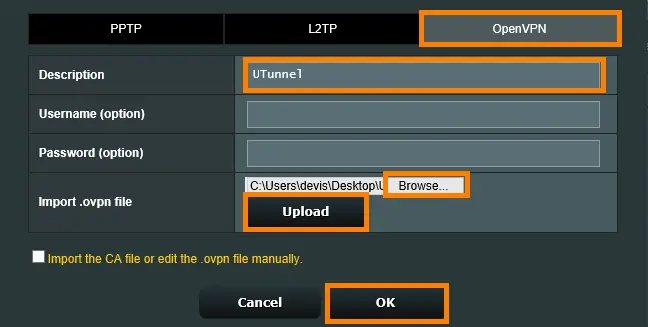
9. A new window will pop up. Select the OpenVPN tab and enter a preferred name in the Description field. Here we have named it as UTunnel. Leave Username and Password fields blank. Upload the .ovpn file downloaded from the UTunnel dashboard. Once the upload is complete, you will get a notification. Click OK to complete the setup.
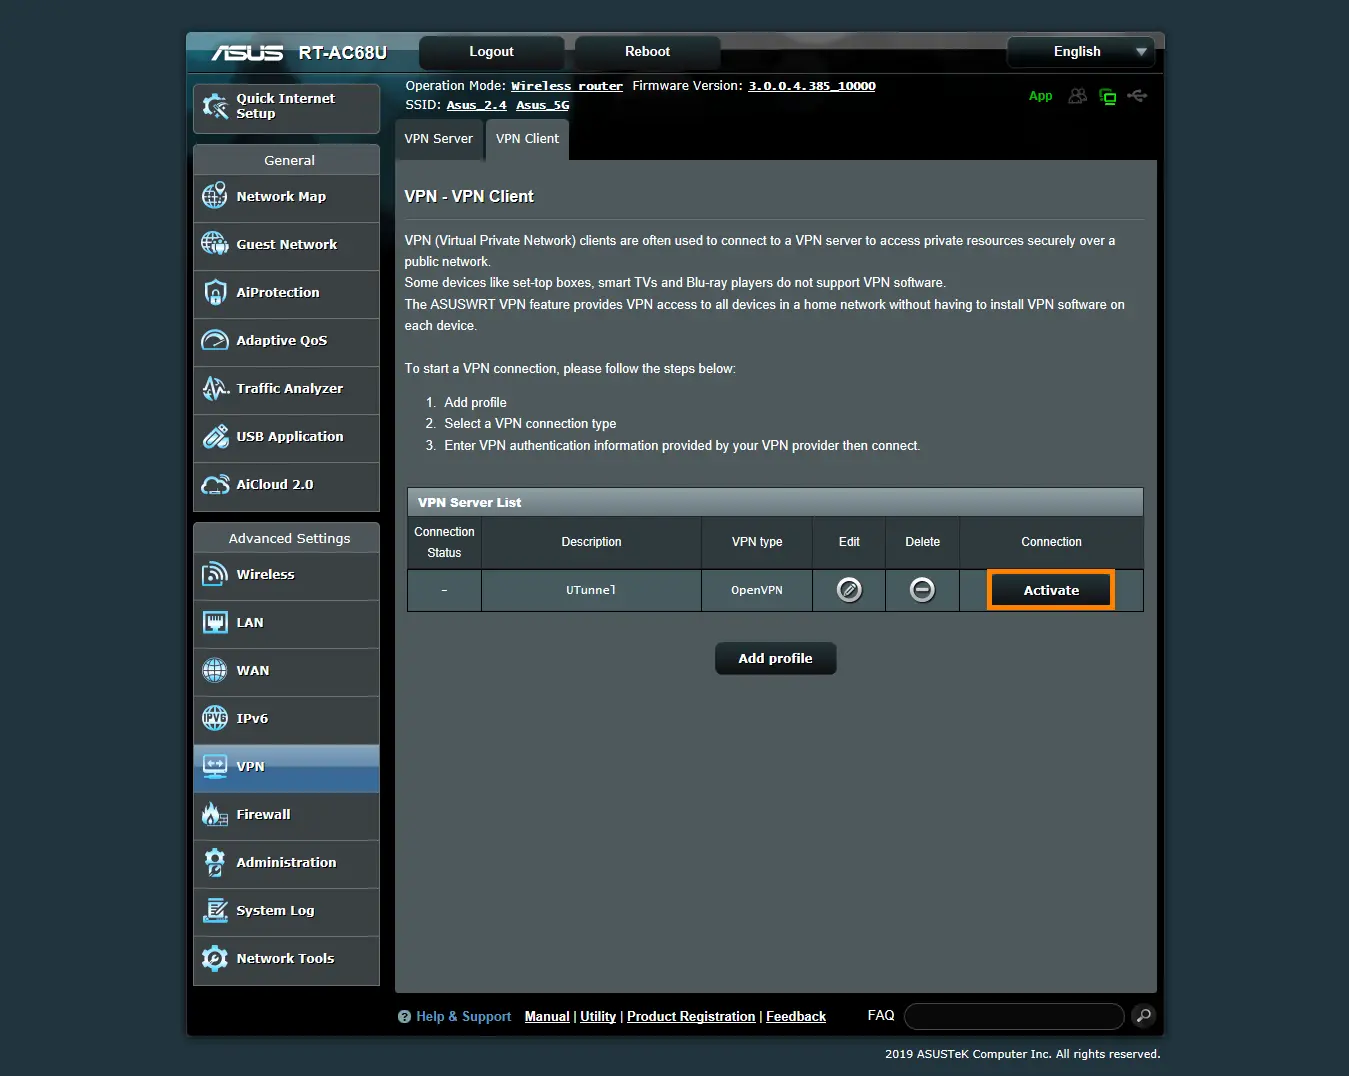
10. The pop-up window disappears. Click on the Activate button below Connection in the VPN Server List.
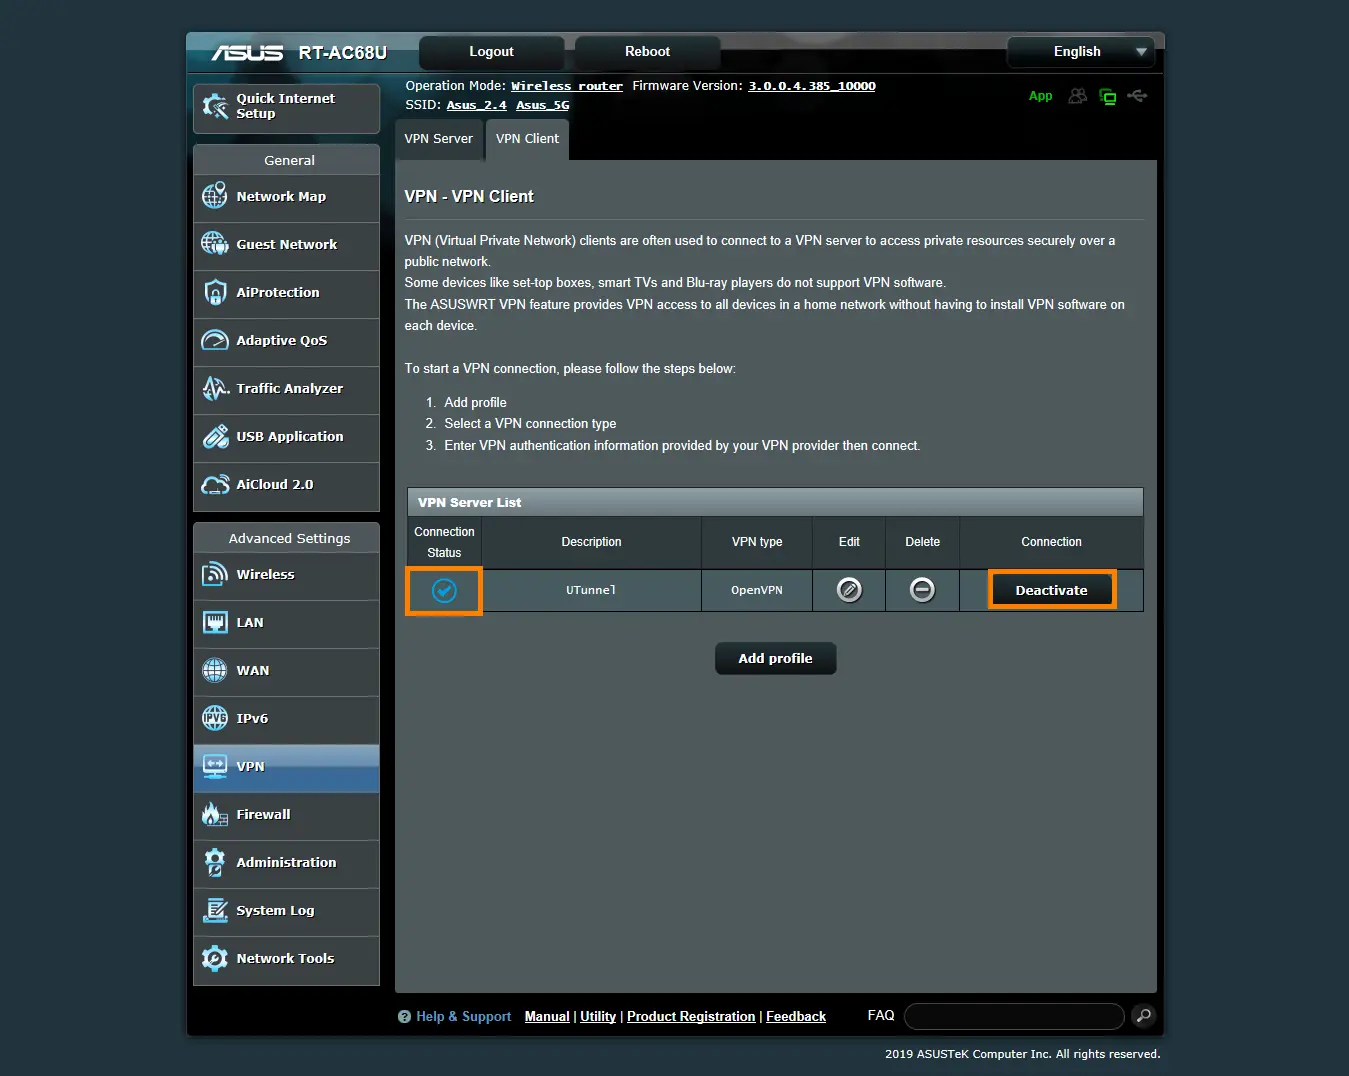
11. Once connected, the Connection Status column gets updated with a blue tick and the Activate button turns to Deactivate.
12. Now you are all set to connect your devices to the ASUS RT router and all the connections will be routed via the UTunnel VPN server.
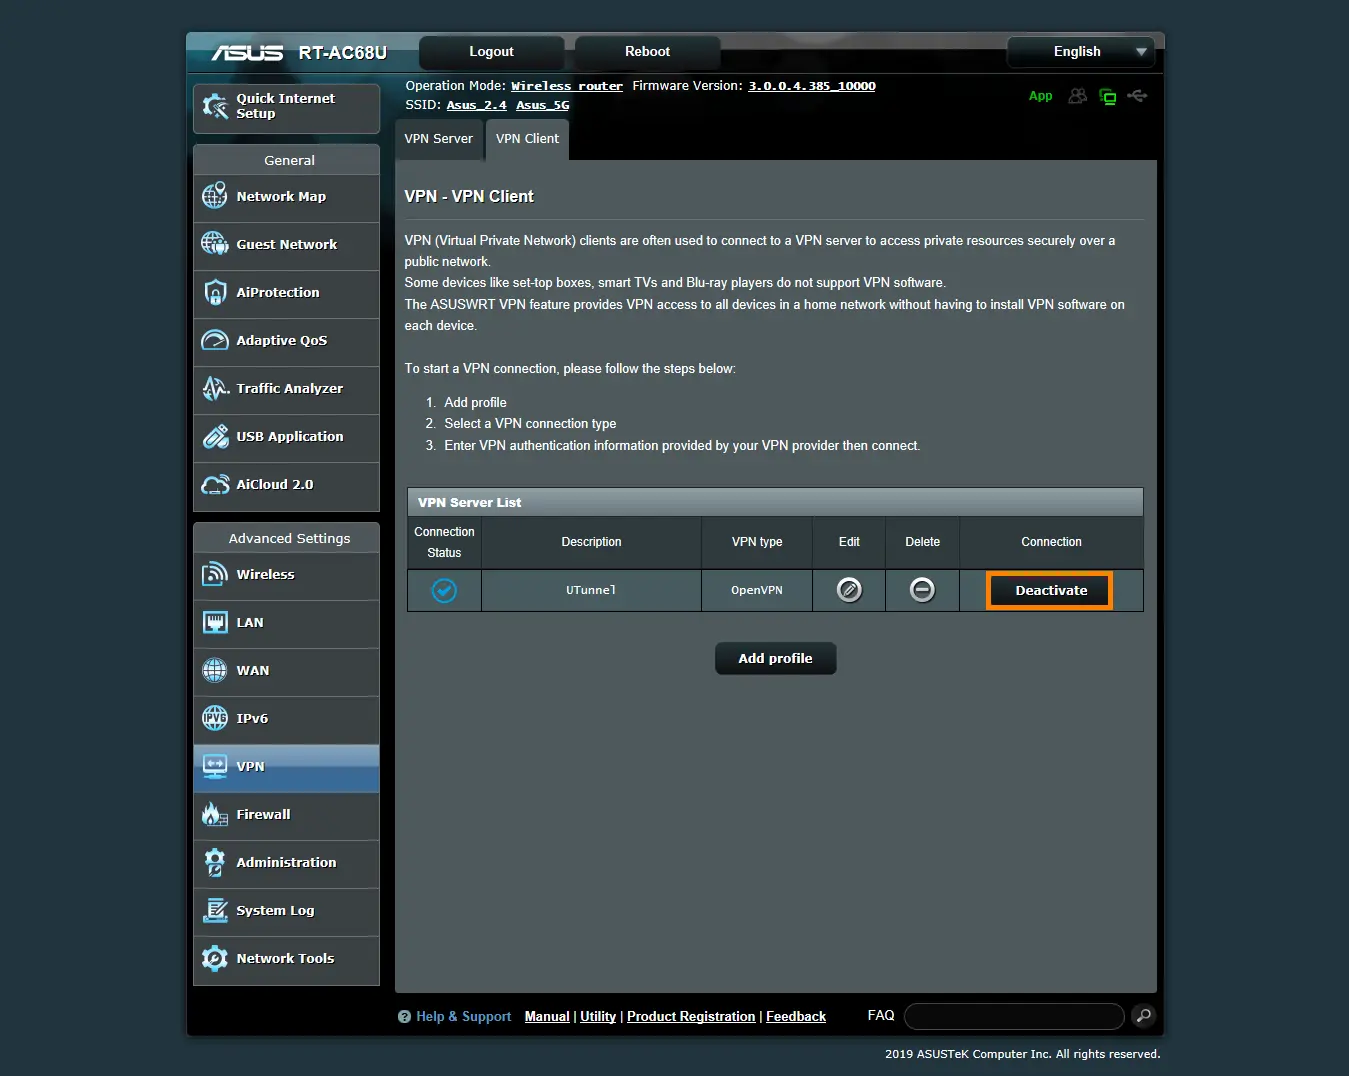
13. To disconnect the VPN, click on the Deactivate button.
Popular Support Articles