UTunnel Secure Access simplifies setting up an On-Premise VPN server with its Access Gateway solution. This flexible approach allows you to deploy a VPN server within your network infrastructure or a Virtual Private Cloud (VPC) effortlessly using the On-Premise option, also known as Bring Your Own Server (BYOS).
With the BYOS option, you can configure your business's on-premise VPN gateway to suit various needs, including secure remote access and creating site-to-site VPN tunnels to interconnect multiple networks seamlessly. Please note that to set up your UTunnel Access Gateway, you'll require a server running Ubuntu 24.04.
The following guide will walk you through the steps involved in creating a UTunnel On-Premise VPN Server or Gateway.
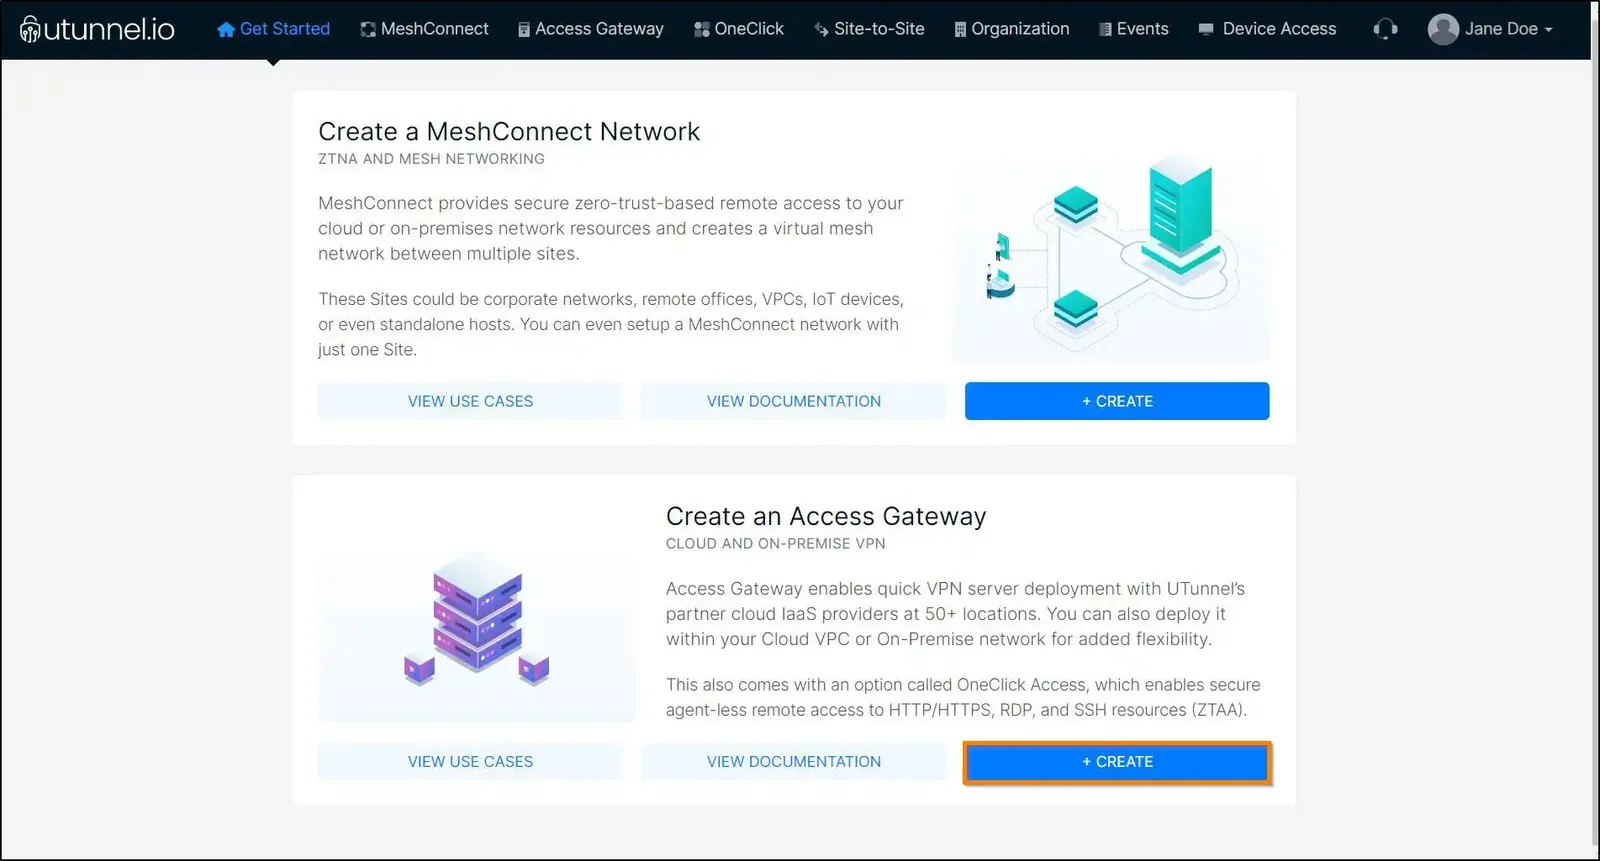
1. Log in to your UTunnel account (Organization/Personal) and navigate to the CREATE button in the Create an Access Gateway section.
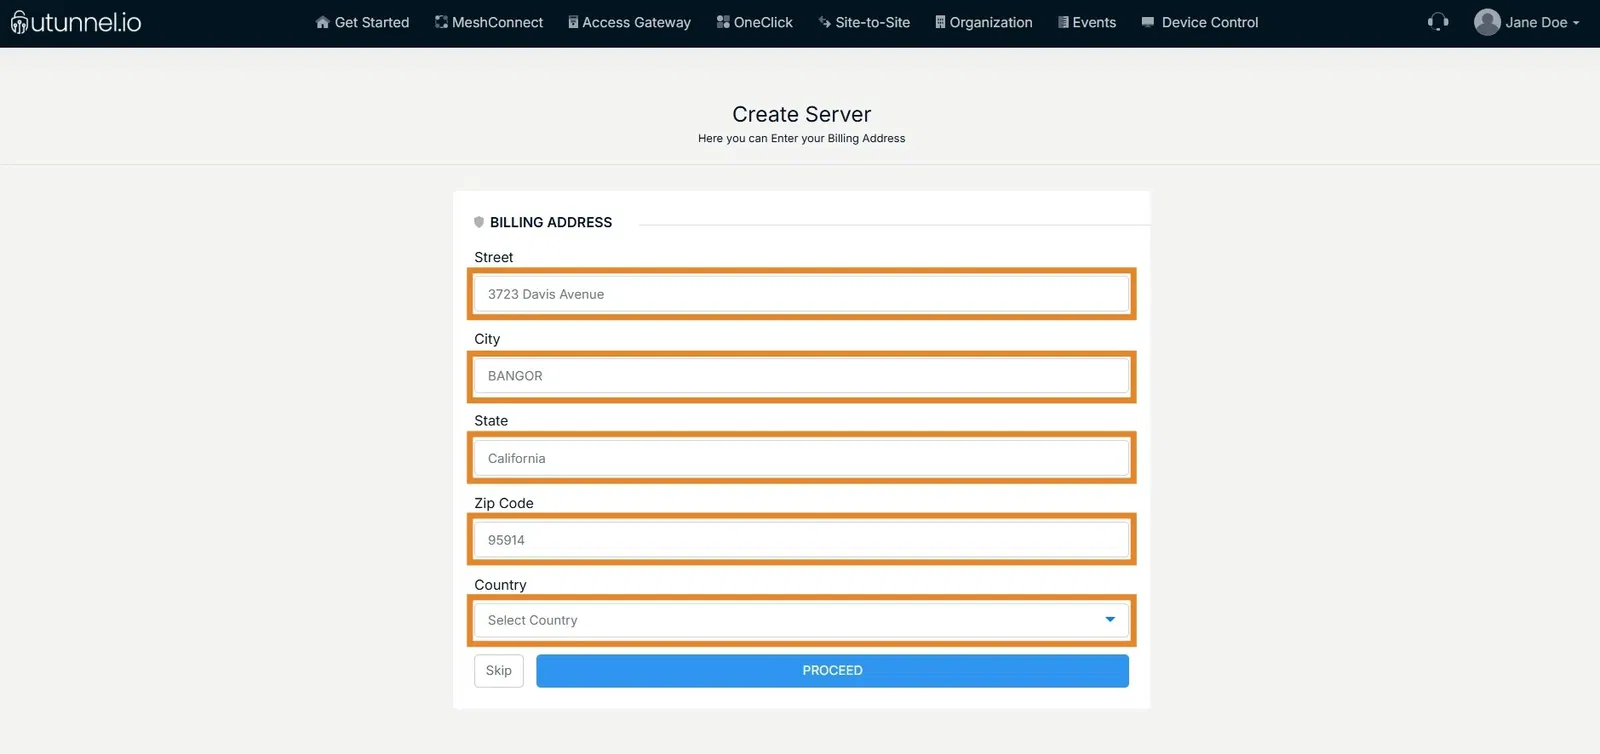
2. If your billing address details aren’t already saved in your account, you’ll be prompted to provide them. This step is optional—you can either enter the details and click Proceed, or choose Skip to add them later from the Billing tab in your dashboard.
3. Enter the required details to configure your on-premise VPN server. Provide the information in the fields below:
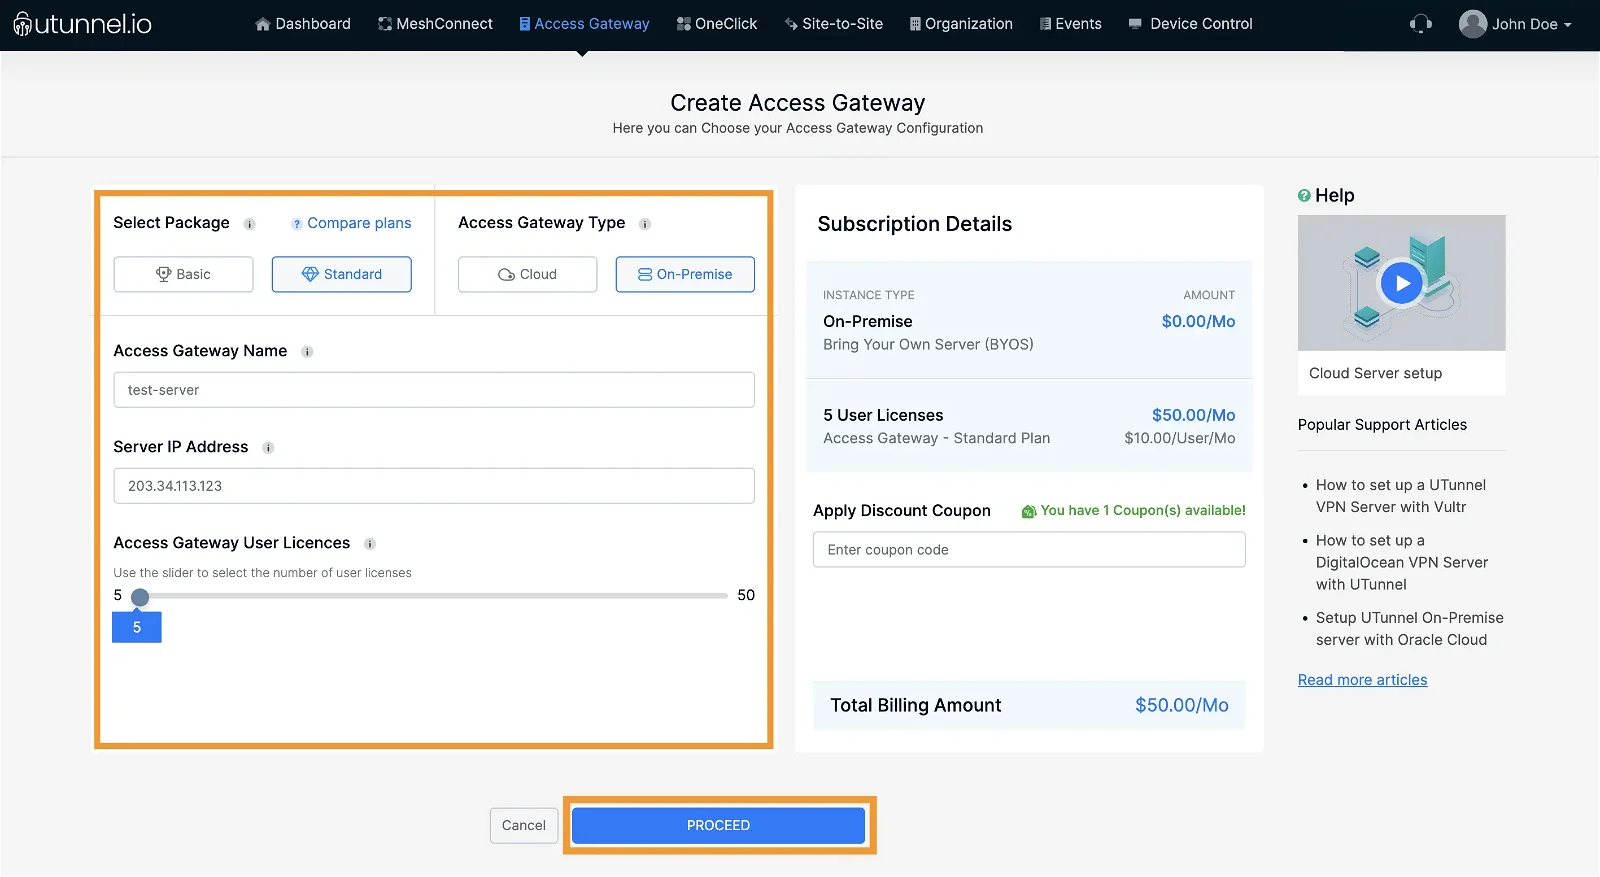
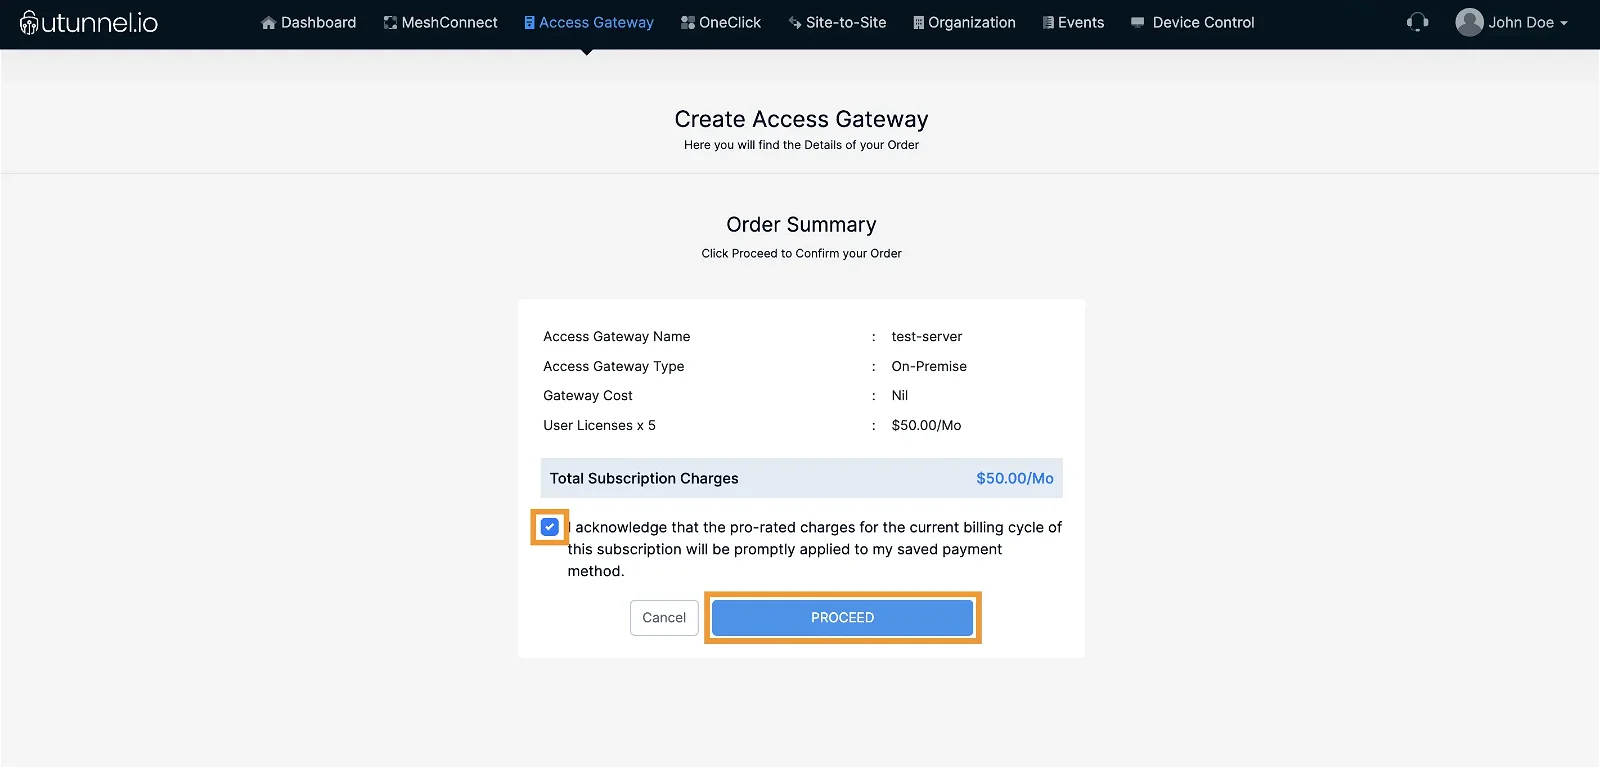
4. You will reach the Order Summary page, which displays the details of the Access Gateway configuration and the billing amount. Click on the Proceed button to make the payment.
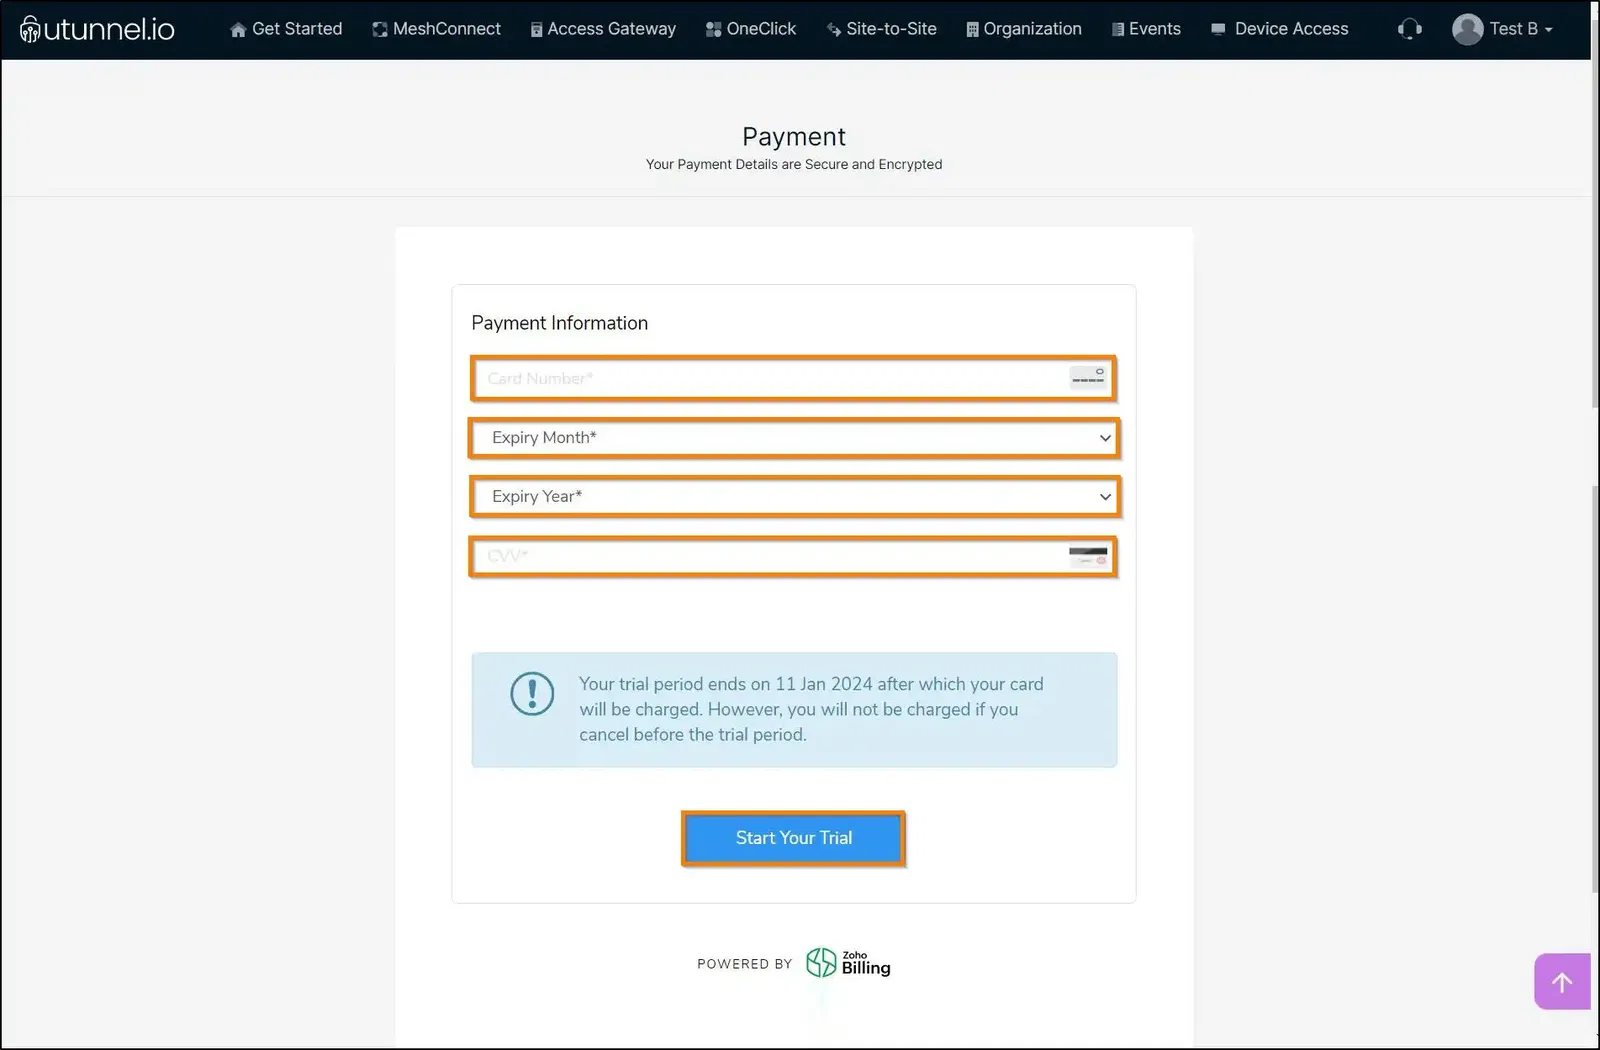
5. If this is your first subscription, you will be asked to enter your credit card details. In that case, enter your payment details and click the Start Your Trial button.
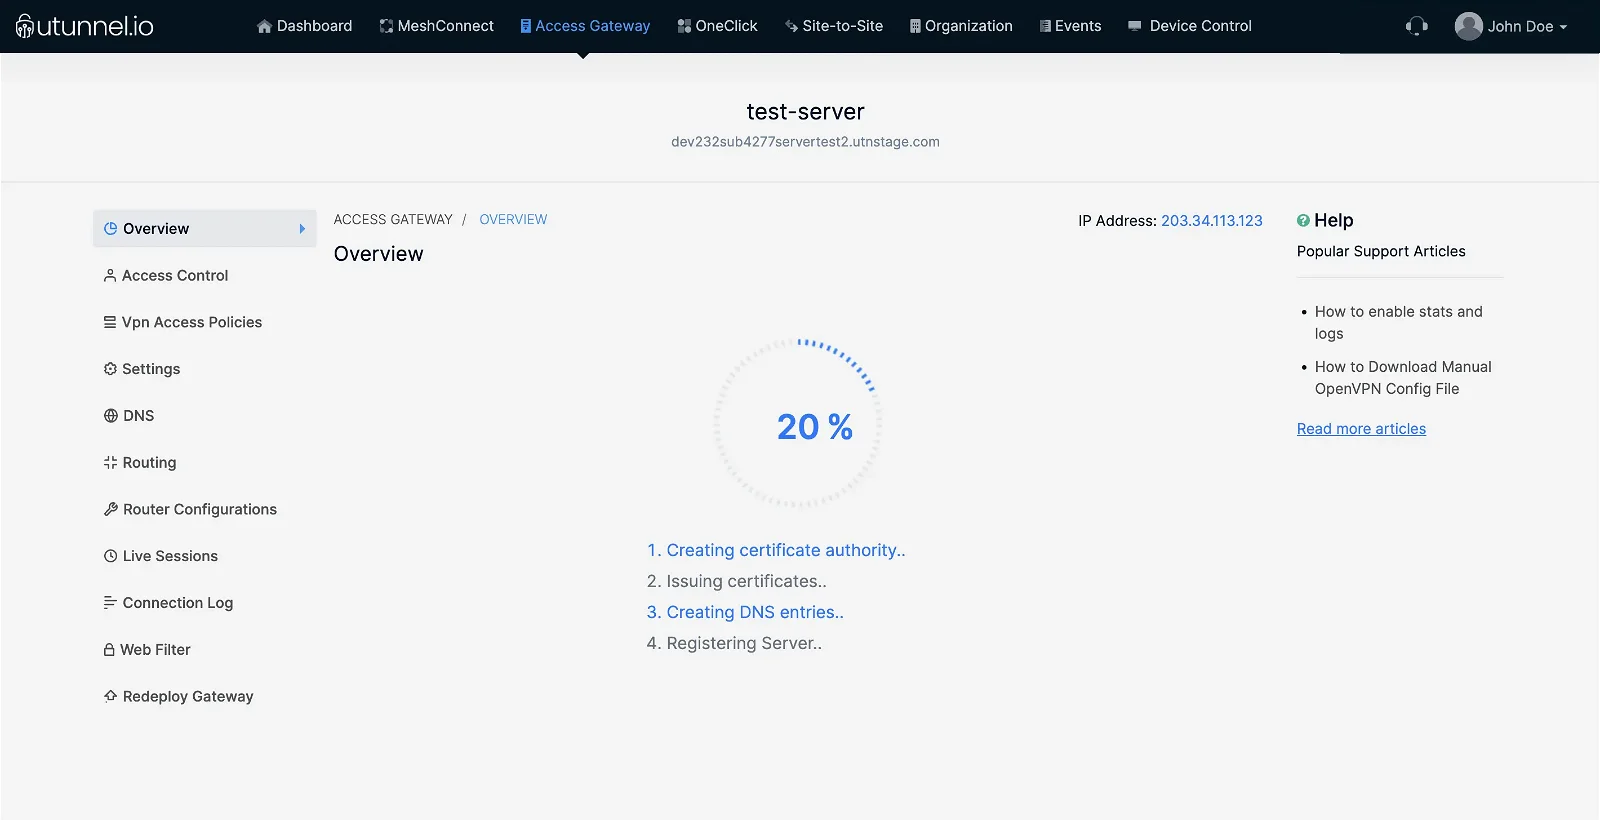
6. You will be directed to the Access Gateway Overview page, where you can check the VPN server creation status.
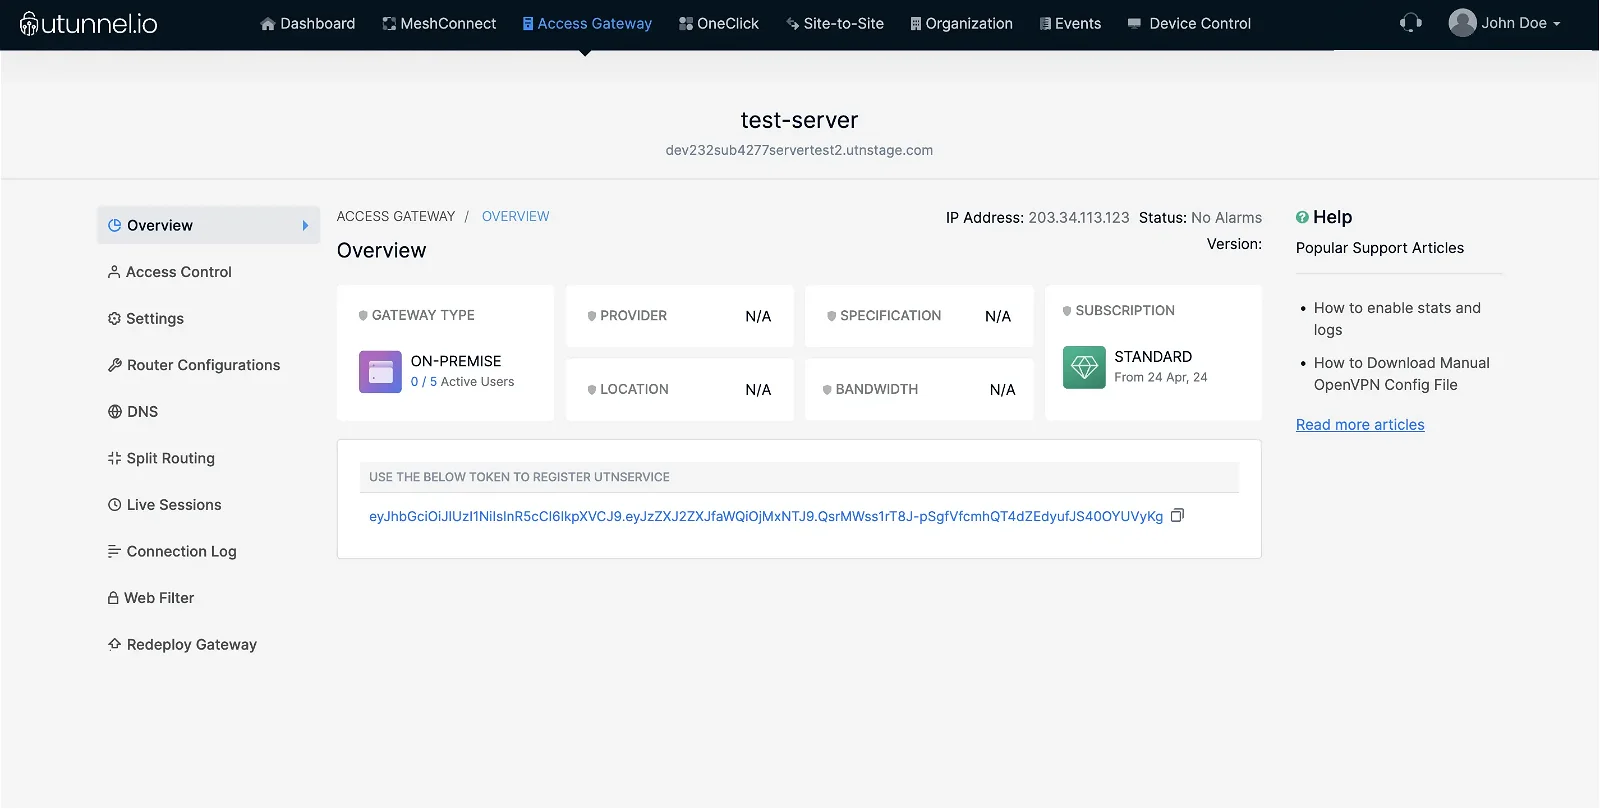
7. You will be directed to the Access Gateway Overview page, where the registration token is displayed. Please copy the registration token as it is required when you deploy the access gateway
8. Now it's time to install the UTunnel service on your Ubuntu 24.04 server. You can do this by running a few commands directly in the server's terminal or by connecting to the server via SSH if it is remote.
You will need superuser privileges (sudo access) to complete the steps below. First, execute the following command.
sudo curl https://files.utunnel.io/production/deploy/install-accessgateway.sh | bash
In the next command, you need to replace YOUR_REG_TOKEN with the registration token you copied from the Access Gateway Overview page.
sudo utnservice register YOUR_REG_TOKEN
Now it's time to start UTunnel Service on your server by running the following command.
sudo utnservice start
9. Make sure that inbound connections to the following ports are allowed to accept VPN connections.
Ports used for OpenVPN connections:
Ports used for IPSEC connections:
Ports used for managing UTunnel services like live sessions, firewalls, and site-to-site tunneling:
9. Now your On-Premise VPN Gateway will be ready to accept VPN connections. You can now manage user access to this VPN gateway through the Access Control section on the left pane.
Users provisioned on this VPN server can now log in to the UTunnel VPN client application, where this server will appear in the Access Gateway list, allowing them to connect seamlessly.
Note: Please contact our support team if you need any technical assistance to set up your On-Premise VPN Gateway.