This article describes how to set up a VPN tunnel between a UTunnel server and AWS Virtual Private Gateway.
First, let's finish the AWS Virtual Private Gateway configuration. Primarily, there are 4 steps involved in setting up a Virtual Private Gateway:
Creating a customer gateway: To get this done, log in to the AWS console and navigate to the Services > VPC page. Then click on the Customer Gateways menu under the VIRTUAL PRIVATE NETWORK section.
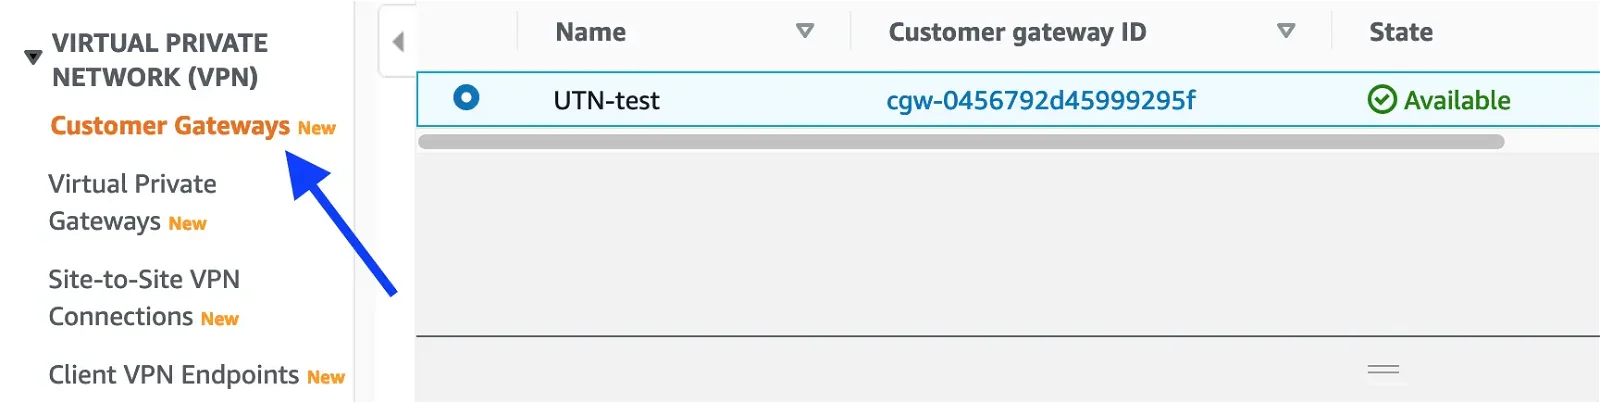
Click on the Create customer gateway button at the top-right corner and fill out the form as shown below:
Name tag: Give a desired name for the customer gateway
BGP ASN: 65000
IP address: IP Address of the UTunnel VPN Server

Set all other parameters to the default and click on Create customer gateway button at bottom of the page.
Creating a virtual private gateway: Click on the Virtual private gateways menu on the left side.
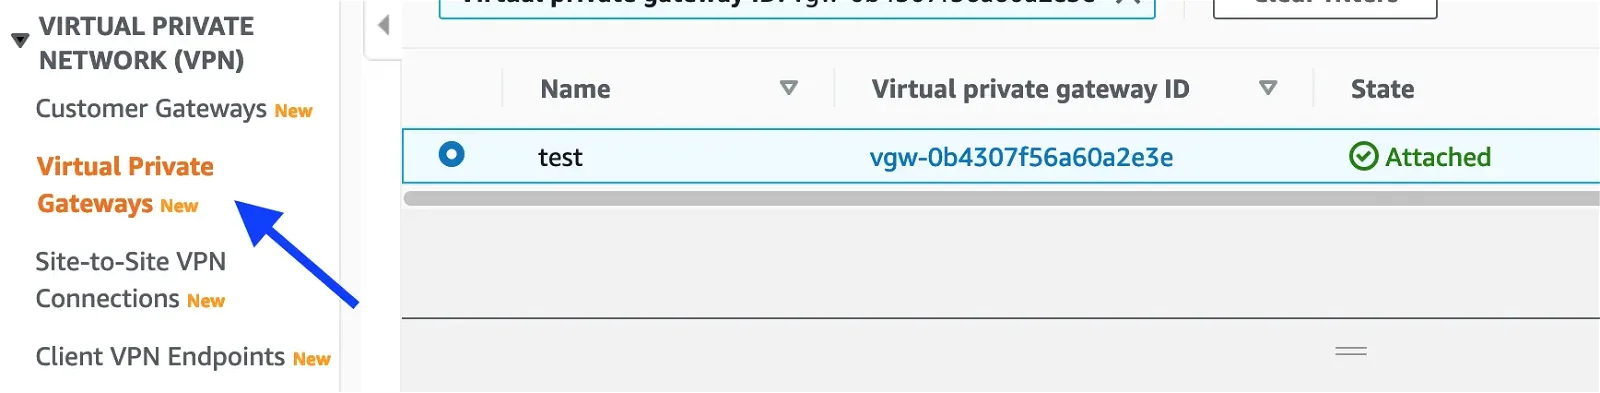
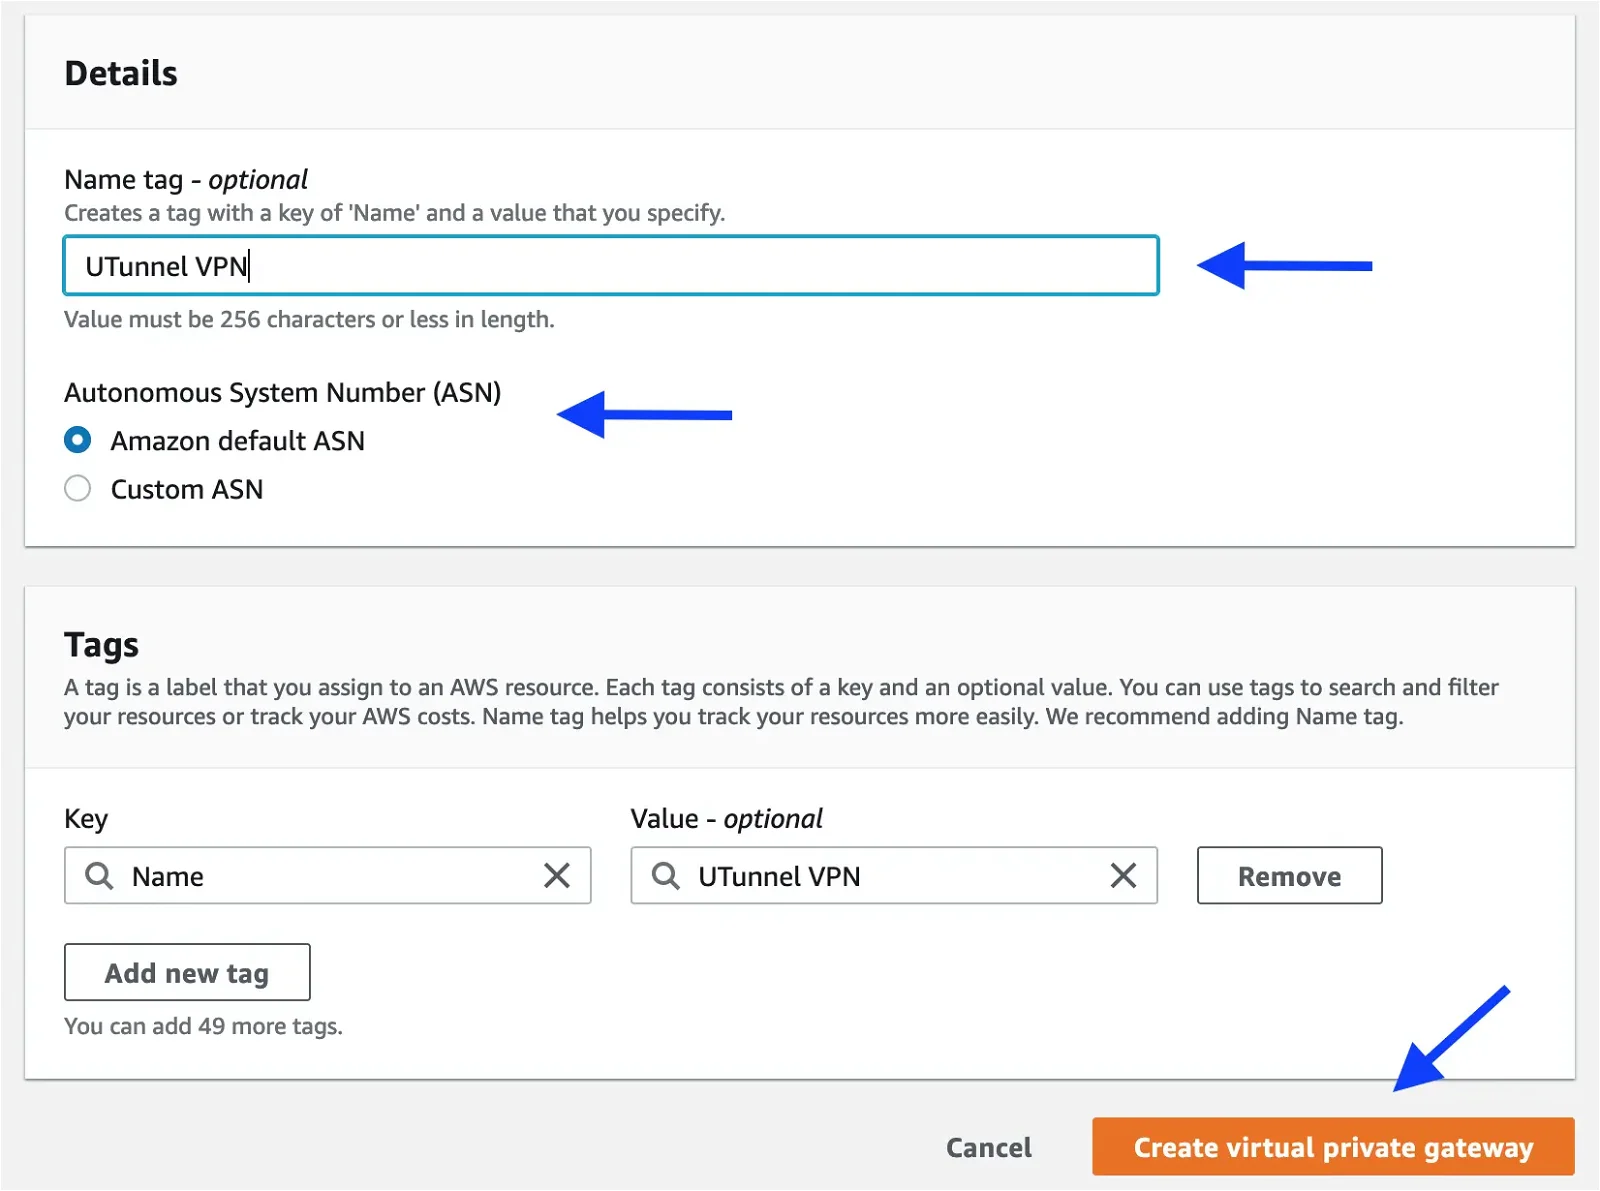
Click on the Create virtual private gateway button at the top-right corner and fill the form as shown below:
Name tag: Give a desired name for the virtual private gateway
Autonomous System Number (ASN): Amazon default ASN
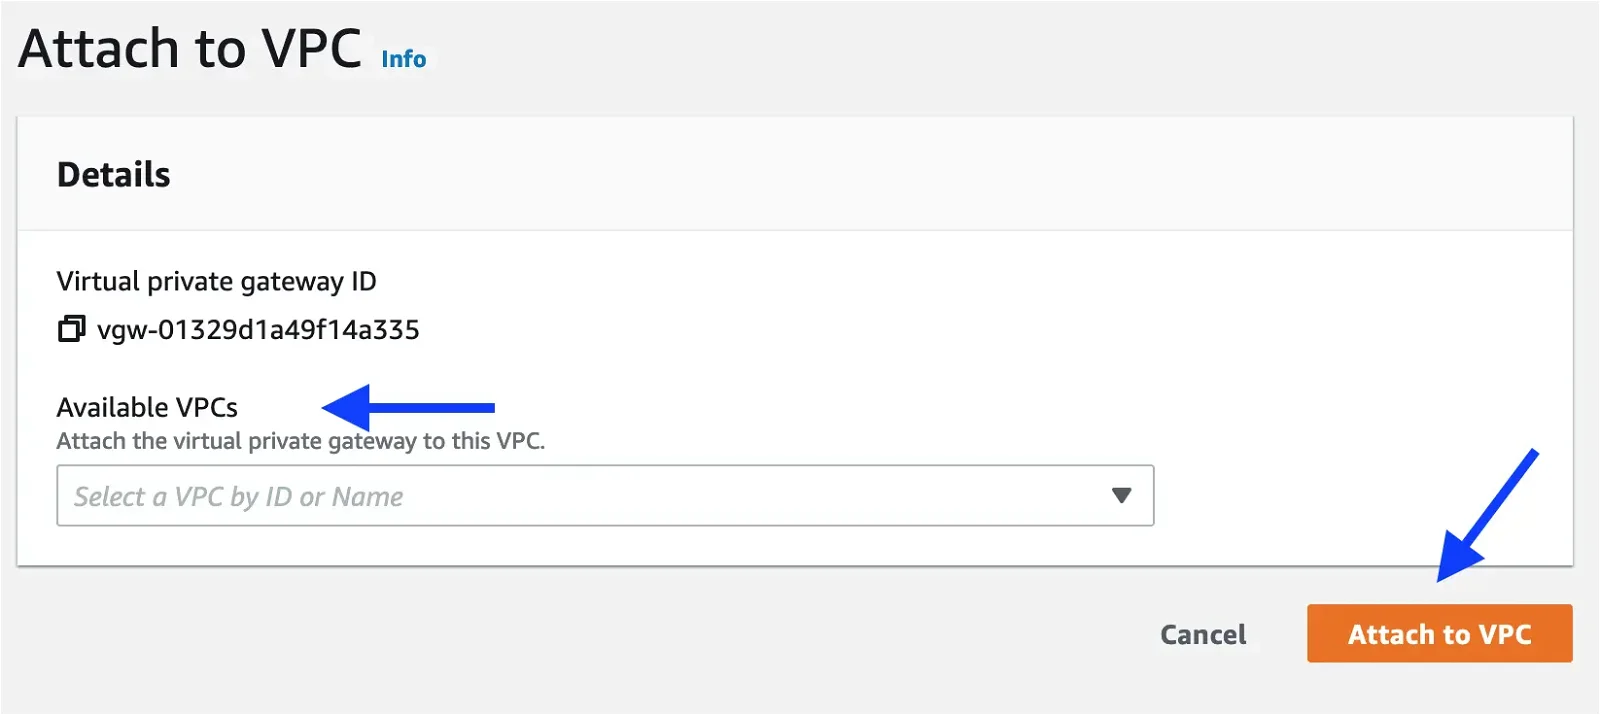
Setting up the site-to-site VPN connection: We need to attach the newly created Virtual private gateway to your VPC that you need to expose across the tunnel. Select the virtual private gateway and navigate to Actions > Attach to VPC.

Select the VPC from the drop-down menu and attach it.
Next, we can create the Site-to-site VPN connection. Click on the Site-to-site VPN connections menu on the left side pane.
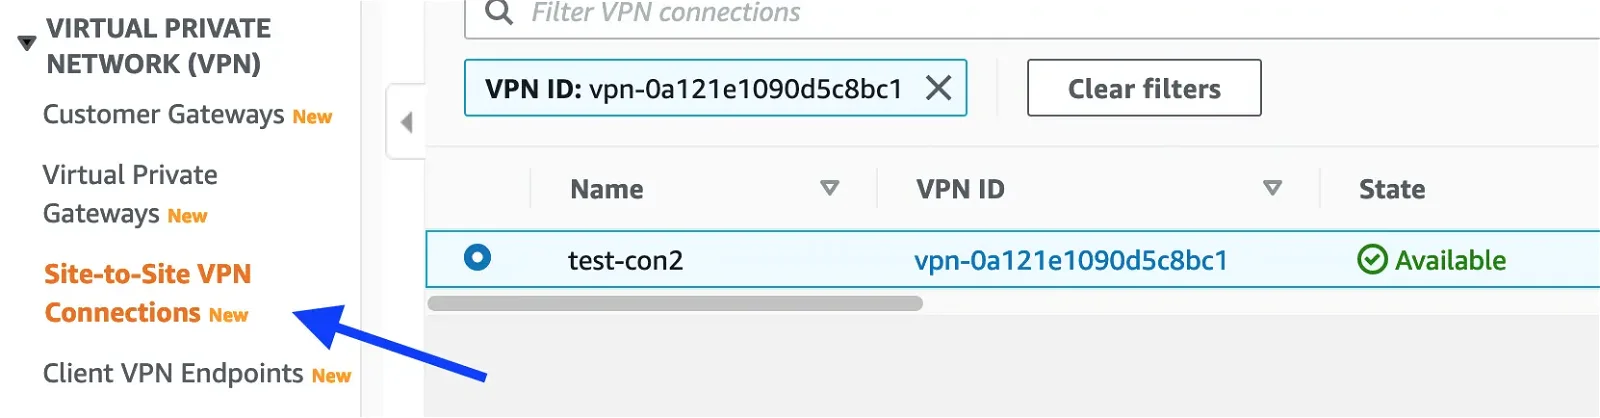
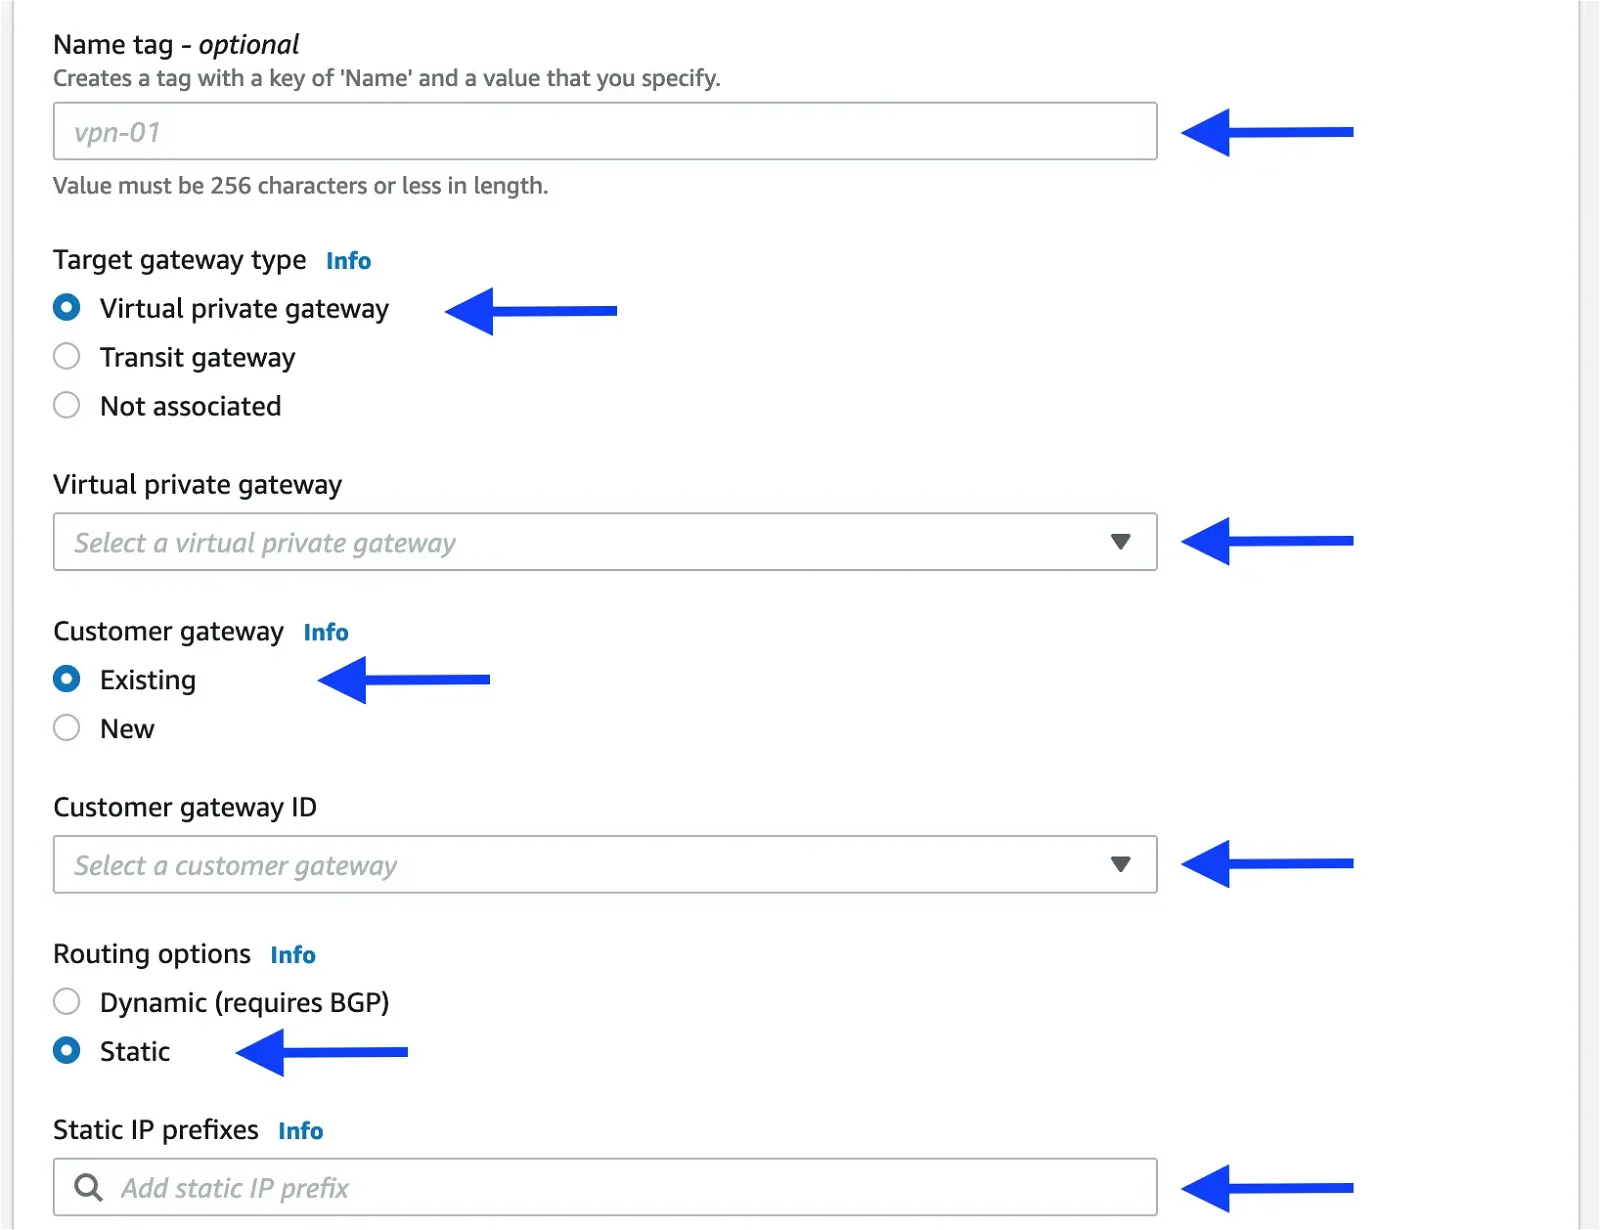
Click on the Create VPN connection button at the top-right corner and fill out the form as shown below:
Name tag: Give a desired name for the VPN connection
Target gateway type: Virtual private gateway
Virtual private gateway: Select the private gateway from the drop-down menu
Customer gateway: Existing
Customer gateway ID: Select gateway ID from the drop-down menu
Routing options: Static
Static IP prefixes: Add subnets behind the UTunnel server
Remote IPv4 network CIDR: AWS VPC CIDR

We are done with the private gateway setup.
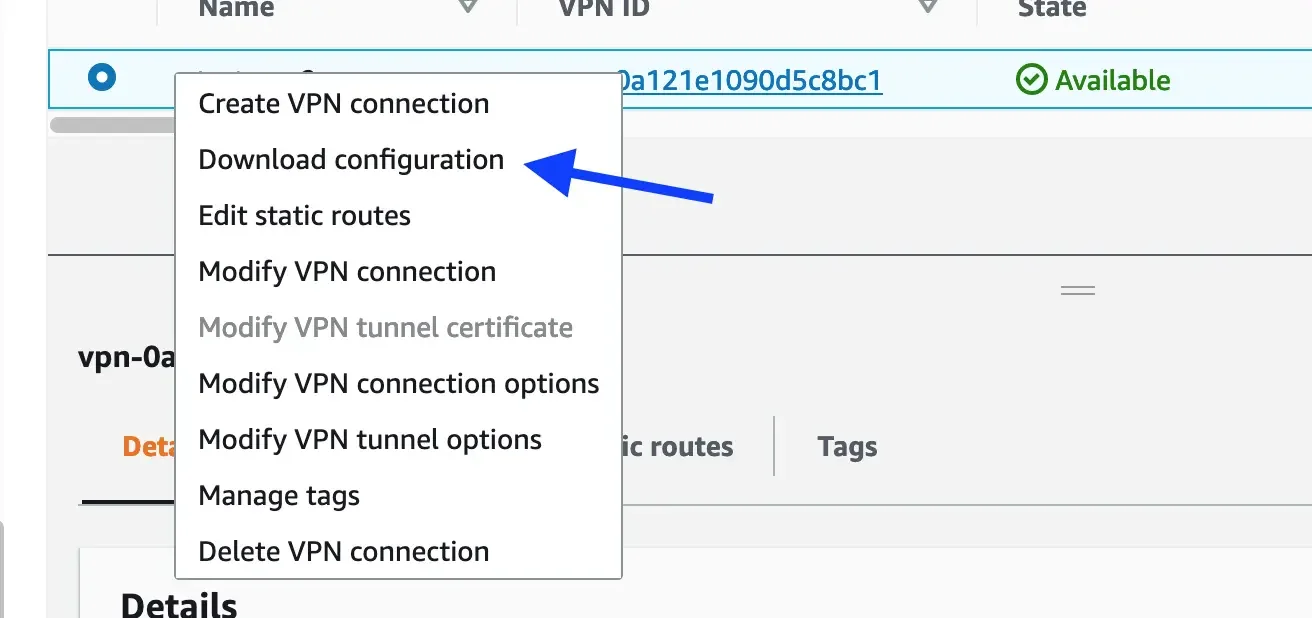
Next, download the VPN configuration. We need to extract the remote gateway IP Address and pre-shared key from it, as we need them while configuring the UTunnel side.
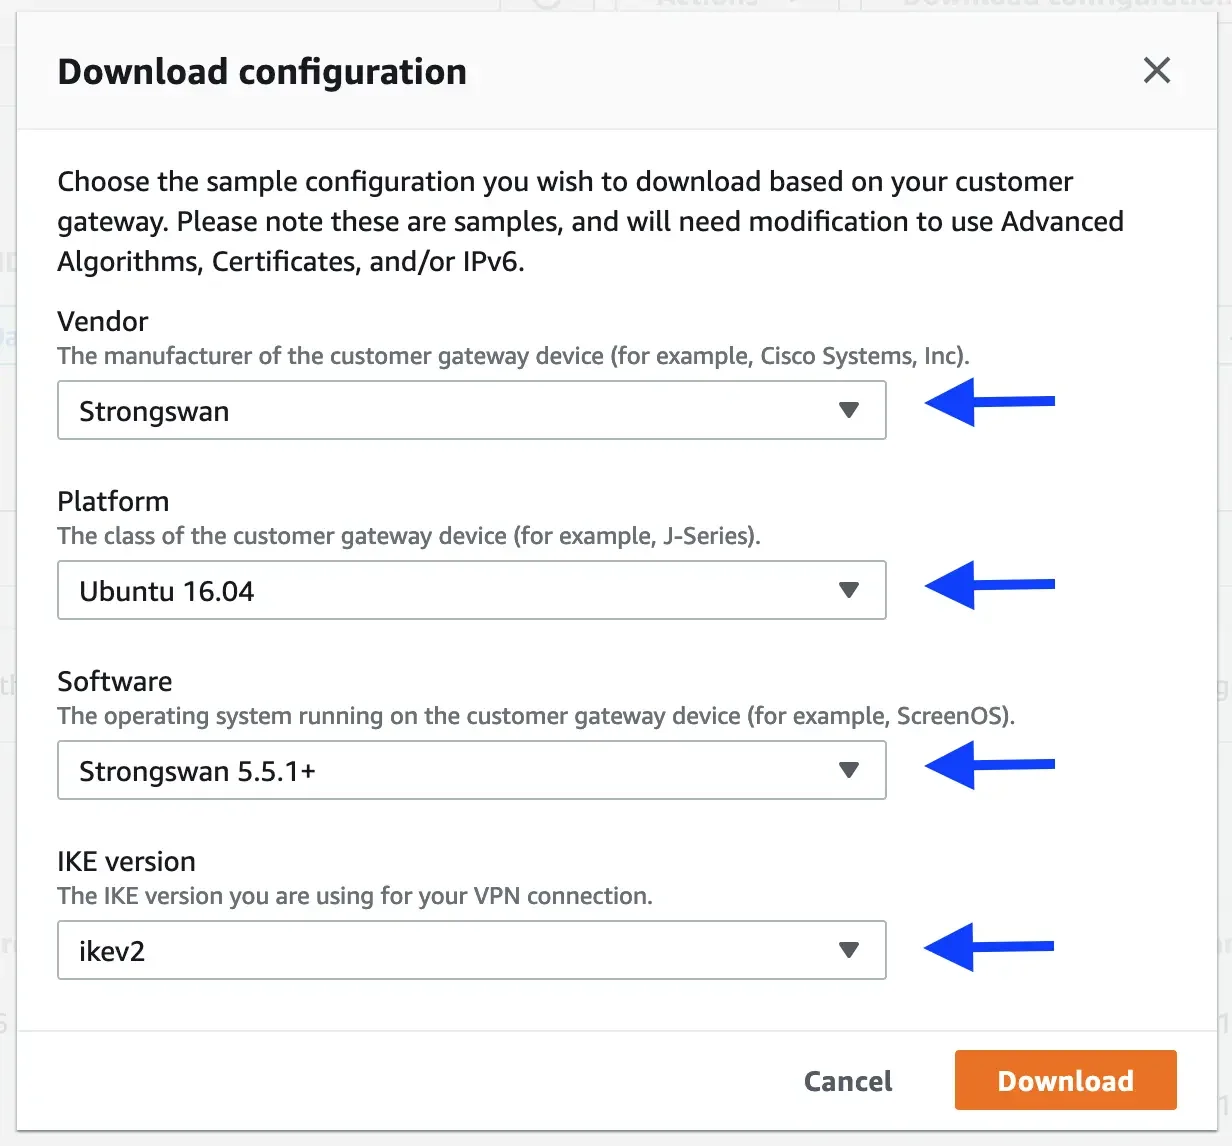
Download the configuration for Strongswan with the following selection:
Next, we need to update the routing table for the VPC. Make sure that the routes are added to send the packets destined for the subnets behind the UTunnel server through the virtual private gateway.
Before starting with the tunnel configuration, get the remote gateway IP address (the second one in the file, as highlighted below) and pre-shared key from the downloaded configuration file. The configuration file will have configuration instructions for the primary and secondary tunnels. At this point, we support only the single tunnel configuration, so let's grab details for the first tunnel from the configuration file.

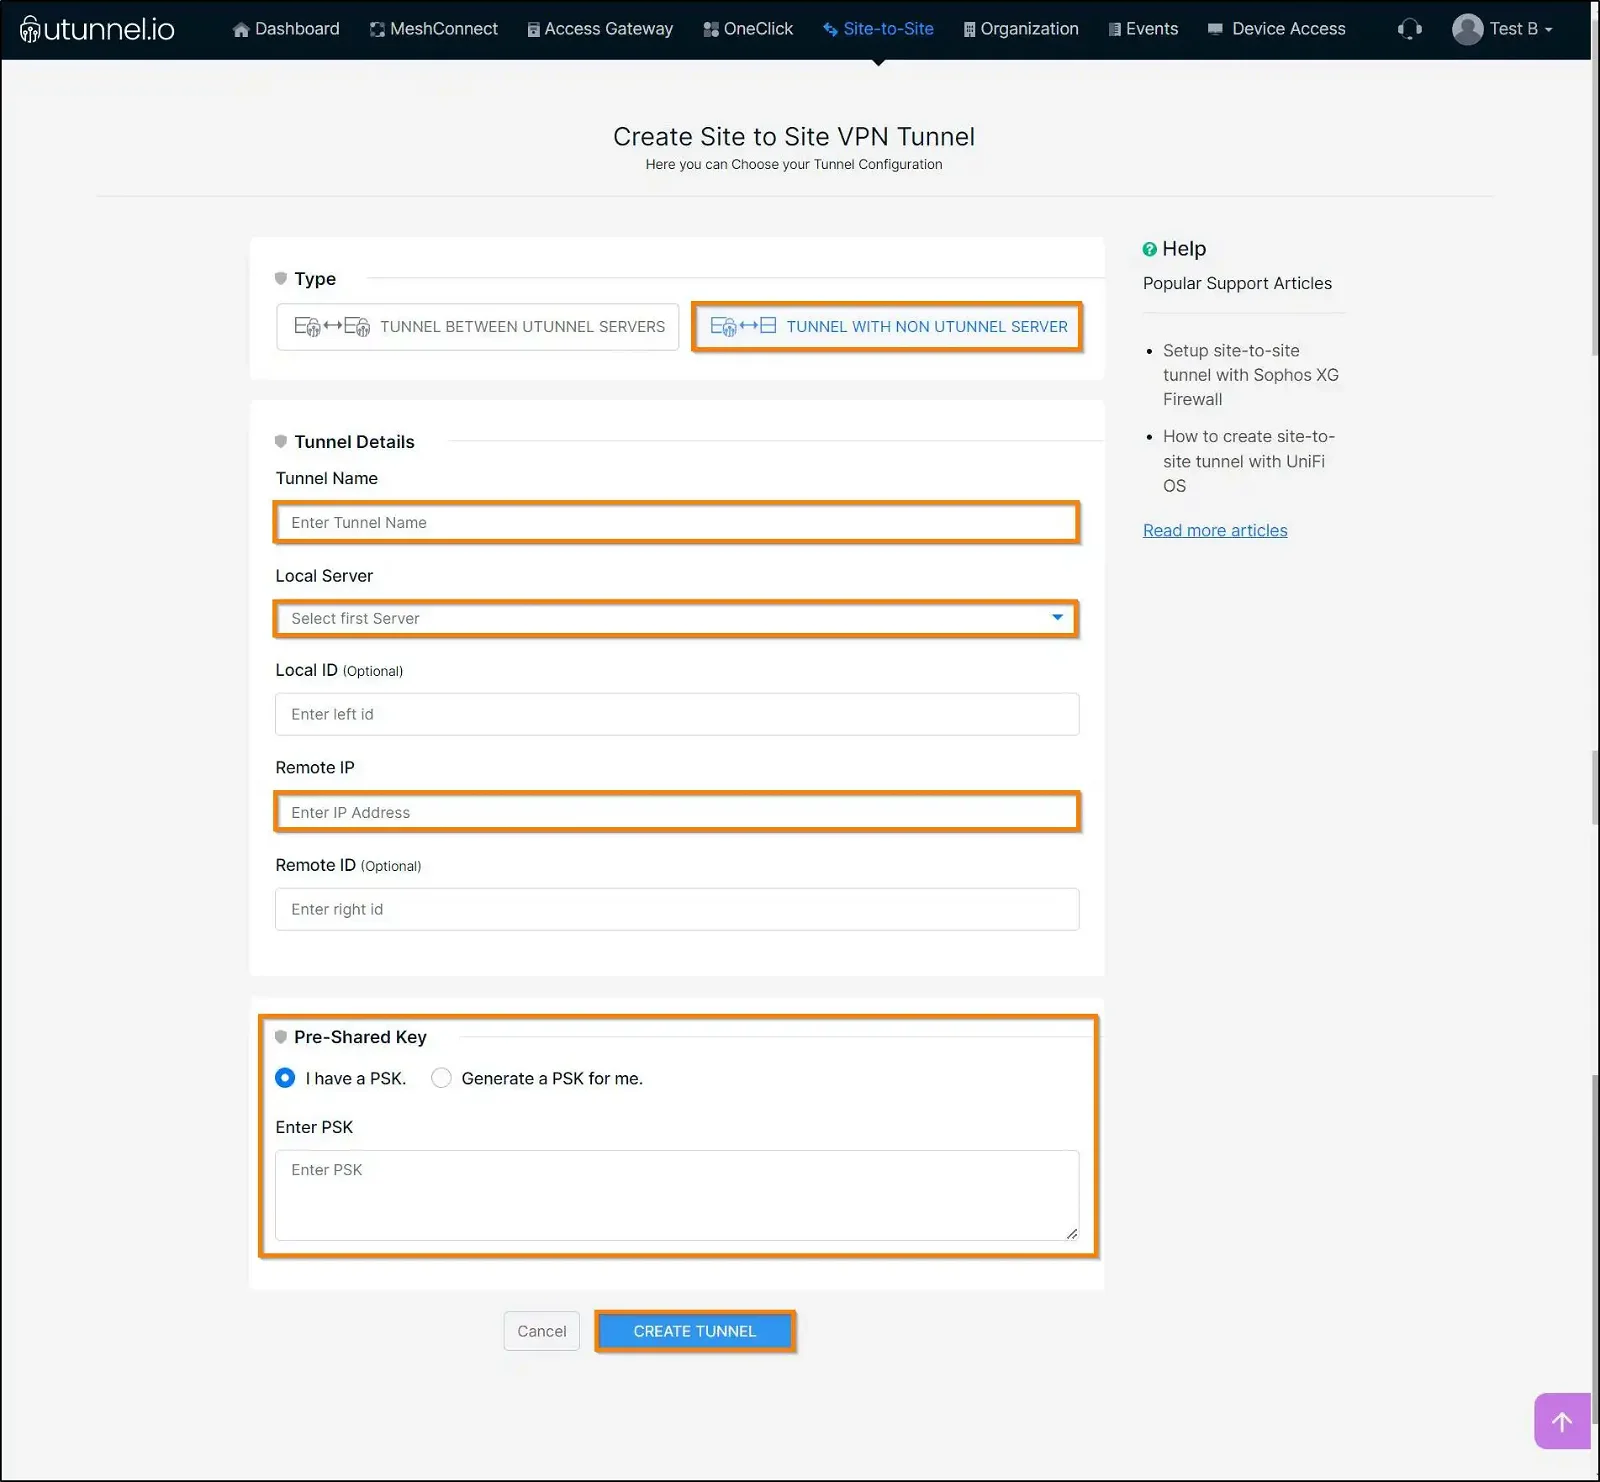
Now, login to your organization's dashboard, navigate to the Site-to-Site tab and click on CREATE TUNNEL button. Fill out the form as shown below:
Type: TUNNEL WITH NON-UTUNNEL SERVER
Tunnel Name: A desired name for the tunnel
Local Server: Select the UTunnel server to build the tunnel with
Remote IP: IP address of the AWS gateway. Find it from the downloaded configuration file.
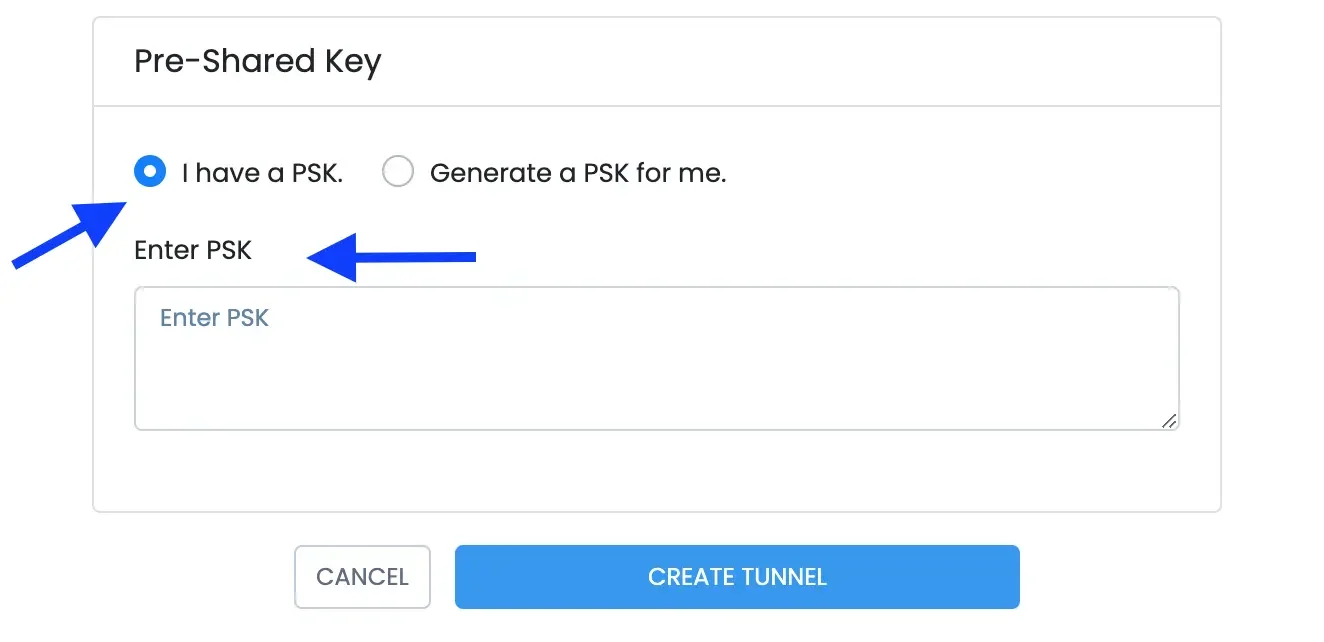
Enter PSK: Enter the pre-shared key obtained from the configuration file.
Select the newly created tunnel to update it with local and remote subnets (encryption domains).
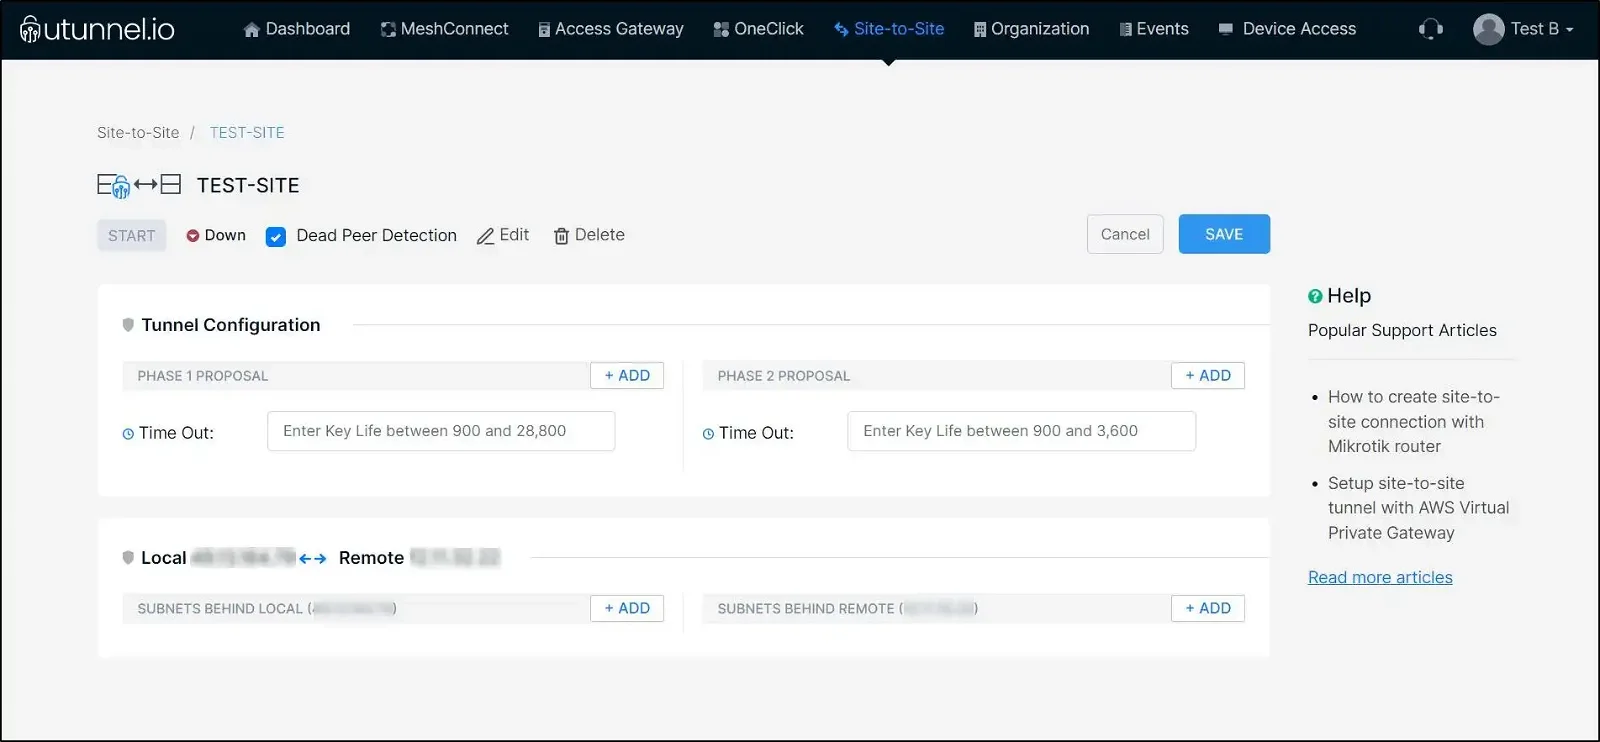
Subnets behind LOCAL: Define subnets behind the UTunnel server here
Subnets behind REMOTE: Define your VPC CIDR here
We are all set! You can go ahead and start the tunnel now.