Organizations utilizing OneLogin's SSO and SCIM features to manage user identities across various apps and services can seamlessly extend this functionality to manage users in UTunnel.
This guide will explain how to enable SSO and SCIM on your UTunnel Account with OneLogin as your Identity Provider (IdP).
Please be aware that these instructions will require you to navigate back and forth between your identity provider and the UTunnel web console several times.
Follow the steps below to set up SSO and SCIM using OneLogin on your UTunnel Organization account.
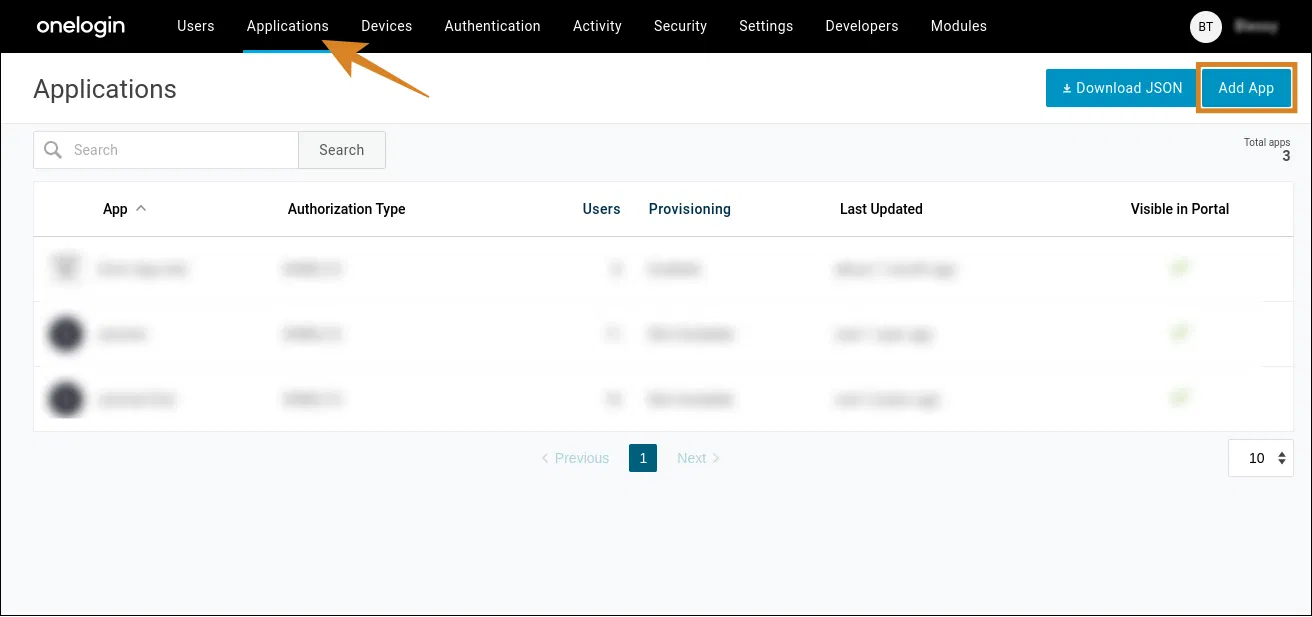
Step 1: Open your browser and log in to your OneLogin account. Go to Applications and click Add App at the top right corner to add your connector.
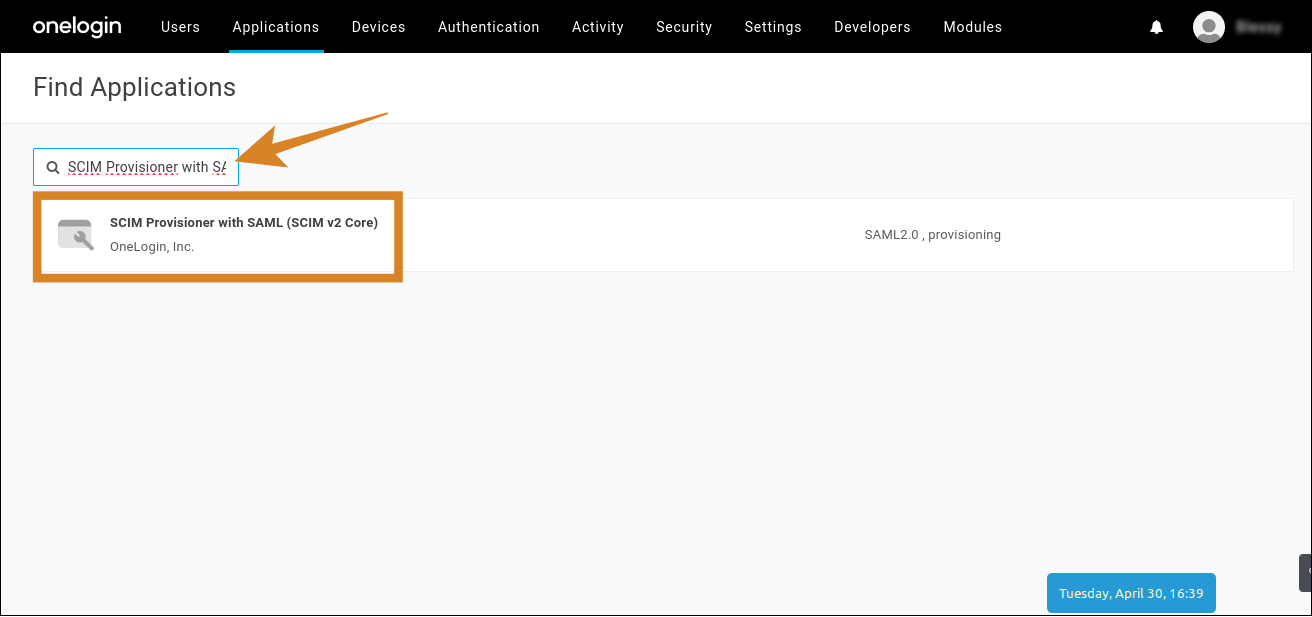
Step 2: Search and open SCIM Provisioner with SAML (SCIM v2 Core) to create the app.
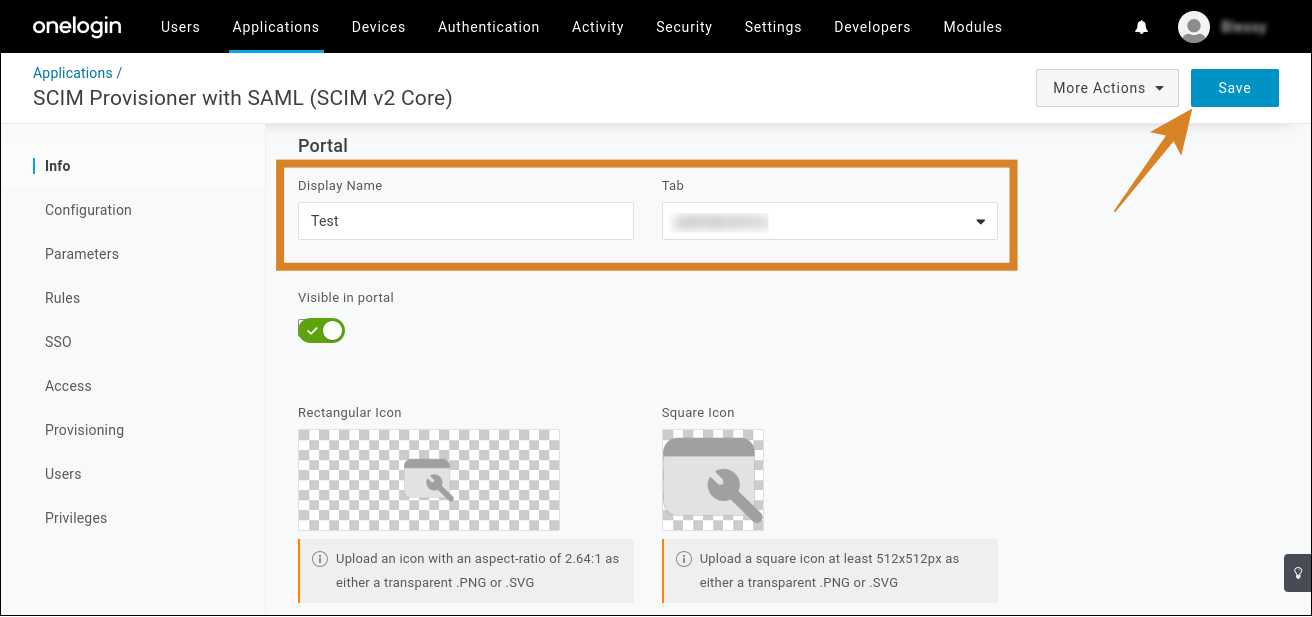
Step 3: Click Save to add the app to your Company Apps and to display additional configuration tabs.

Step 4: Provide a name for the app and hit Save.
Step 5: Keep the Configuration tab open. Go to the UTunnel web dashboard and select the Organization tab from the top menu. Then, go to Single Sign On from the left menu and select OneLogin. Click Enable OneLogin and copy the Single Sign On URL and Audience URL.
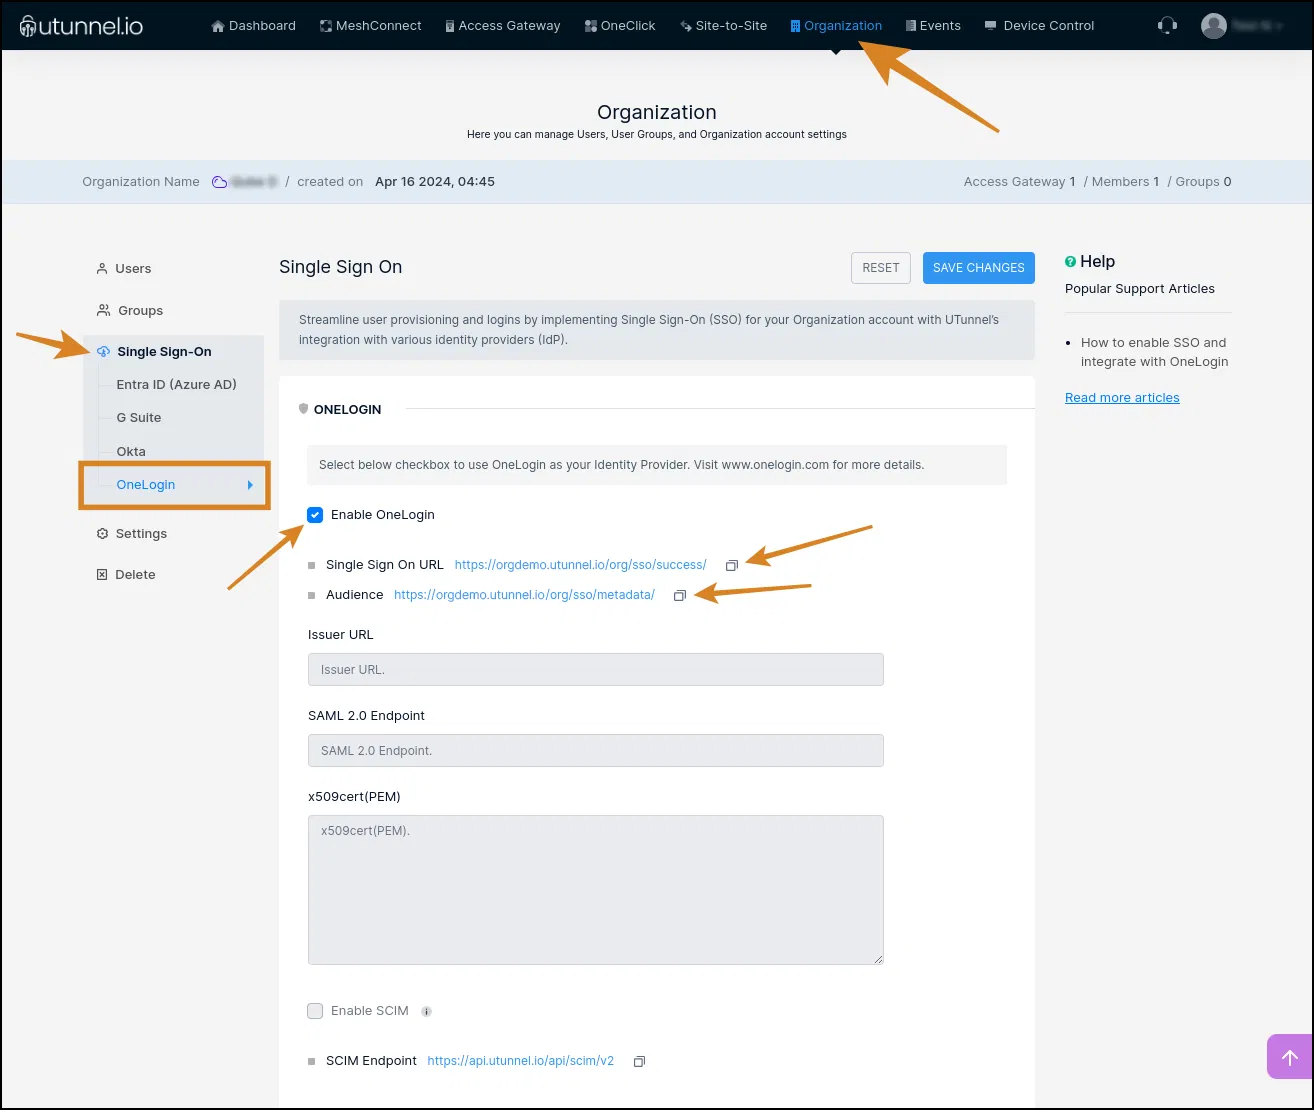
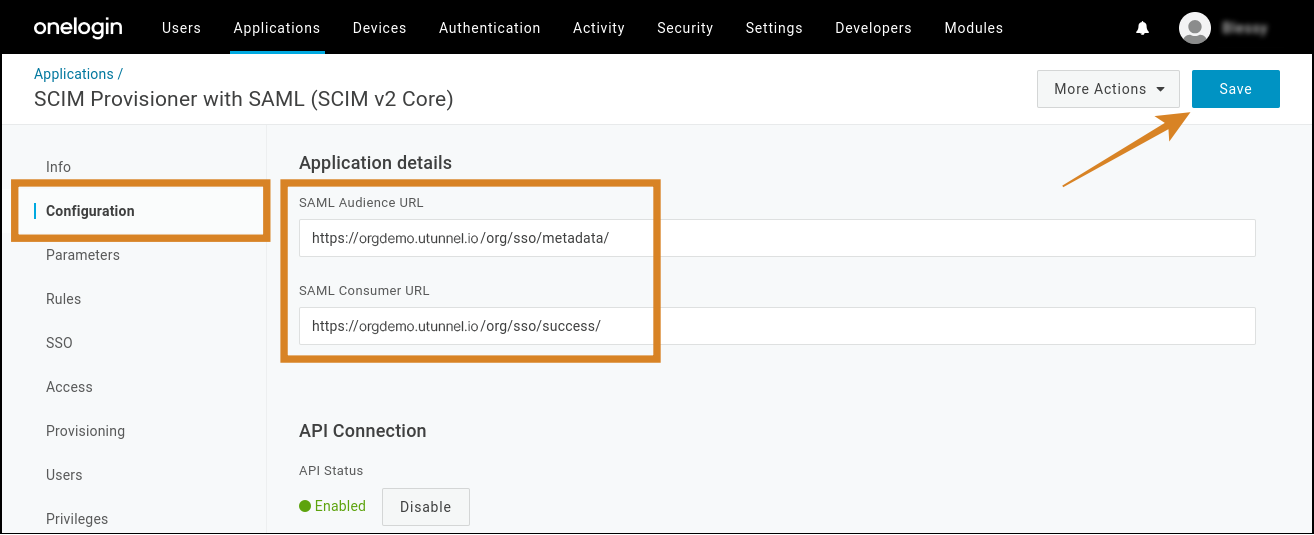
Step 6: Paste the copied data on the SAML Consumer URL and SAML Audience URL in the Configuration tab of OneLogin, respectively. After that, click Save.
Step 7: Copy the SCIM Endpoint URL from the UTunnel web dashboard.
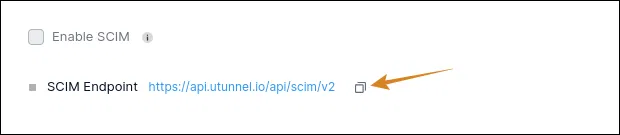
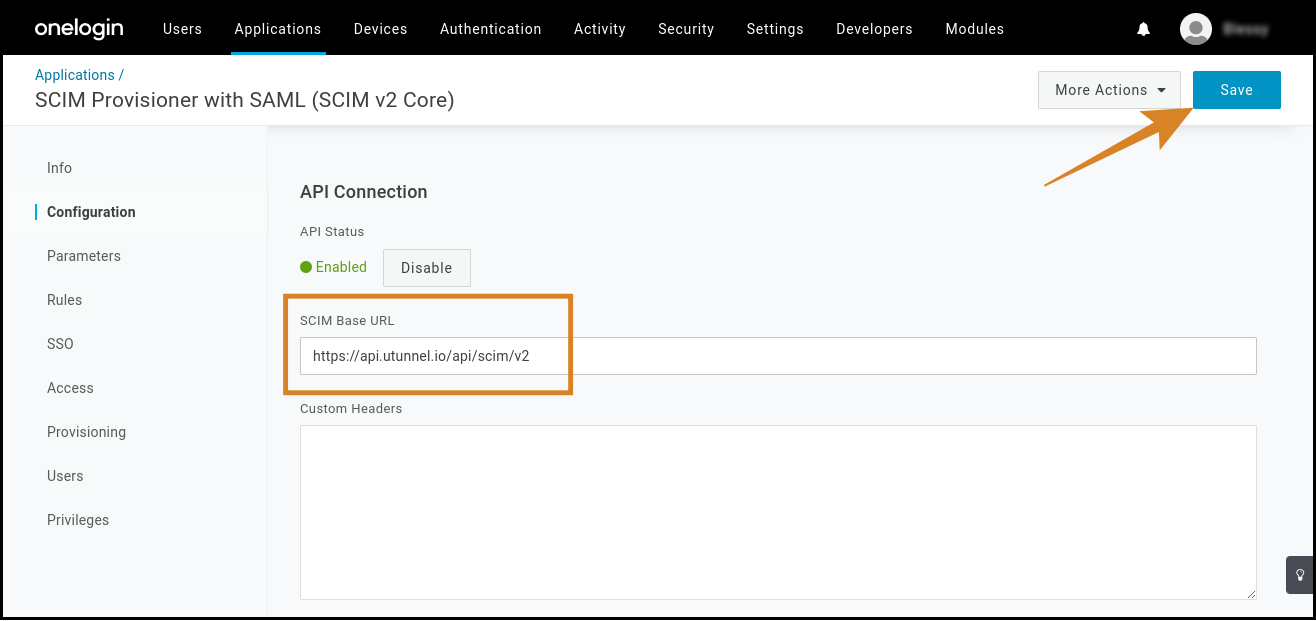
Step 8: Paste it inside the SCIM Base URL dialogue box inside OneLogin and click Save.
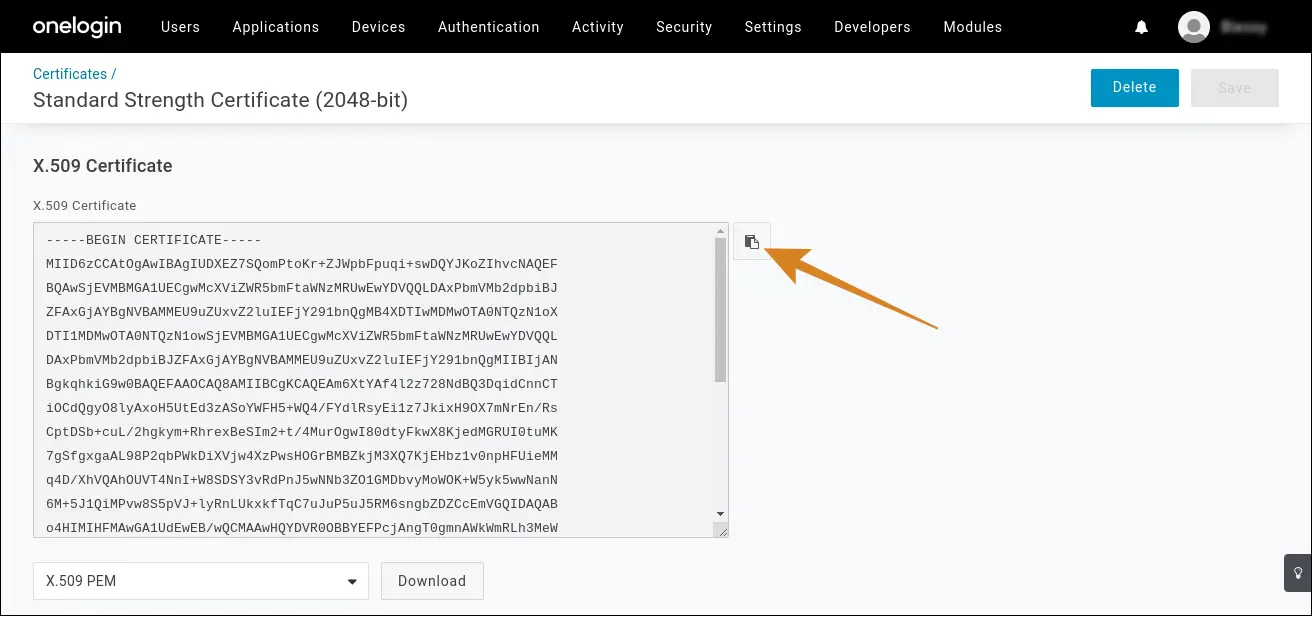
Step 9: Now, open the SSO tab and view the X.509 Certificate by clicking View Details.
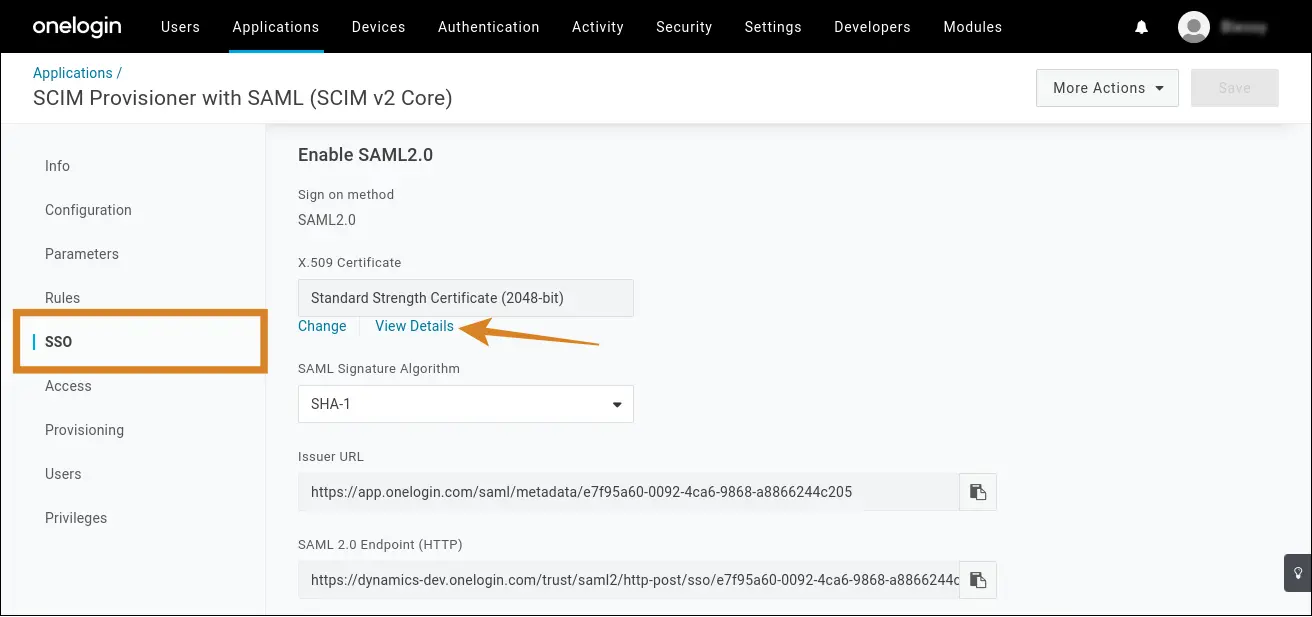
Step 10: Copy the X.509 Certificate and paste it into the corresponding field in the UTunnel web console.
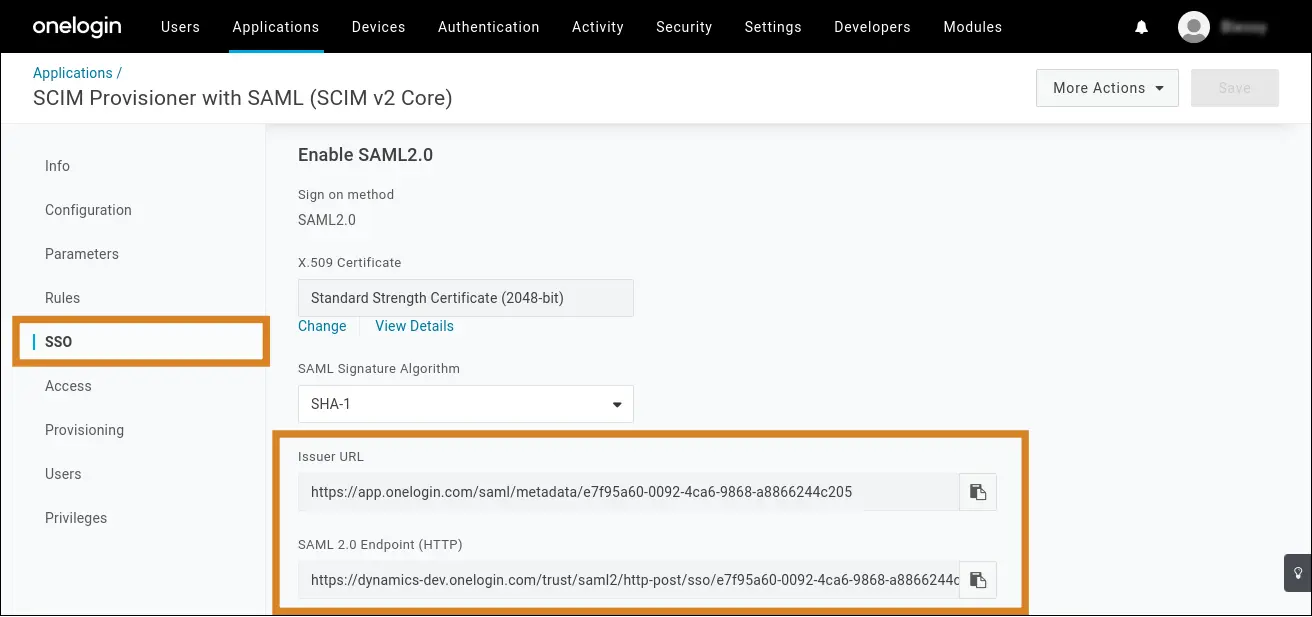
Step 11: Next, choose SSO from the sidebar, copy both the Issuer URL and SAML 2.0 Endpoint (HTTP) and paste the values in the respective fields in the UTunnel web console.
Step 12: Once all the fields in the UTunnel web console are correctly populated with data from the OneLogin page, click the checkbox next to Enable SCIM and click Save Changes.

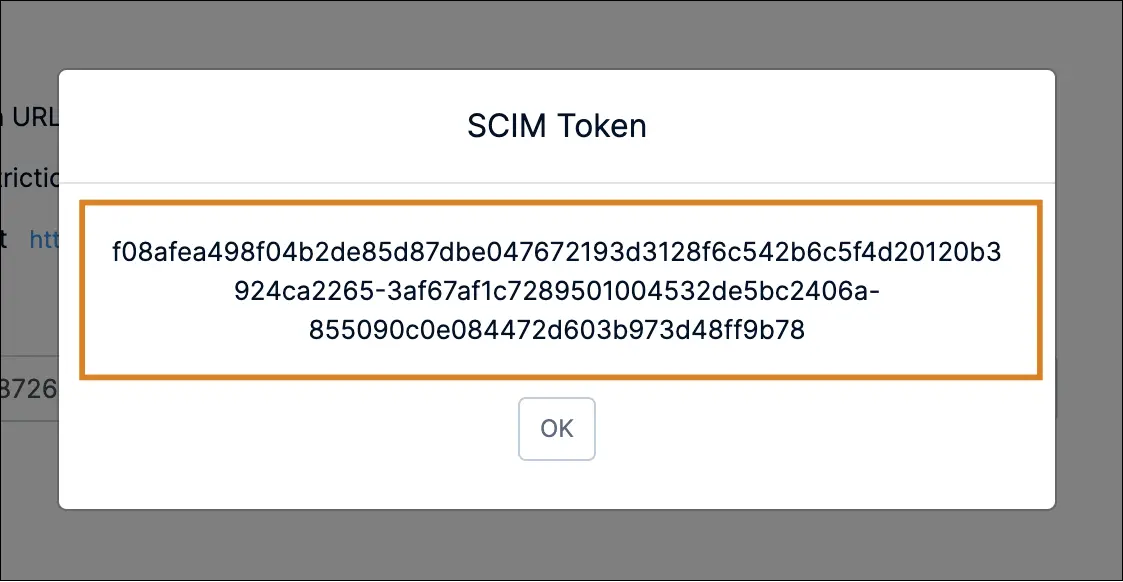
Step 13: A pop-up window displaying the SCIM token will now appear. Copy the SCIM token from the pop-up screen.
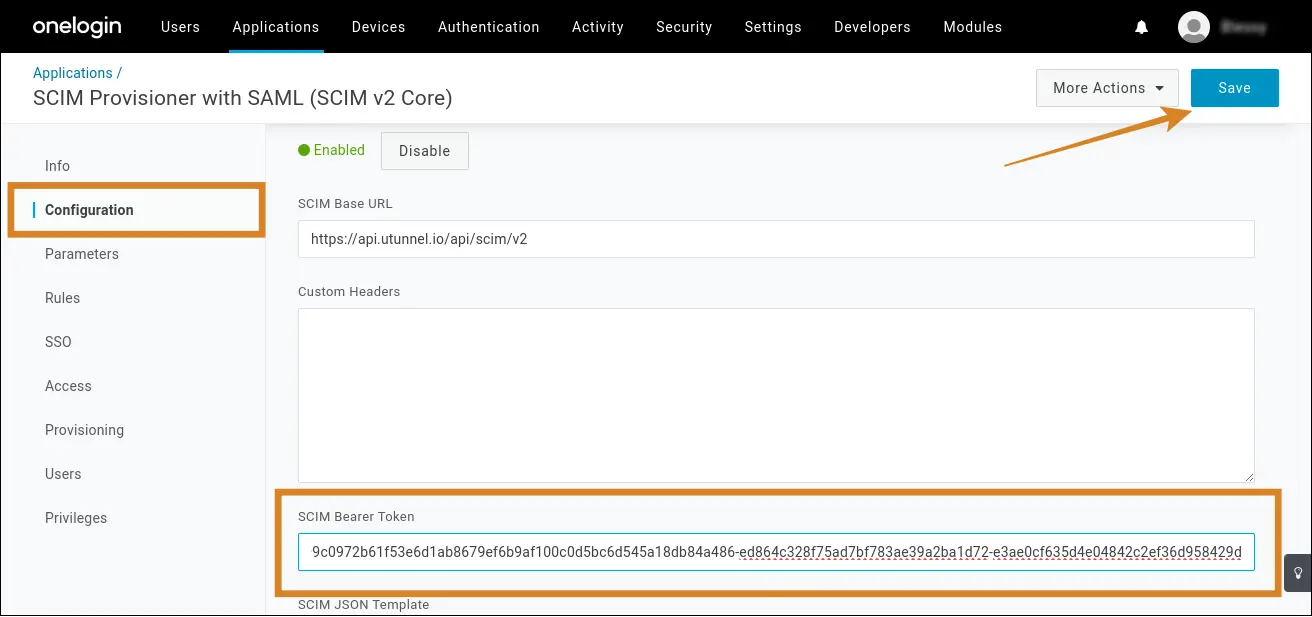
Step 14: Now, go to SCIM Bearer Token under the Configuration tab in the OneLogin portal. Once done, click Save.
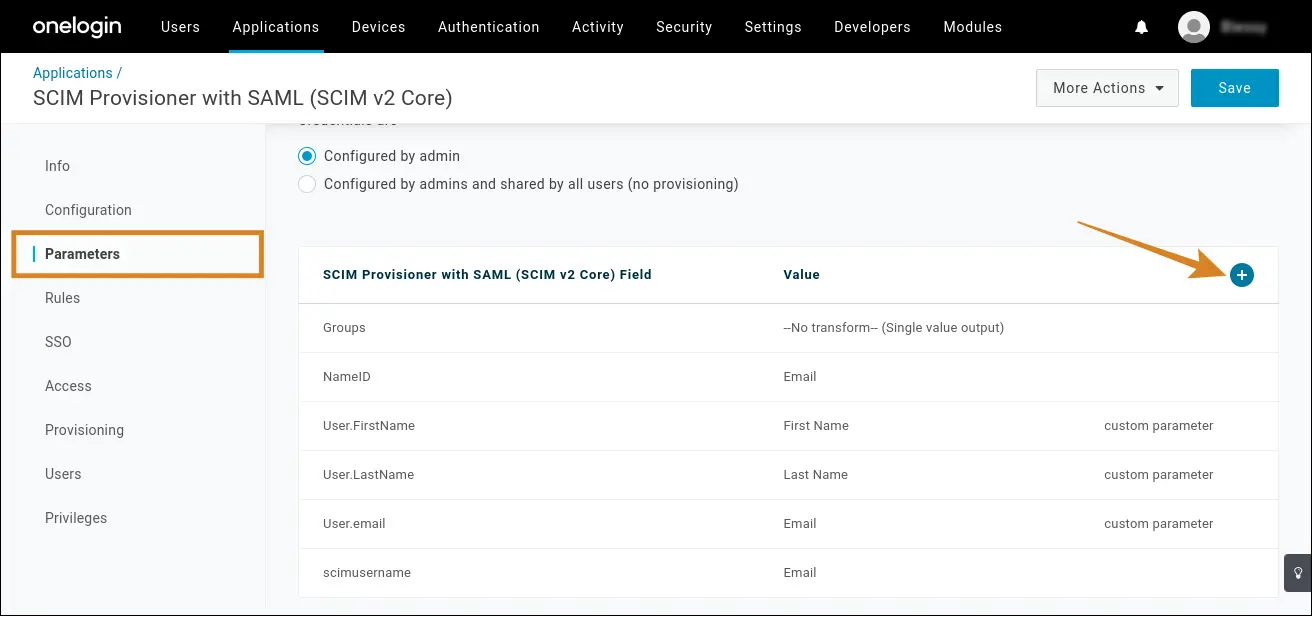
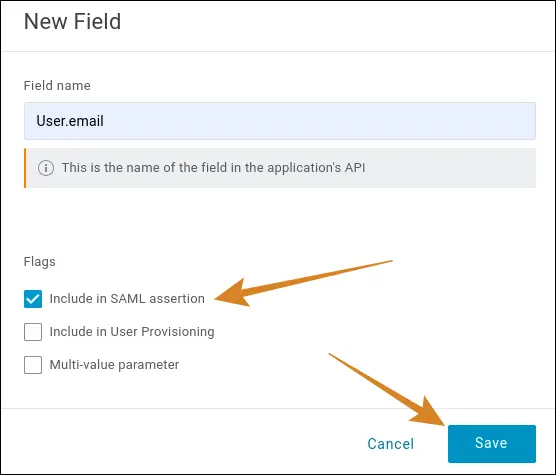
Step 15: Now click the Parameters tab. Here, map the UTunnel user attributes to OneLogin attributes. To do so, click the Add (+) button and enter each attribute in the field name. When adding attributes from the Parameter tab, enable the Include in SAML assertion option for the three attributes and click Save.
Note: Ensure you copy and paste as given below because the attributes are case-sensitive.
| Field Name attributes | Value |
| User.email |
|
| User.FirstName | First name |
| User.LastName | Last name |
| scimusername |
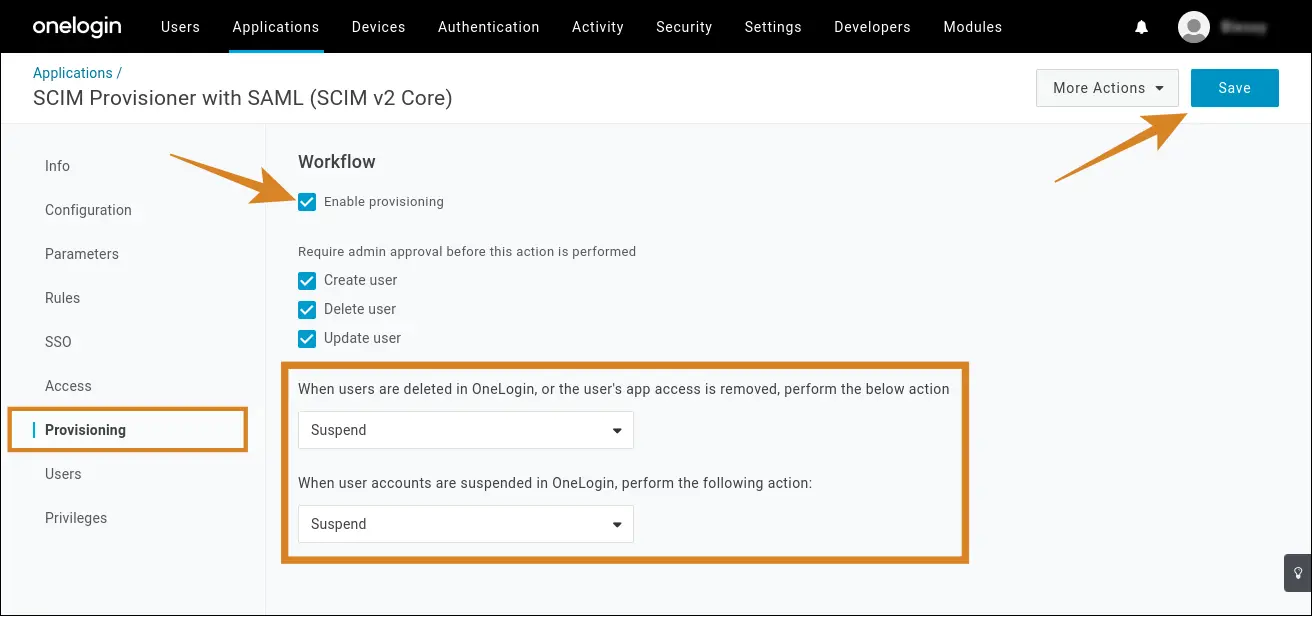
Step 16: Now, navigate to the Provisioning tab and check Enable provisioning. You can continue to check the other boxes, Create User, Delete User, and Update User. Select Suspend from the dropdown box for both the questions marked below. Once done, click Save.
You have successfully integrated OneLogin with SSO and SCIM with UTunnel. Now, users with OneLogin credentials who are granted access to UTunnel can login and utilize our VPN and ZTNA solutions. The organization owner, however, must log in with his registered email and password.
Popular Support Articles
How to Create a Group and Add Users
How to Enable SAML SSO and SCIM With Okta
How to enable SSO and use G Suite as Identity Provider
How to Add a User to an Organization Server
How to Convert an Organization From Non-SSO to SSO