UTunnel’s OneClick Application solution lets authorized users easily and securely access HTTP or HTTPS web applications on your network in a single click from a web browser. To create an HTTP/HTTPS OneClick Application, you should first have a UTunnel server deployed on your VPC or on-premise network with our Standard subscription plan.
This guide provides the steps to set up Zero Trust Application Access (ZTAA) by creating a OneClick HTTP/HTTPS application using UTunnel.
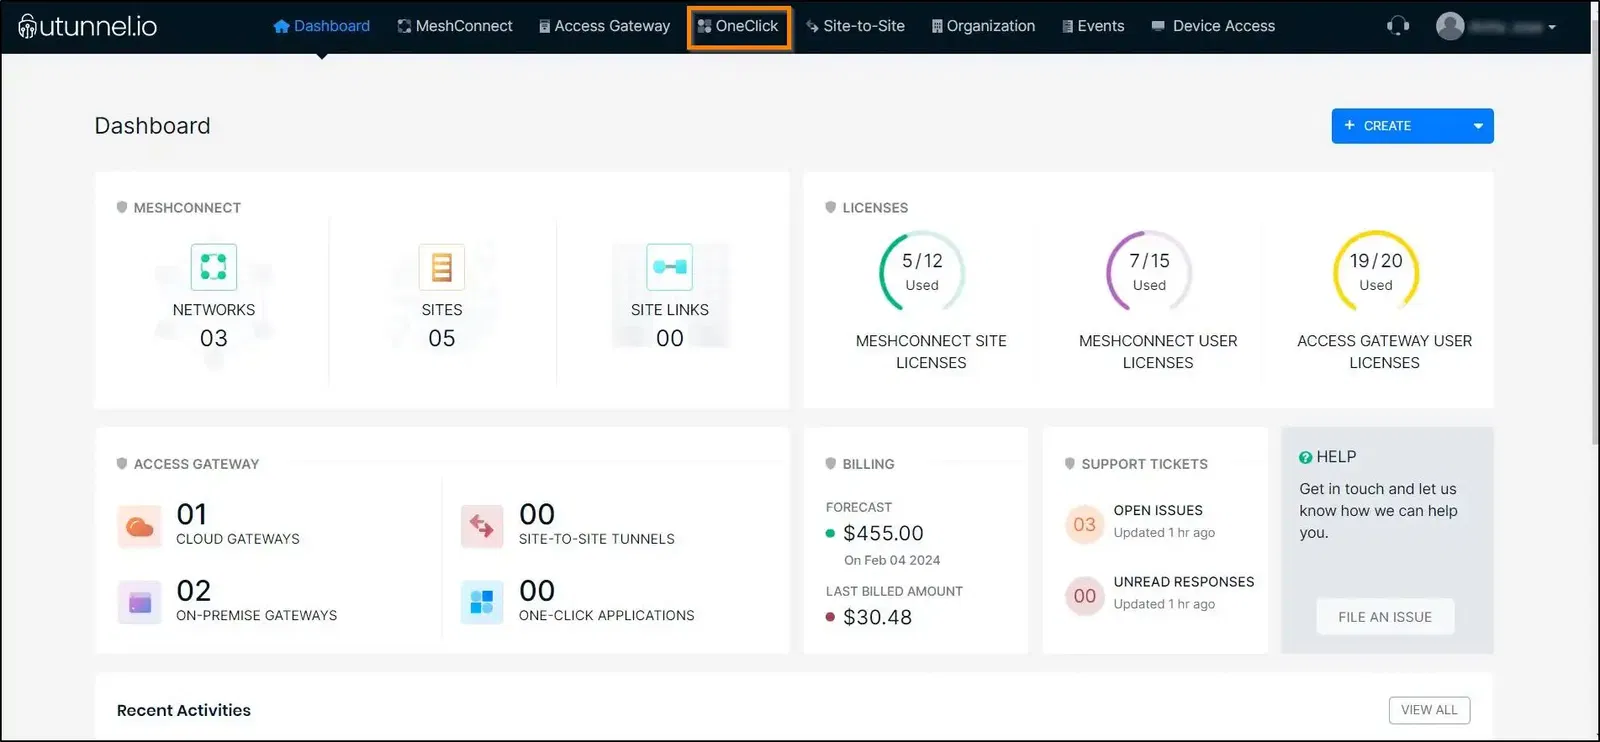
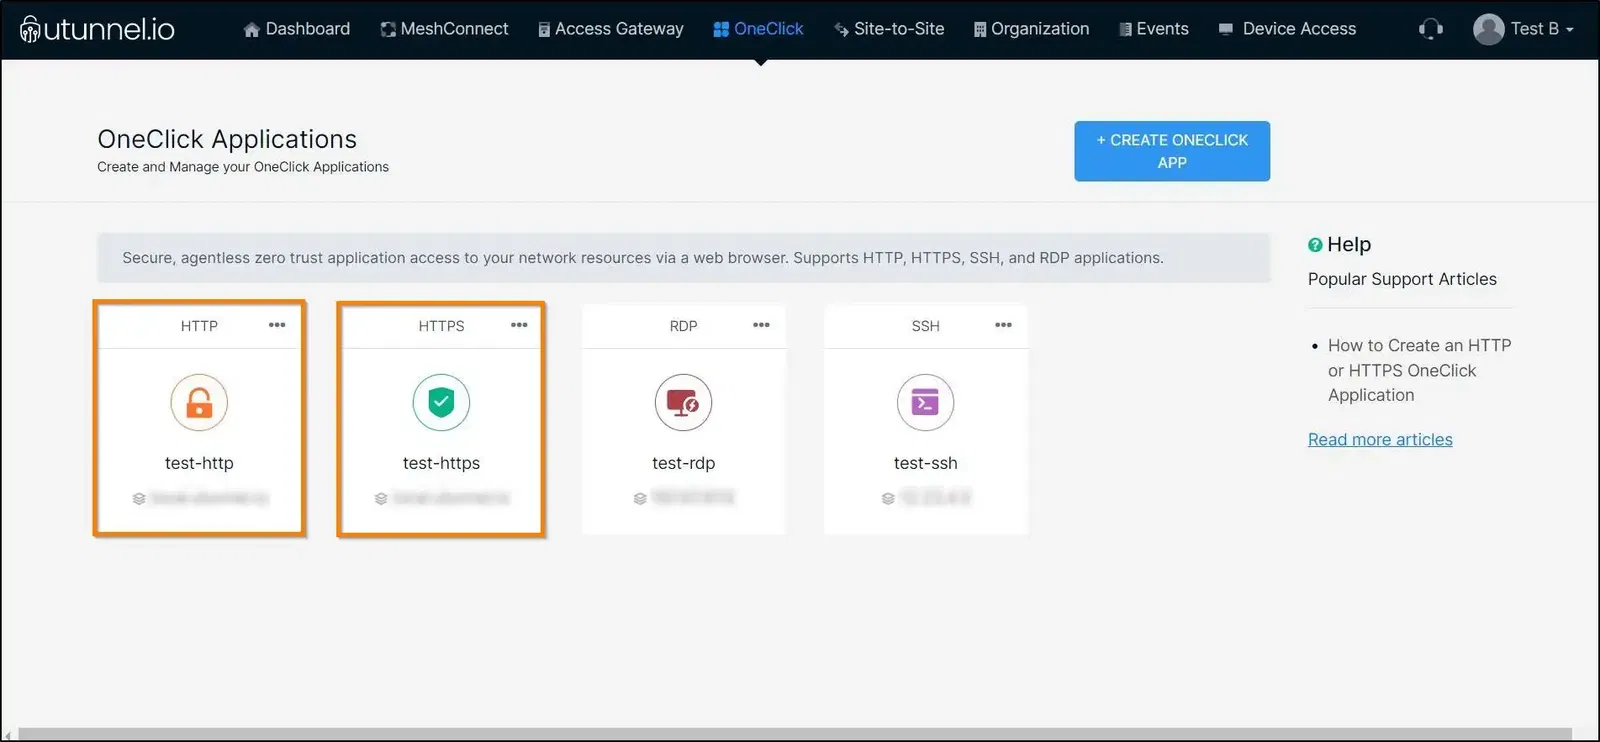
1. Log in to your UTunnel Organization account and navigate to the OneClick tab.
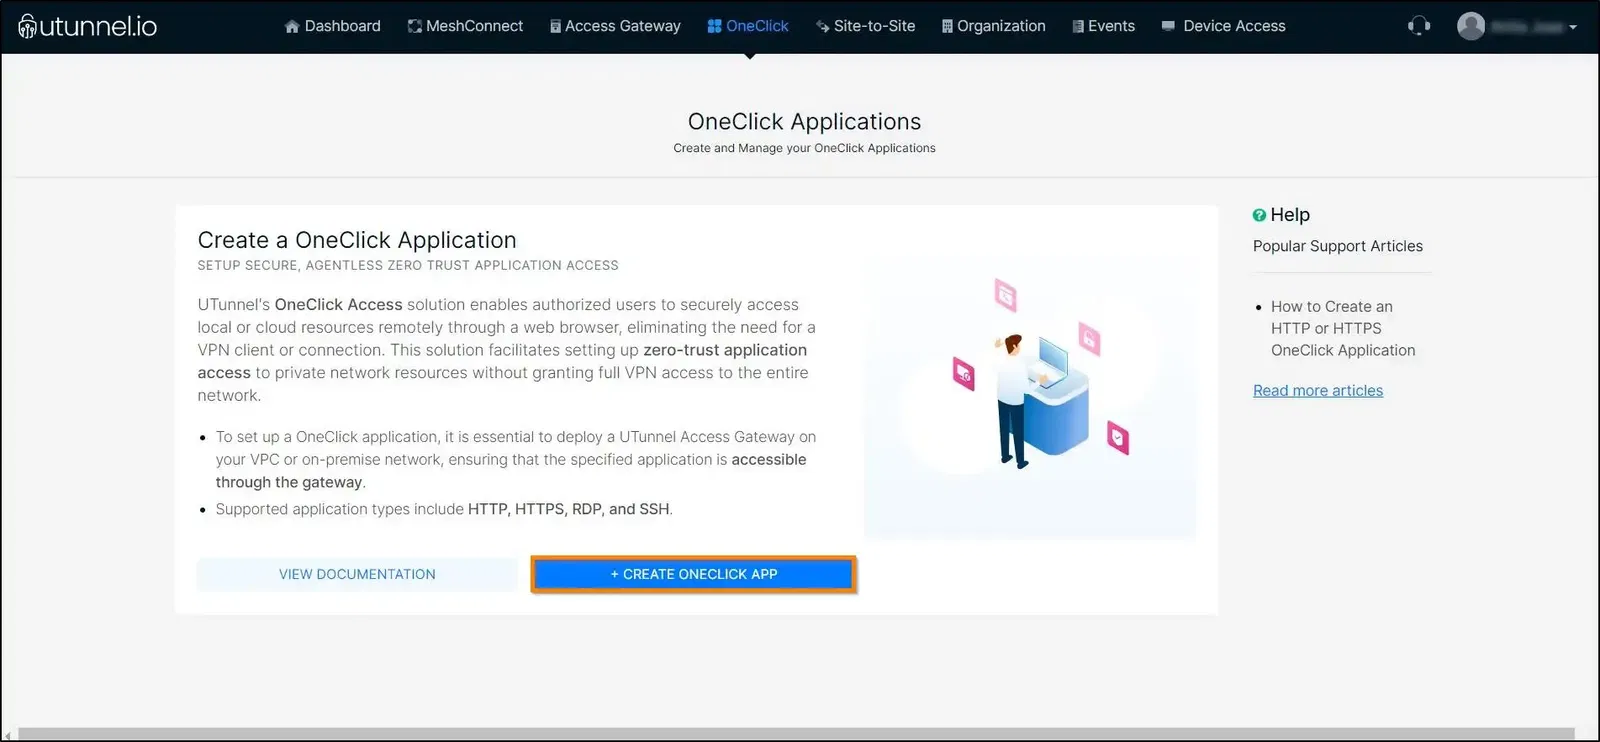
2. Click on the CREATE ONECLICK APP button to create an HTTP/HTTPS application.
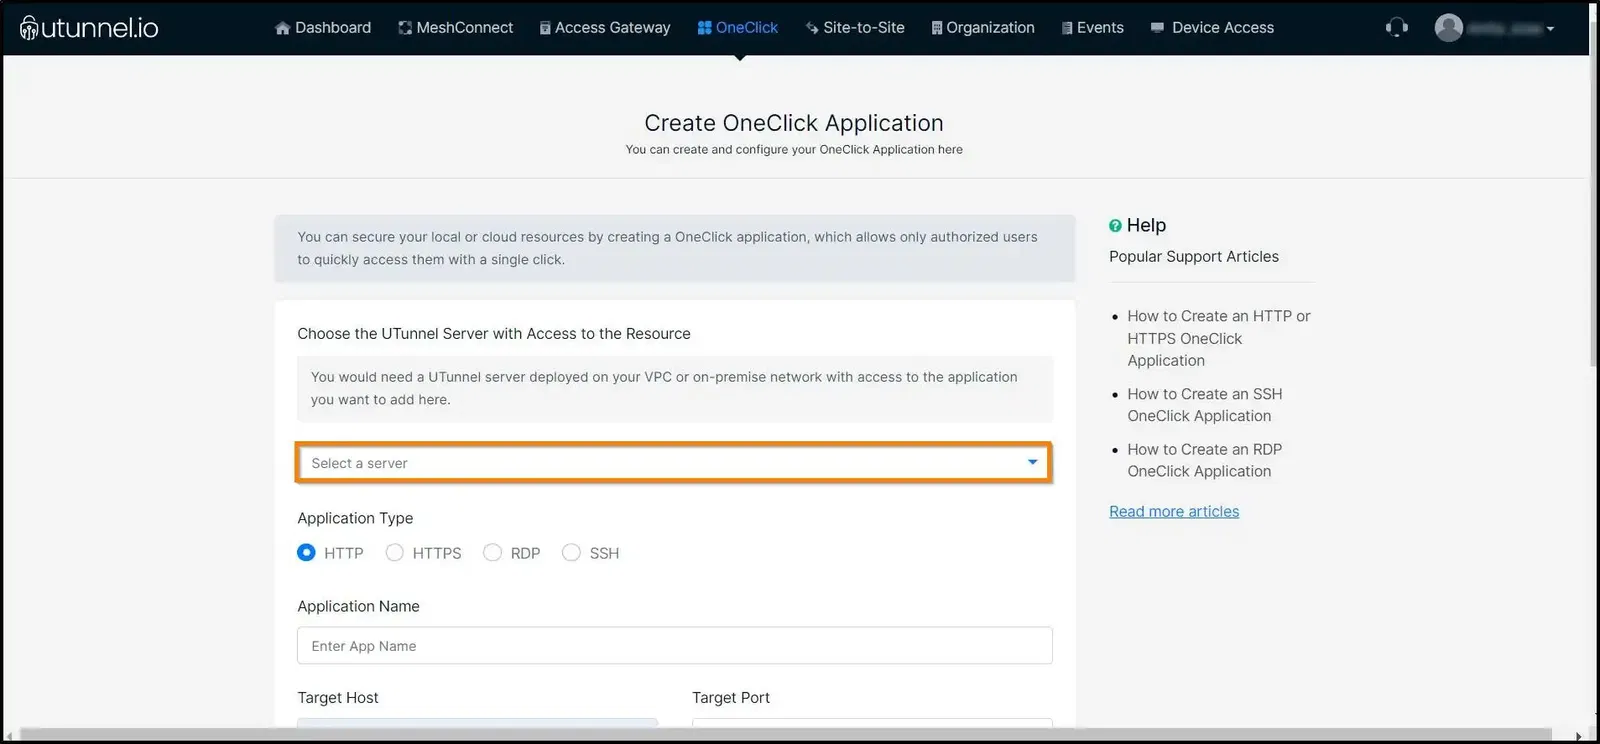
3. Select the server on which you want to create the OneClick application, from the list of UTunnel servers with a Standard subscription plan.
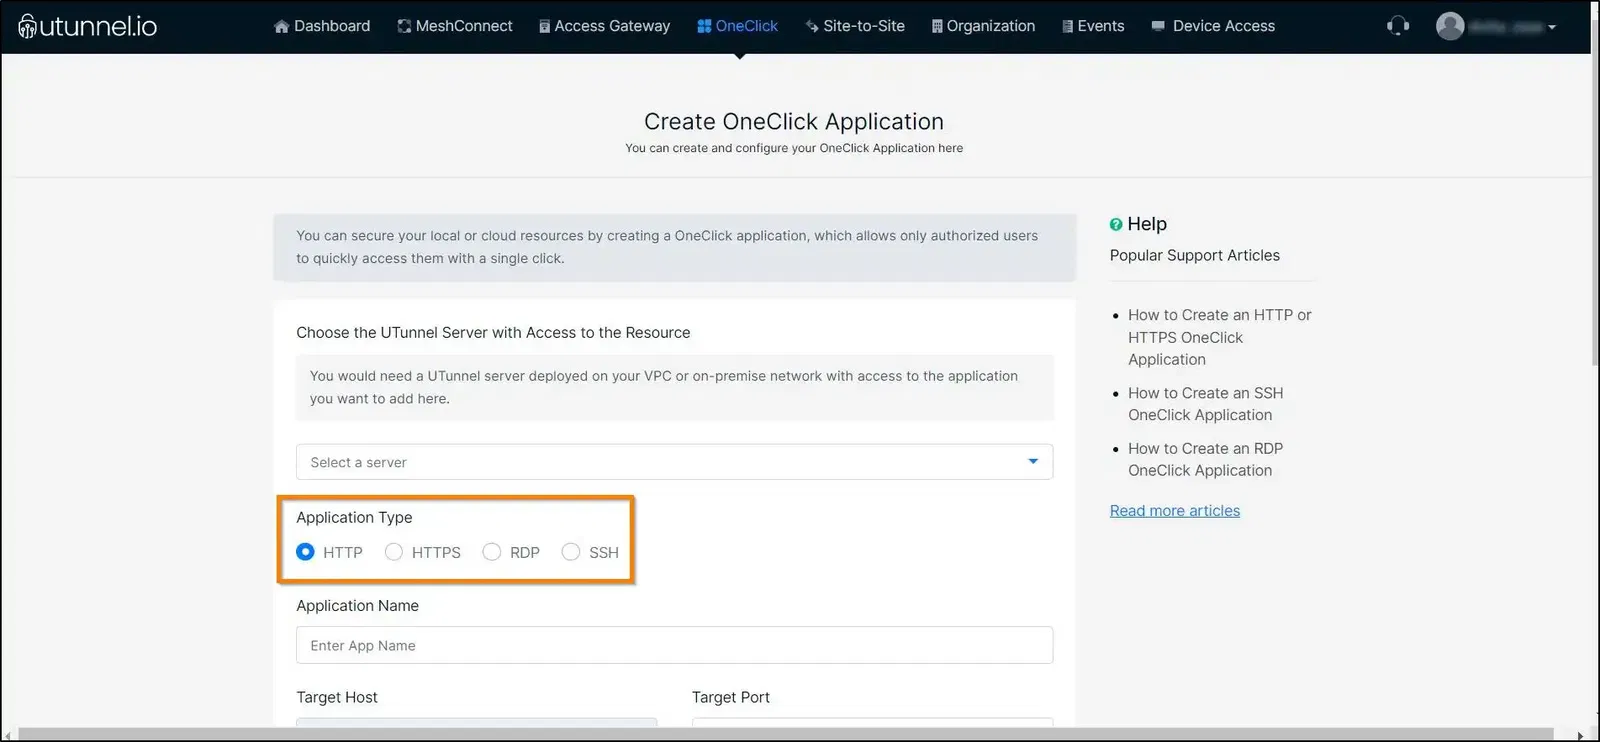
4. Select the Application Type as HTTP/HTTPS based on the web application you are trying to access.
5. Enter an easily recognizable name for your application.
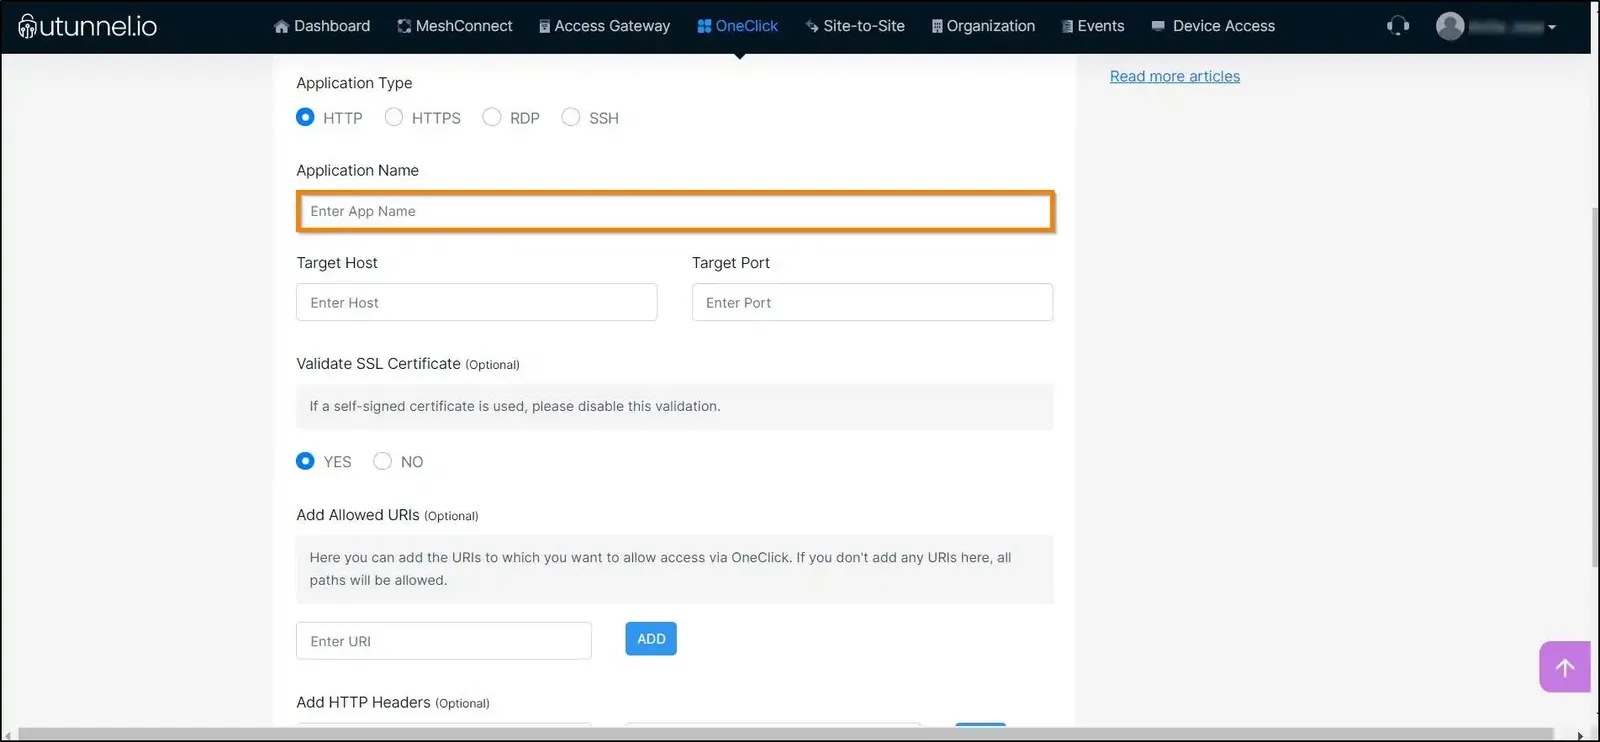
6. As Target Host, enter the IP address or domain name of the application for which you want to create access through the OneClick application.
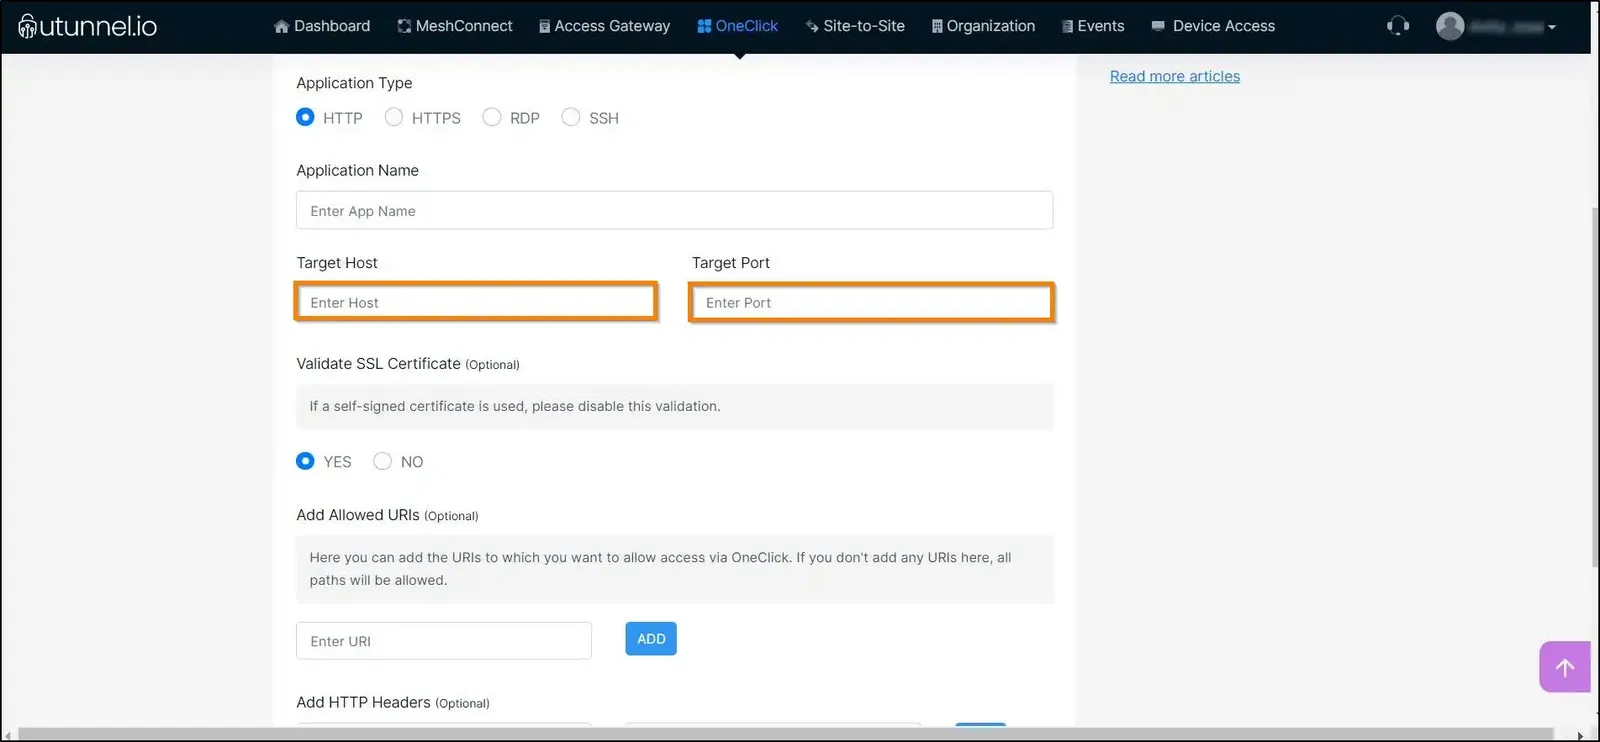
Also, enter your Target Port. For HTTP and HTTPS applications, the ports are set to 80 and 443 respectively by default.
7. If you want to validate the SSL certificate of your connection, then select YES. In case you are using a self-signed certificate, select option NO.

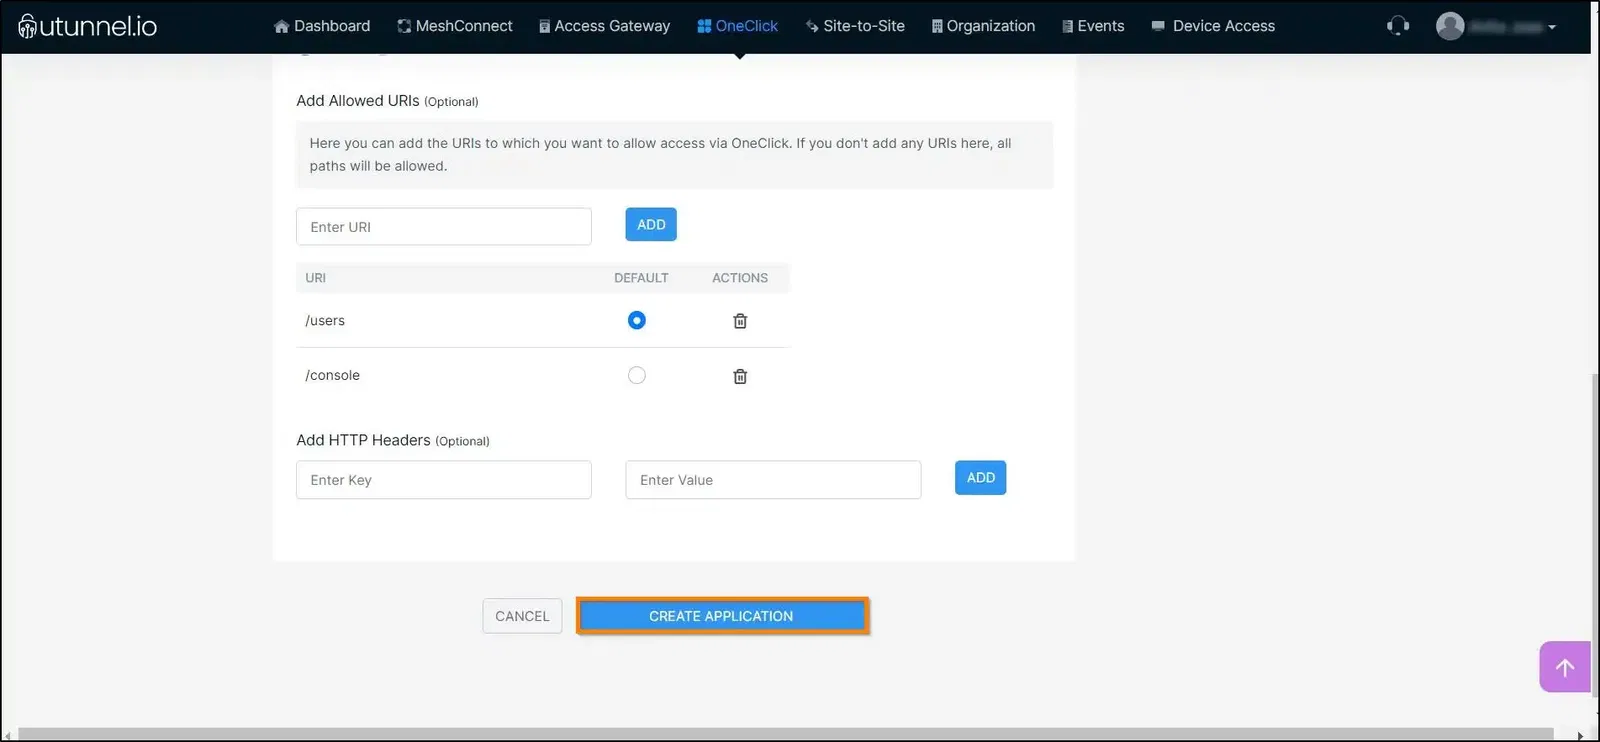
8. You can add the URIs to which you want to allow access through this OneClick Application here. Enter each URI and click on the ADD button.
If you don't add any URIs here, all paths will be allowed. If you add URIs here, all paths except the added URIs will not be accessible.
You can set one URI as default by clicking on the radio button beside the URI. The default URI will be used when launching the One-Click application from the UTunnel dashboard. You can remove any already added URI by clicking on the bin icon.
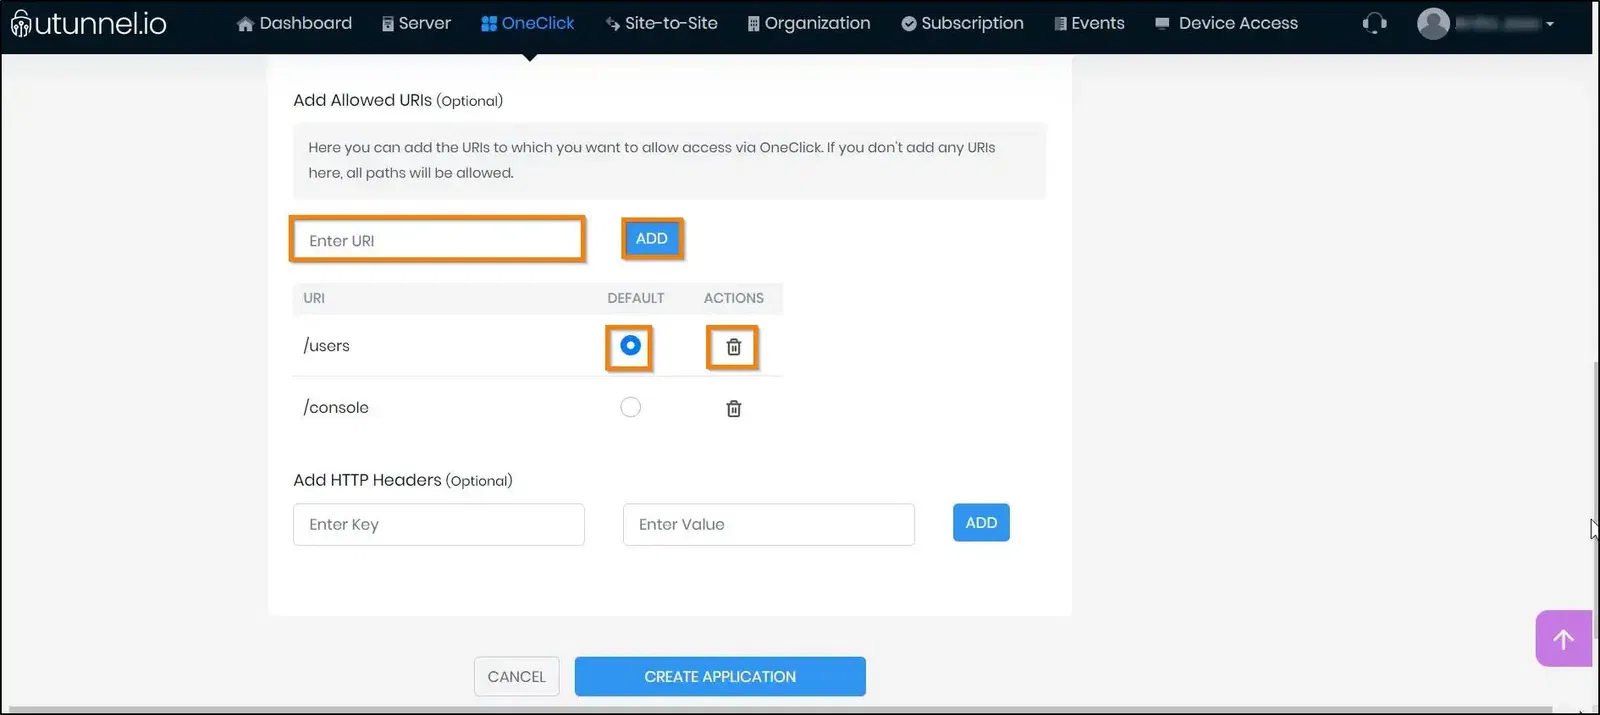
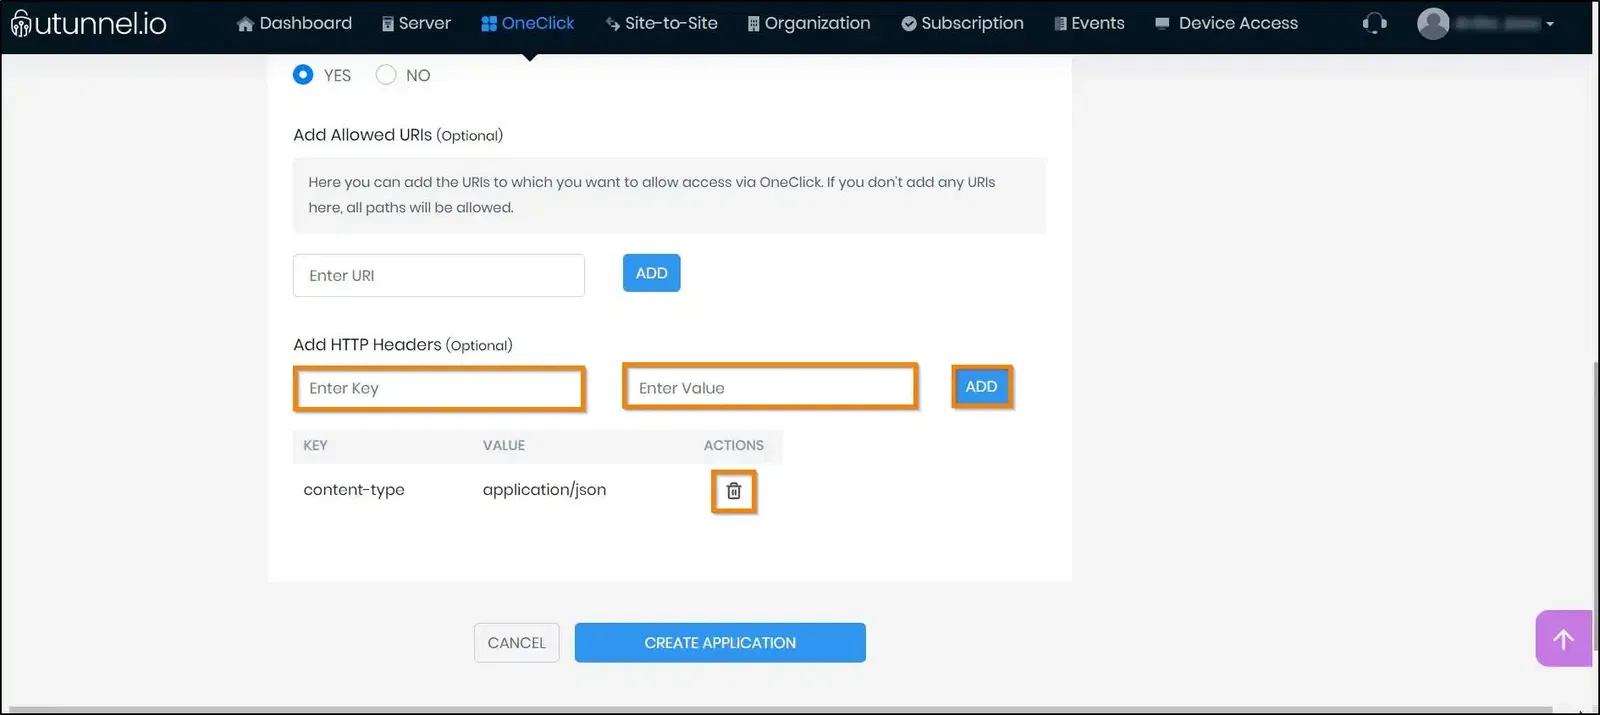
9. If you want to add HTTP Headers, enter each key and value in the below fields and click on the ADD button. You can delete the already entered values by clicking on the bin icon.
10. Once you finish customizing the settings, you can click on the CREATE APPLICATION button to save them and create the HTTP/HTTPS application.
11. You have now successfully created an HTTP/HTTPS OneClick application. Now, this application will be listed on the OneClick tab and you will be able to access it by clicking on the application.
12. You can now go ahead and grant application access to users by adding them to the app. It is also possible for the server admins/owners to auto-provision User Groups/Teams on this application.
13. After adding users and groups to the application, owners/admins can define access policies for your OneClick HTTP/HTTPS Application and control the device operating systems, locations, and timings for accessing the application.