How to Enable SAML SSO and SCIM With Okta

Organizations using Okta as their Identity Provider (IdP) can automate user management in UTunnel with Single Sign On (SSO) and SCIM (System for Cross-domain Identity Management). 

This guide details the steps to enable SSO and SCIM in your UTunnel account using Okta. 

Please note that following these instructions will involve navigating between your identity provider and the UTunnel web console multiple times.

Steps to Enable SSO With Okta

Below are the steps for setting up SSO in UTunnel for your organization with Okta:

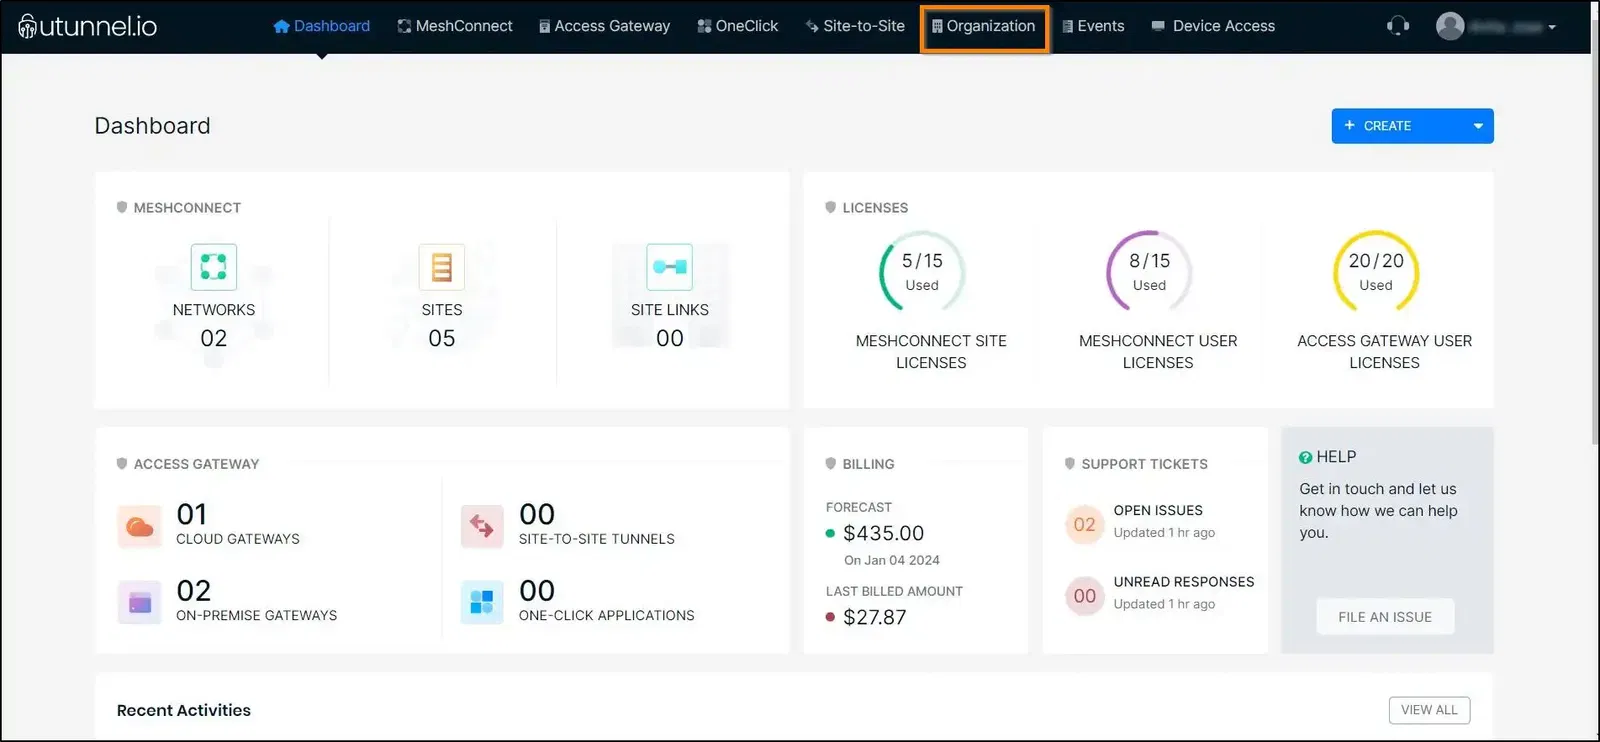
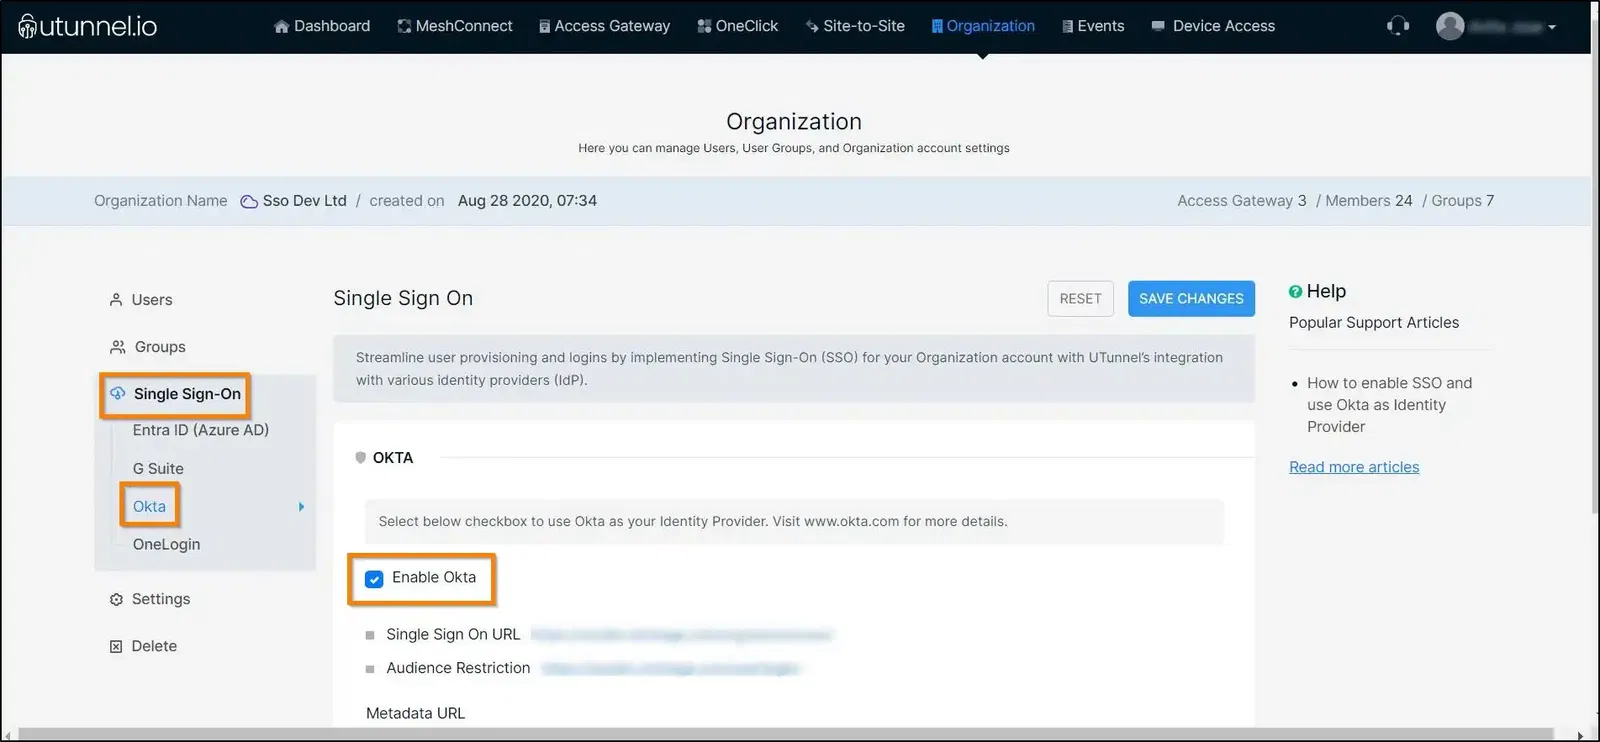
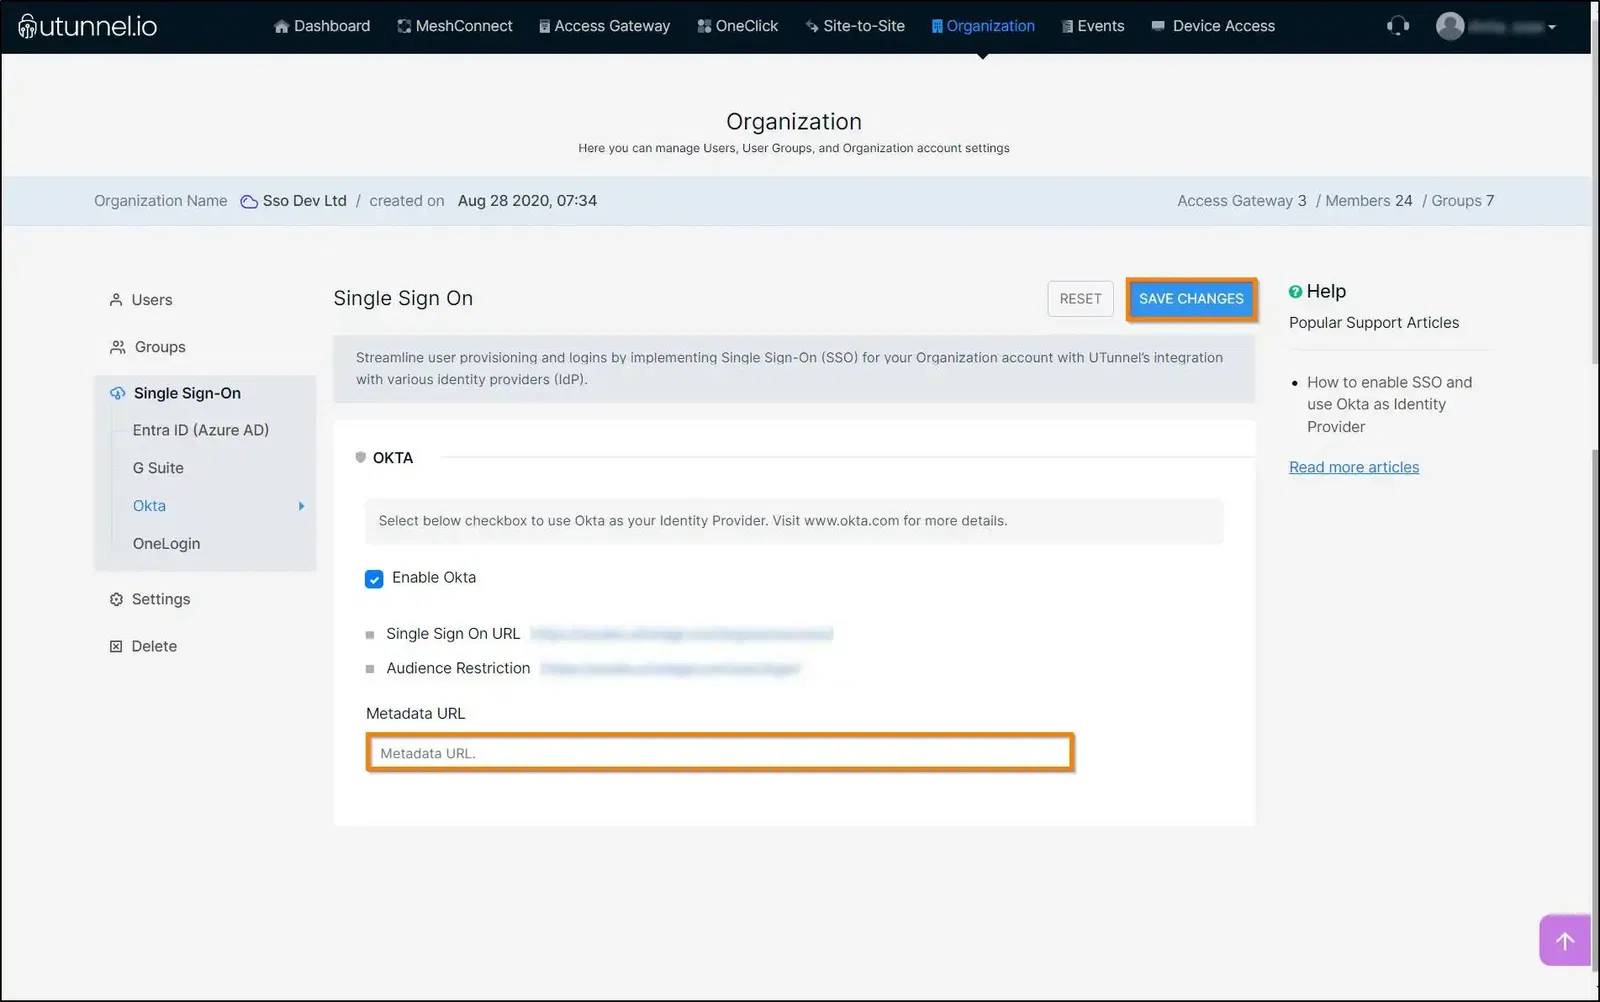
Step 1: Open the UTunnel web dashboard and navigate to Organization > Single Sign On, and select Okta. After that, select Enable Okta to make Okta your identity provider.

Please don’t close this page, as we need it later.

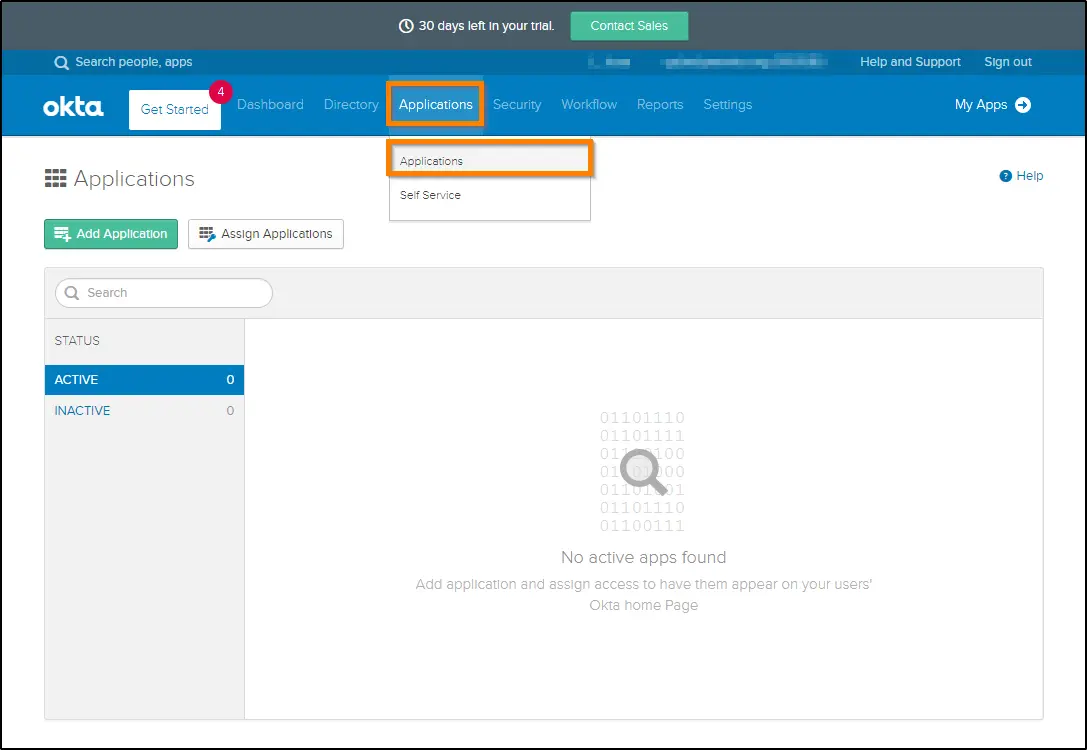
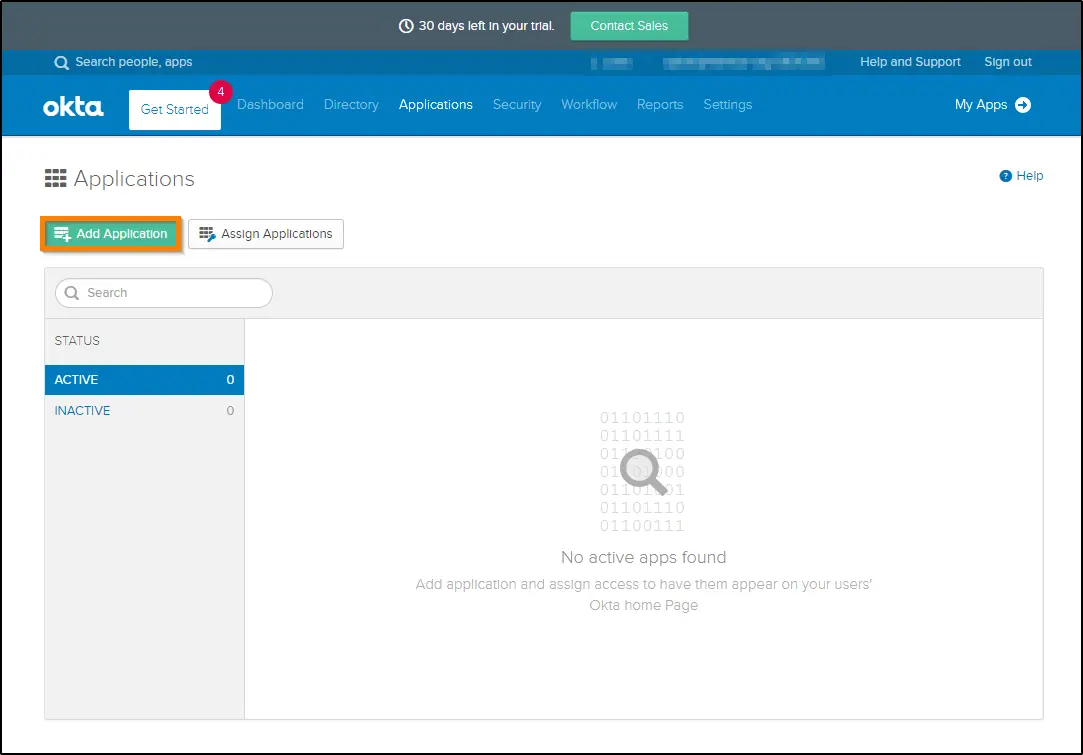
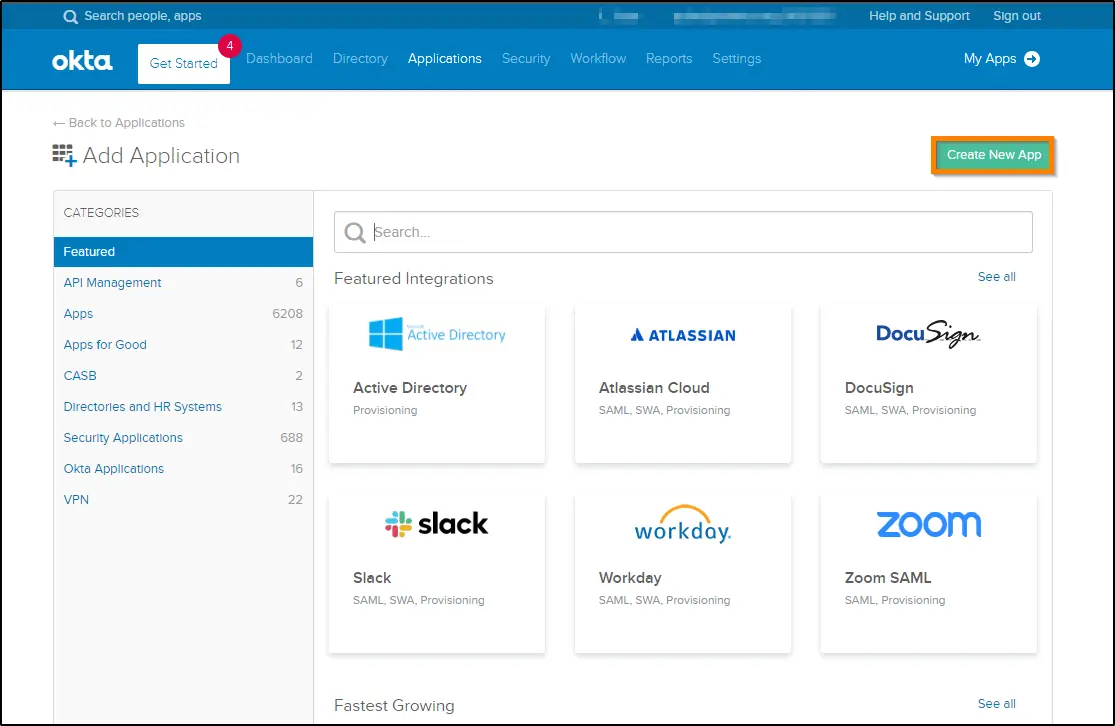
Step 2: Open a new tab and login to your organization’s portal in Okta. From here, expand Applications from the sidebar and choose Applications. Now, Click Create App Integration.

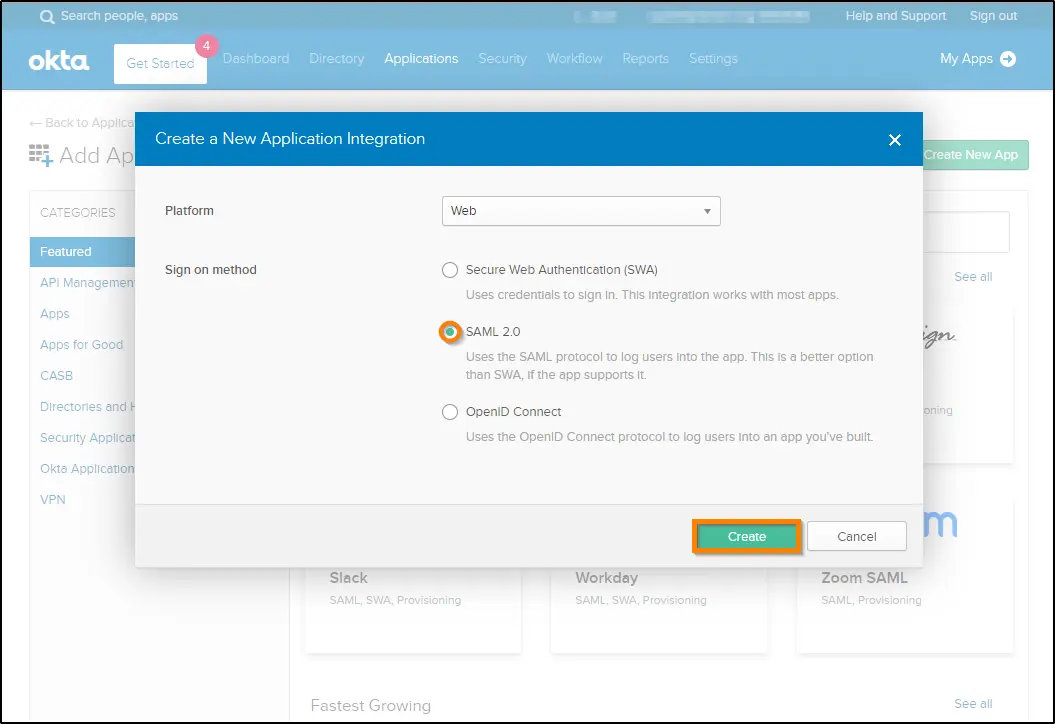
Step 3: A new window will pop up. From here, select Web for the Platform field and enable SAML2.0. Once you are done, click Next.

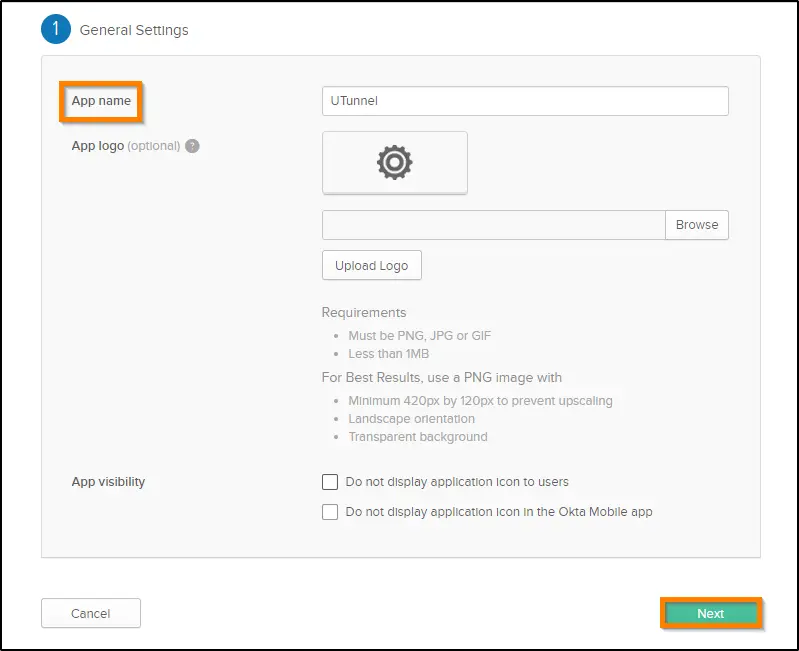
Step 4: Enter “UTunnel” in the App Name field and click Next.

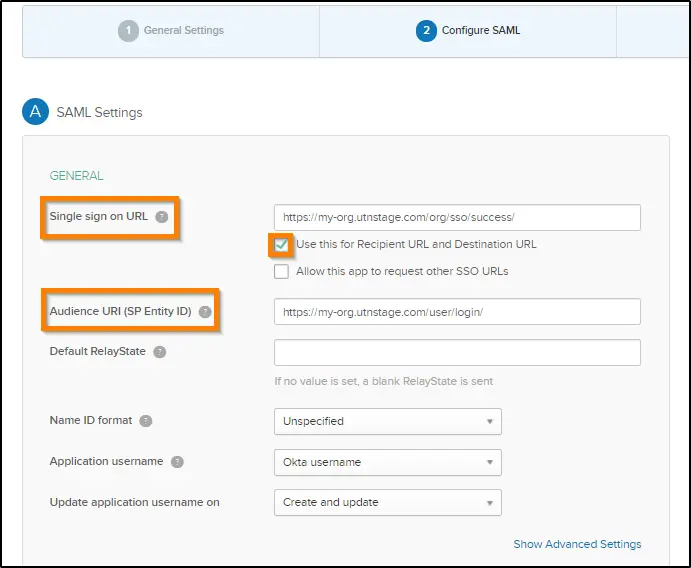
Step 5: Now fill in the following areas: 

  • Single sign-on URL: Copy the Single Sign-On URL from the UTunnel dashboard and paste it here. Also, choose the Use this for Recipient URL and Destination URL checkbox. 
  • Audience URI (SP Entity ID): Copy the Audience Restriction URL from the UTunnel dashboard and paste it here. 

Now, set the SAML attributes as follows. Ensure to click Add Another to add each field as given below: 

Note: These attributes are case-sensitive. Make sure to keep that in mind while you enter the data.

Name Name Format Value
FirstName Basic user.firstName
LastName Basic user.lastName
Email Unspecified user.email

Once done, click Next to proceed.

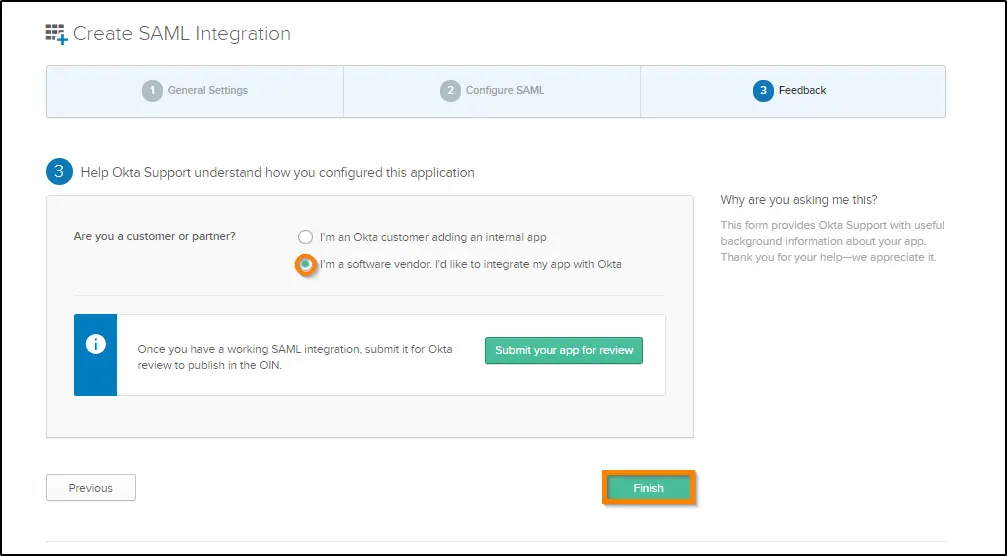
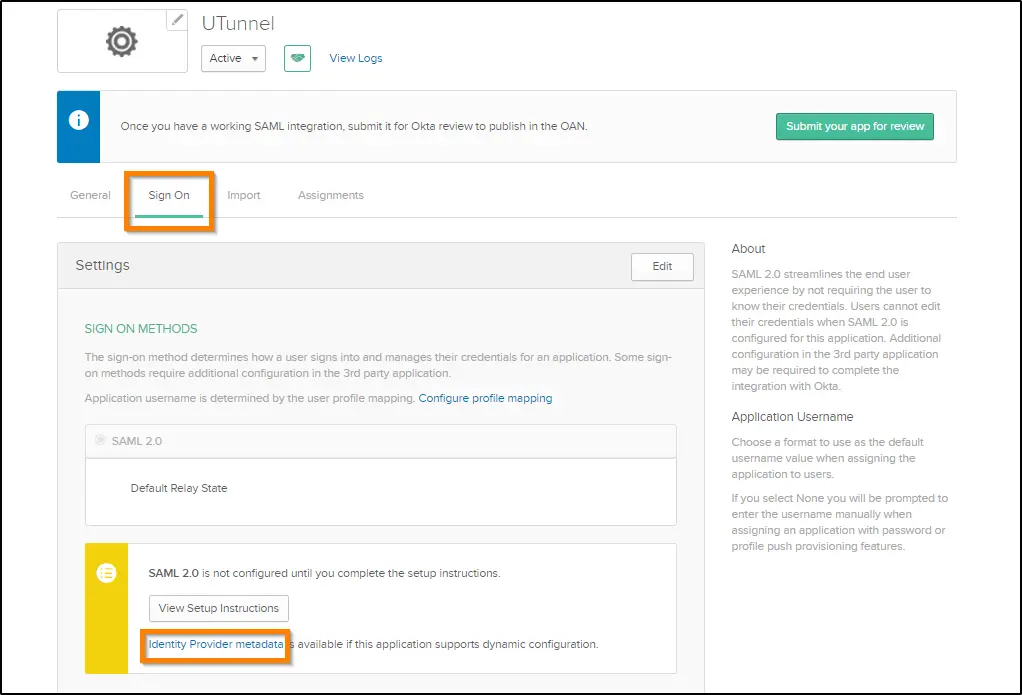
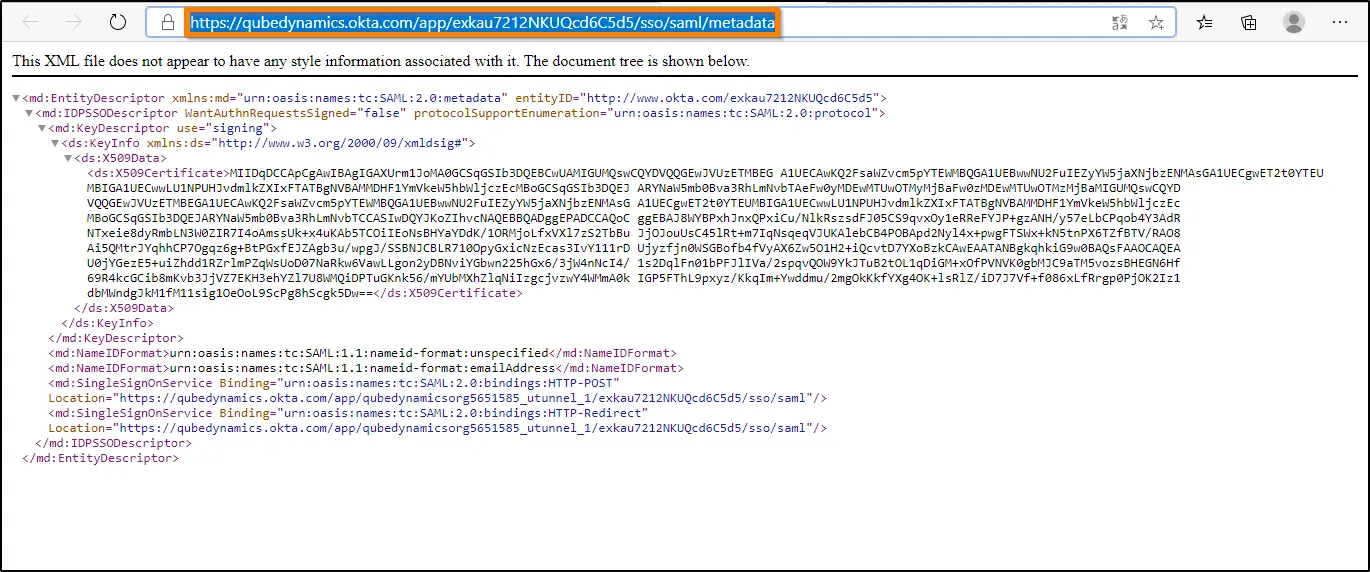
Step 6: Select an option based on your role in the Feedback section and click Finish. Upon doing so, you will be redirected to the Applications screen. Here, choose Sign On, and then scroll down and copy the Metadata URL.

Step 7: Now, navigate back to the SSO page in UTunnel, which you have kept open. Here, paste the copied URL inside the Metadata URL field. Once, click Save Changes to confirm.

Now, your SSO setup with Okta is complete on your UTunnel account. Users with active Okta login credentials and required privileges can access your organization's UTunnel dashboard. However, please note that the organization owner must continue to log in using their registered email and password, rather than using Okta SSO.

How to Enable SCIM With Okta

SSO streamlines login processes, but automated user de-provisioning is not included unless SCIM is activated. By enabling SCIM, organizations can ensure consistent and current user access, minimizing manual tasks and the potential for discrepancies. 

Below are the steps for setting up SCIM in conjugation with SSO in UTunnel for your organization with Okta:

Step 1: Navigate to Organization > Single Sign on > Okta. After that, scroll down and choose Enable SCIM and then click Save Changes.

Step 2: A pop-up window will now display the SCIM token. Keep this page open; you will need the token for the next steps in the Okta portal.

Step 3: Open a new tab, login to your organization’s portal in Okta, and head over to Applications to choose Applications. From here, select the UTunnel application you have created before and choose General. Click Edit and then enable the checkbox Enable SCIM Provisioning. Once done, click Save.

Step 4: After saving, click the Provisioning tab and select Integration. Now, click Edit next to SCIM Connection.

Step 5: Enter the following details: 

  • SCIM connector base URL: Copy the SCIM URL from the UTunnel Okta SSO page and paste it here. 
  • Unique identifier field for users: Enter unique identifier userName in this field 
  • Supported provisioning action: Choose Push New Users and Push Profile Updates
  • Authentication Mode: Select HTTP Header from the menu. 
  • Authorization: Copy the SCIM token from the Dashboard and paste it here.

Step 6: After making the necessary changes click Test Connector Configuration.

Step 7: When a pop-up window appears, ensure that the connector is configured successfully and click Close.

Step 8: Lastly, click Save.

Step 9: Now, choose Provisioning and then click To App under Settings tab. Here, click Edit, and enable Create Users, Update User Attributes, and Deactivate Users. Once done with the process, click Save.

That's it. You have now successfully completed SSO and SCIM configuration in your UTunnel account with Okta. 

Popular Support Articles

How to Create a Group and Add Users

How to enable SSO and use G Suite as Identity Provider

How to Add a User to an Organization Server

How to signup as Organization

How to enable user provisioning on a server

How to Convert an Organization From Non-SSO to SSO

How to Enable SAML SSO and SCIM With Entra ID or Azure AD