By Jijo Joy
Updated on 29 Jan, 2024
This guide helps to create a site-to-site tunnel between the UTunnel server and UniFi devices.
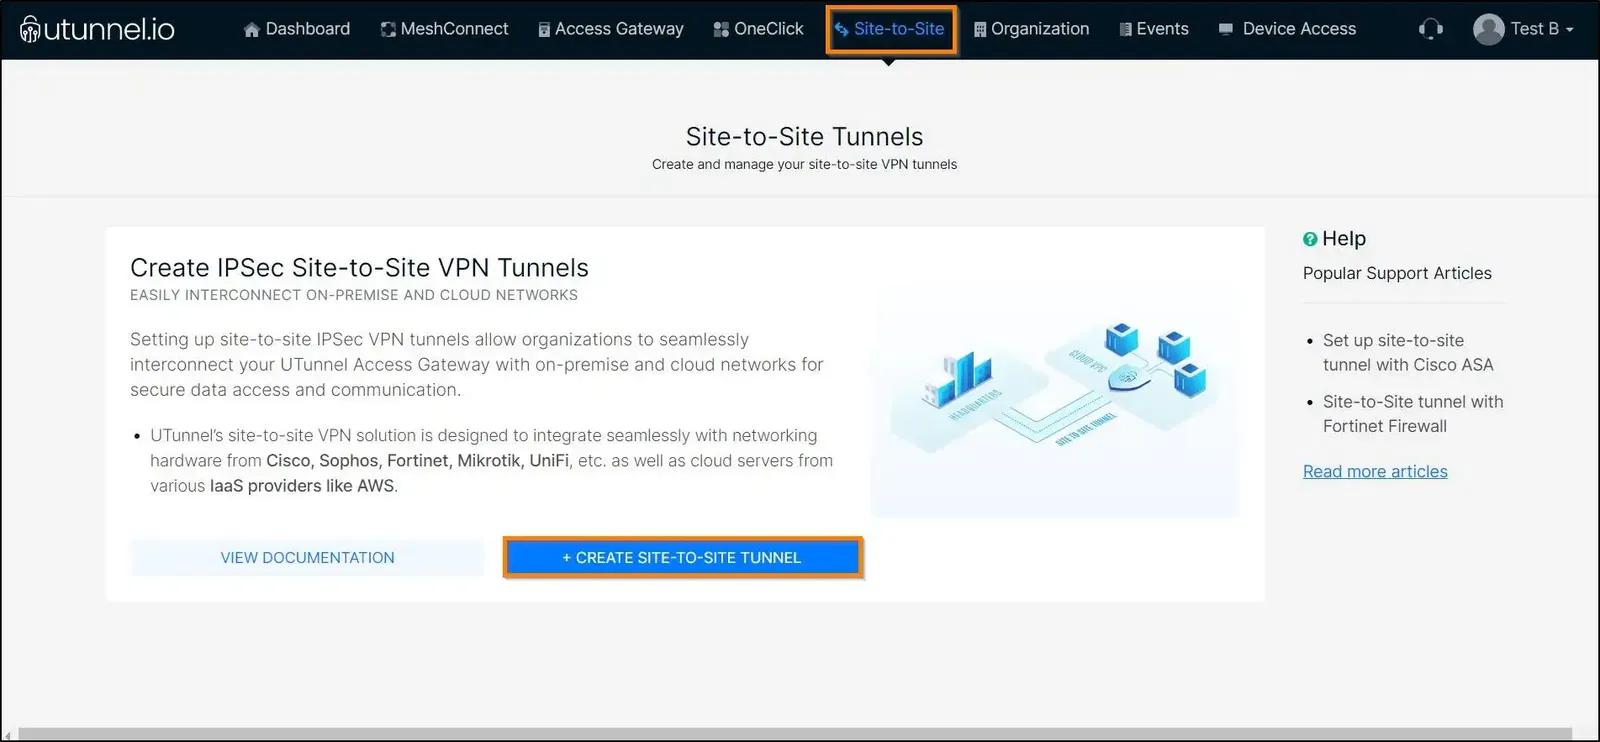
1. Login to the UTunnel dashboard and navigate to Site-to-Site and click on CREATE TUNNEL button.
2. Select the option TUNNEL WITH NON UTUNNEL SERVER and key in details as seen below.
Tunnel Name: A desired name for the tunnel
Local Server: Select the UTunnel server from the dropdown menu
Remote IP: Enter the UniFi device's Public IP address
Pre-shared Key: You can either enter your own key or generate a new PSK
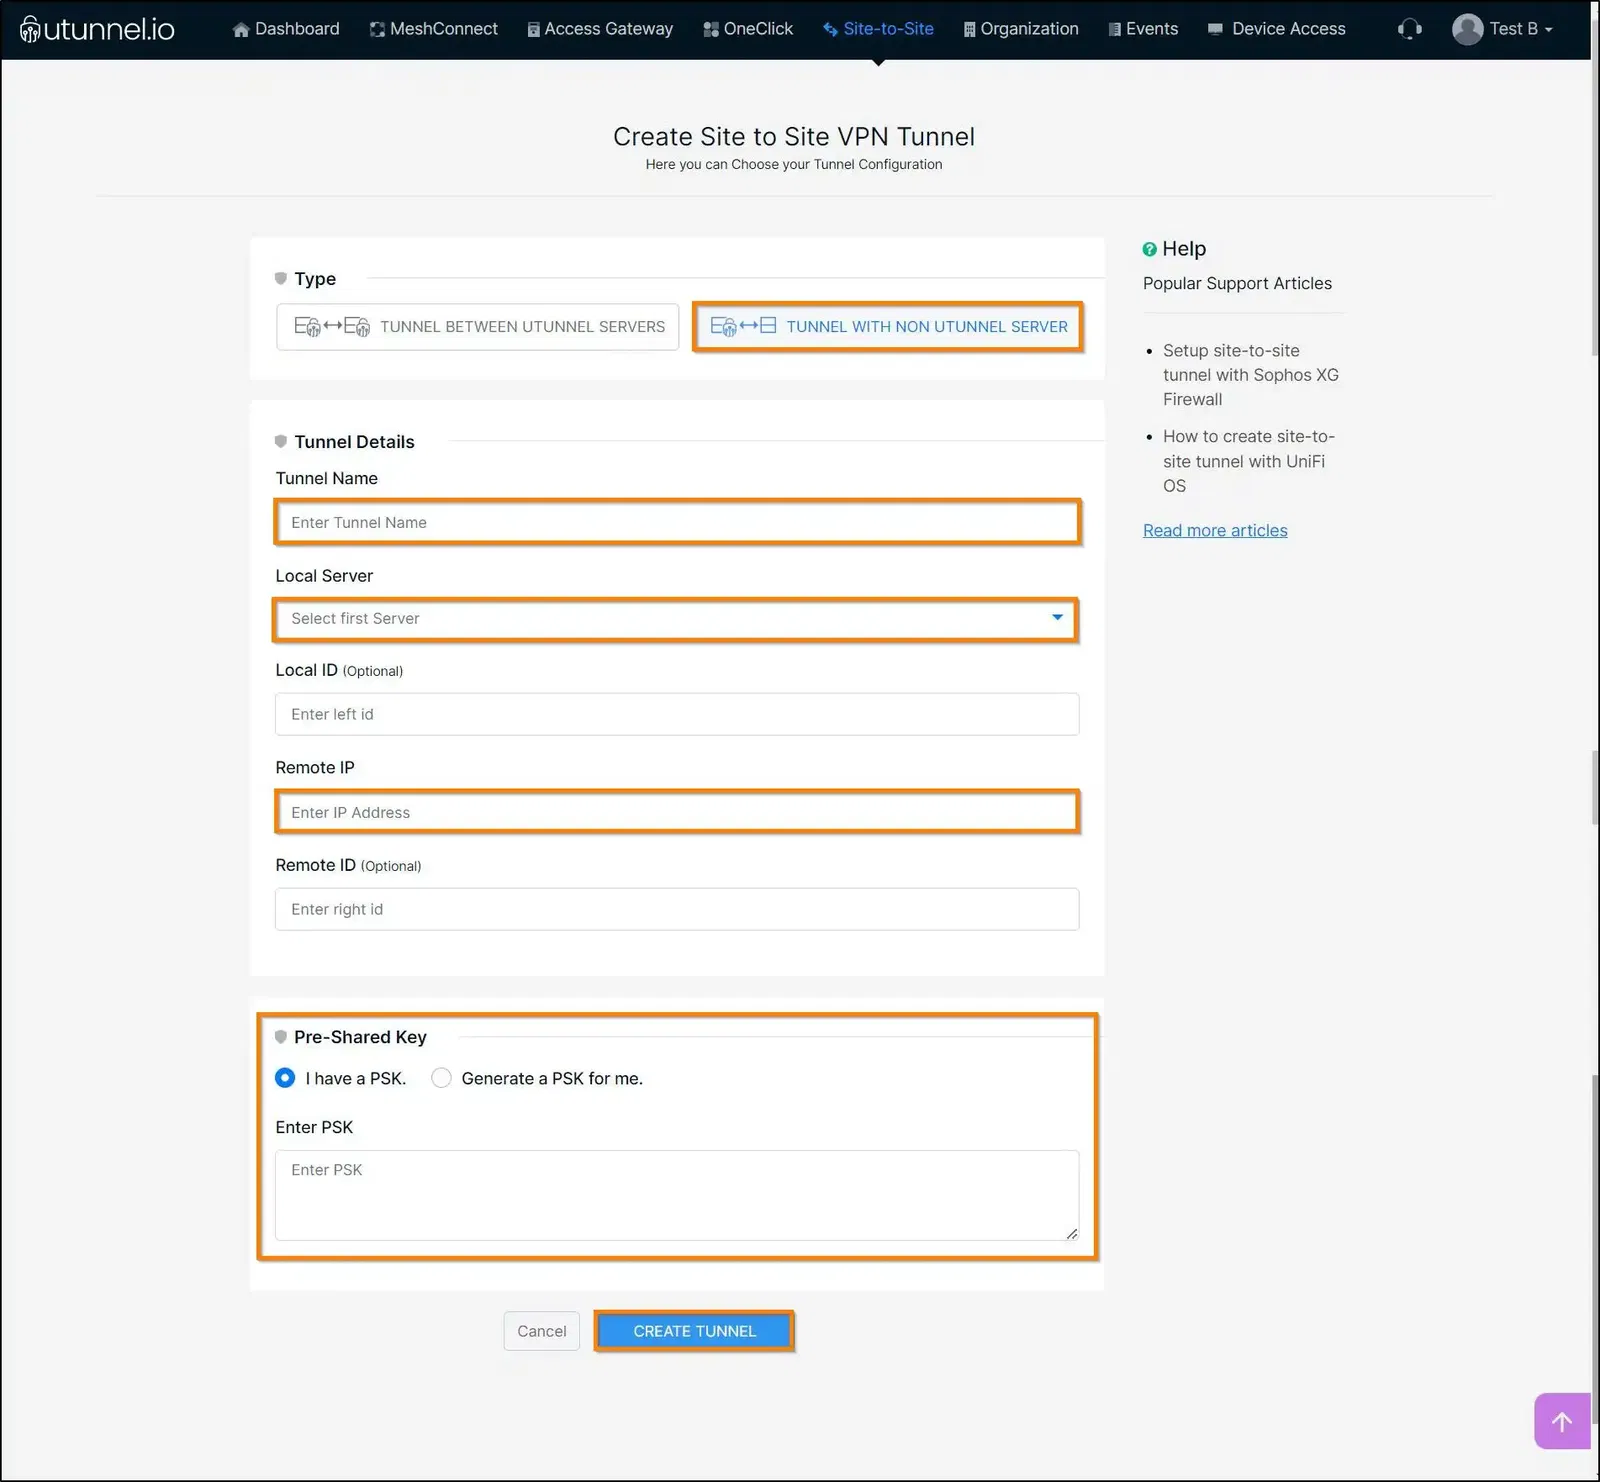
Click SAVE CHANGES to save and apply.
3. Now, we have to specify the subnets behind UTunnel server and the UniFi device. Click on the new tunnel created to add the subnet.
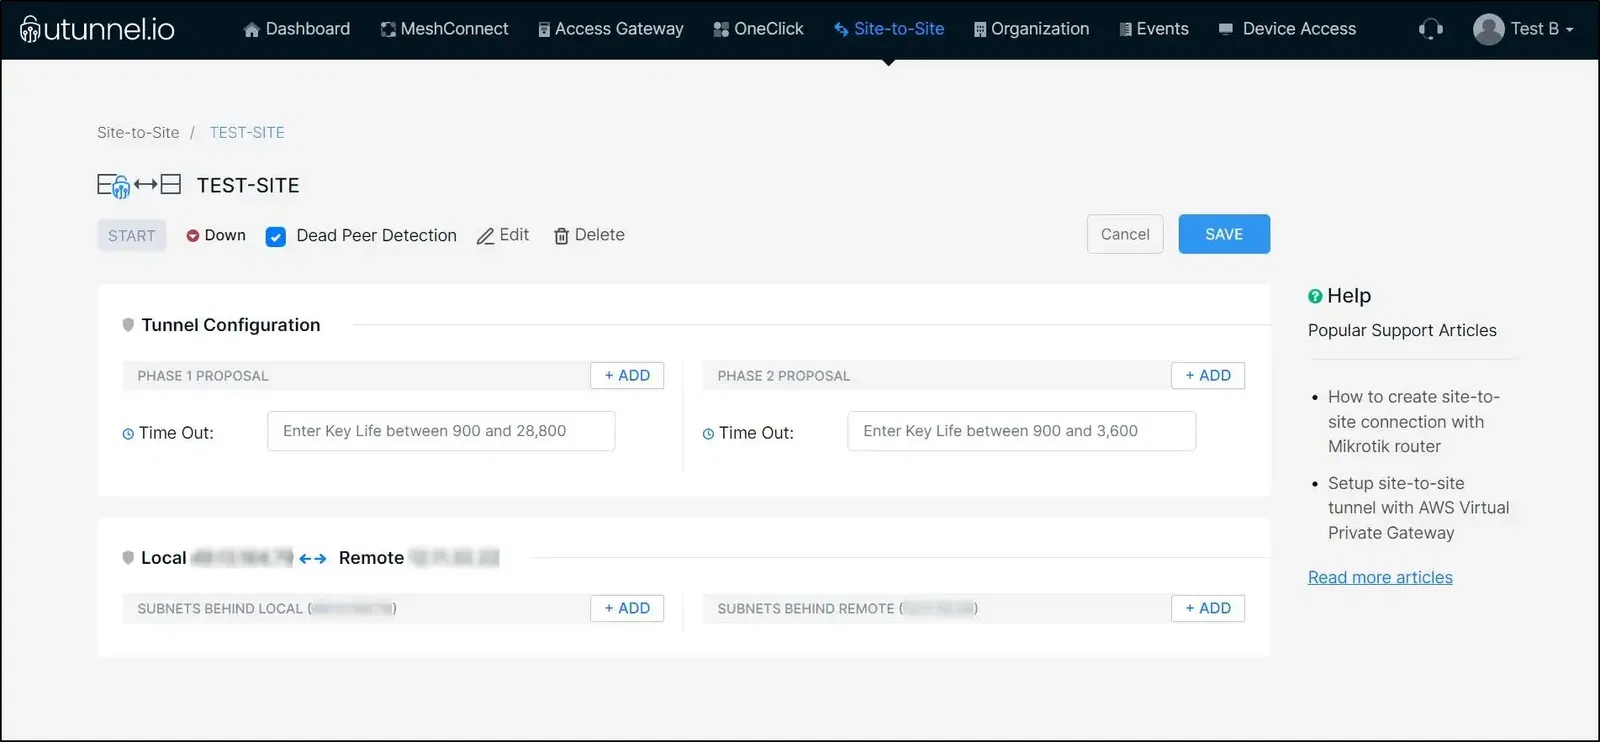
Subnets behind LOCAL are the network behind UTunnel server and Subnets behind REMOTE are the network behind UniFi device.
4. Now, Login to UniFi device and avigate to Network section as shown below.

Then, navigate to Network > Settings > VPN > Site-to-Site VPN.
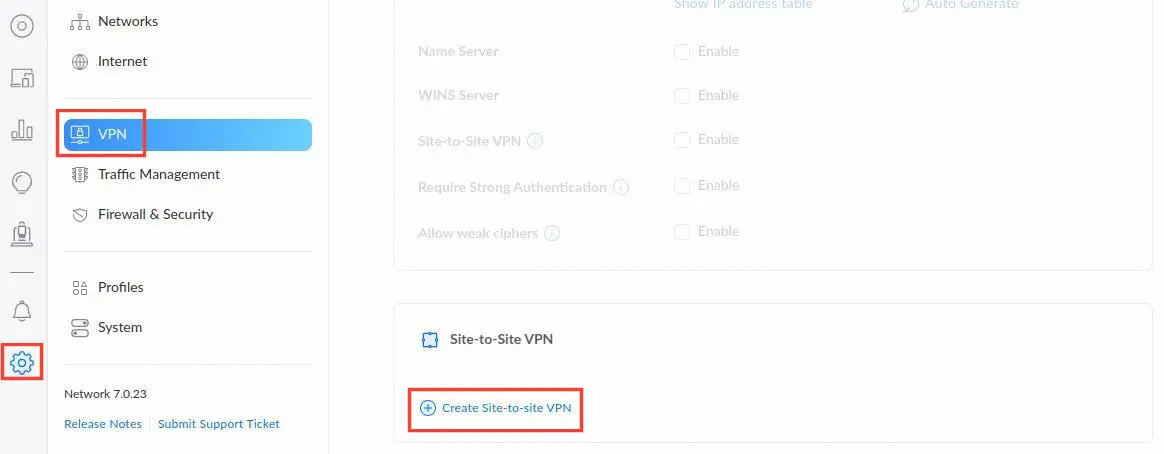
5. Click on Create Site-to-site VPN
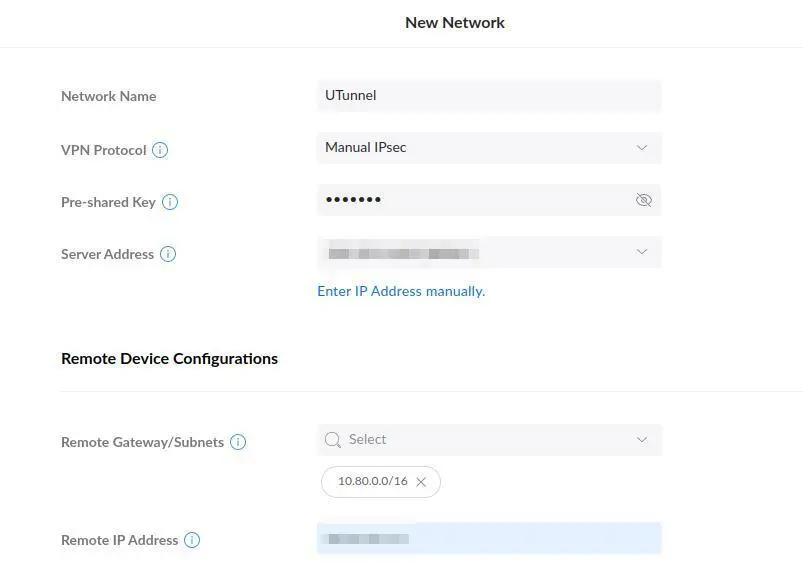
Network Name: A desired name for the tunnel
VPN Protocol: Select Manual IPsec from the dropdown menu
Pre-shared Key: Enter the preshared key created via the UTunnel dashboard in step 2
Server Address: Select the IP address of UniFi from the dropdown menu
Remote Gateway/Subnets: Enter the network behind the UTunnel server
Remote IP Address: Enter the IP address of UTunnel server
On the Advanced option select Manual
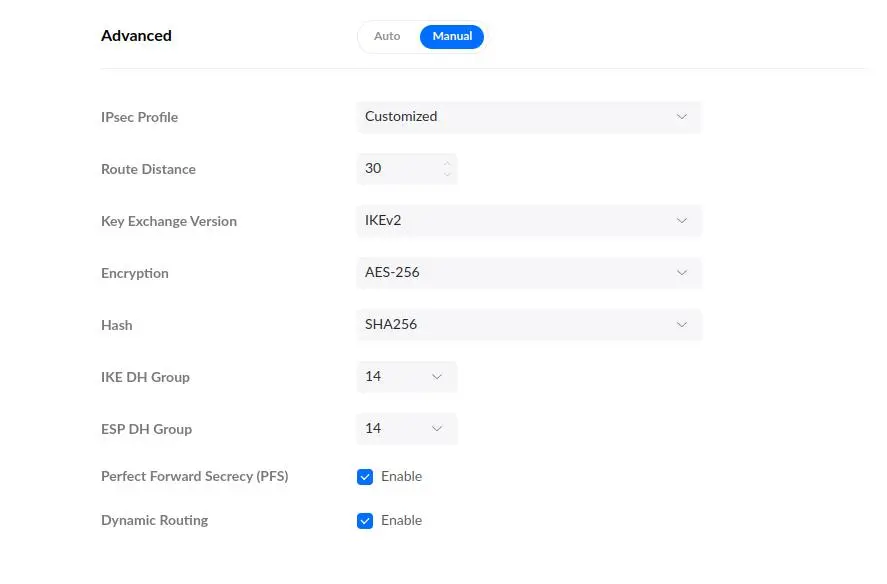
IPsec Profile: Select Customized from the dropdown menu
Route Distance: Default value
Key Exchange Version: Select IKEv2 from the dropdown menu
Encryption: Select AES-256 from the dropdown menu
Hash: Select SHA256 from the dropdown menu
IKE DH Group: Select 14 from the dropdown menu
ESP DH Group: Select 14 from the dropdown menu
Perfect Forward Secrecy: Enable
Dynamic Routing: Enable
Click on Add Network
Now login back to the UTunnel dashboard and click the START button to start the tunnel.