Updated on 19 Jul, 2023
A clean installation is the process of installing a software package after completely uninstalling the previous version. While troubleshooting some issues which cannot be solved from the server side, users are advised to do a clean installation of the VPN client application to rectify the issue. To perform a clean installation of the UTunnel Windows VPN client application, you need to:
This guide will explain the above steps in detail.
1. Log in to your Windows system and navigate to the Control Panel to click on the Programs tab.
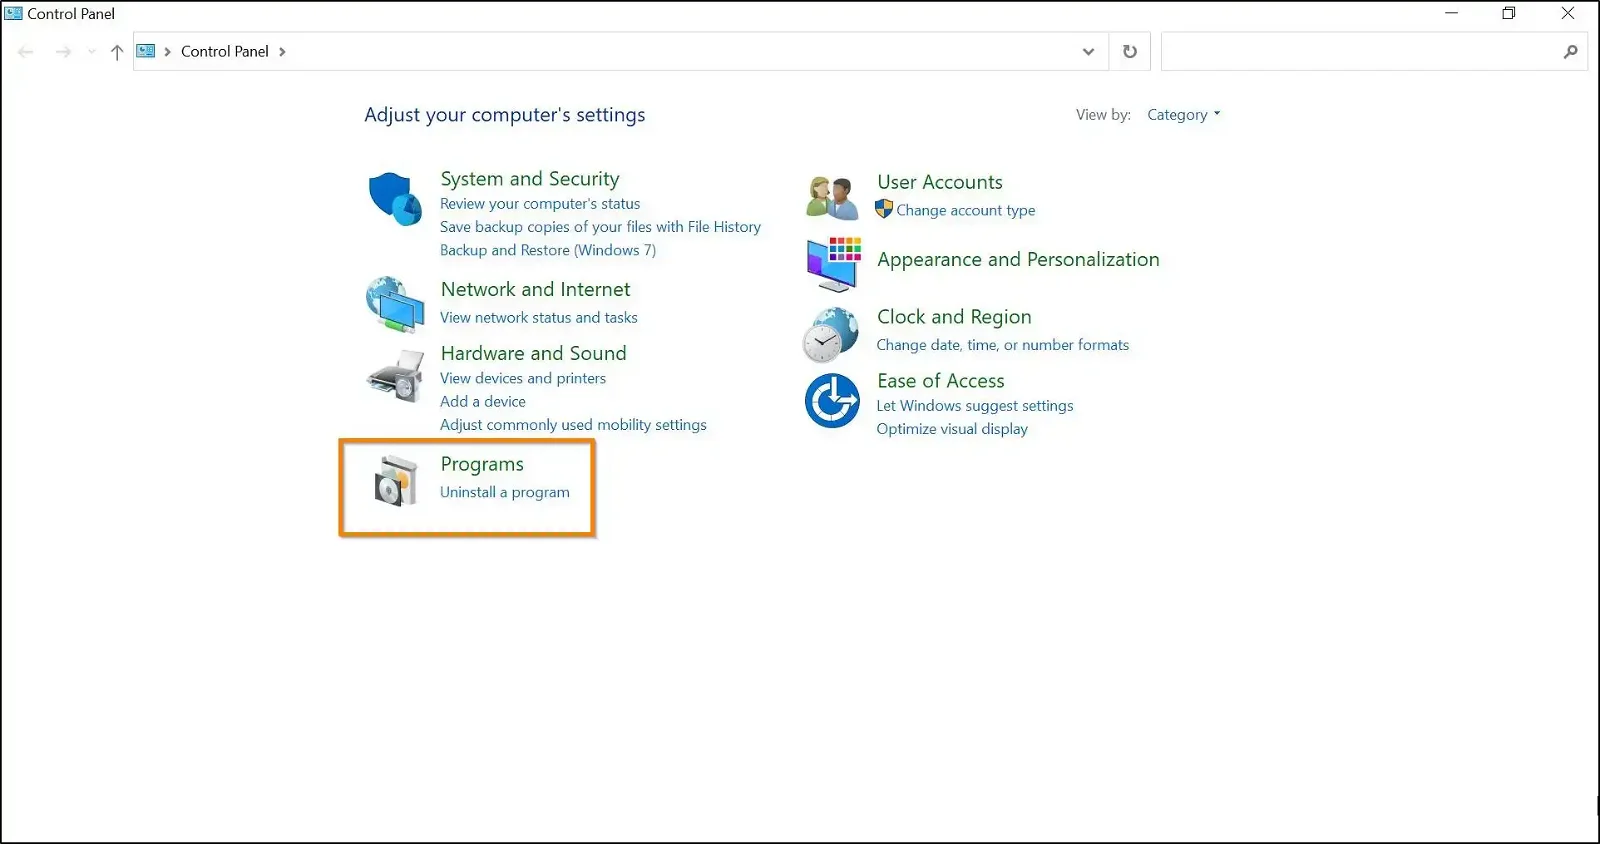
2. Click on the Uninstall a program link.
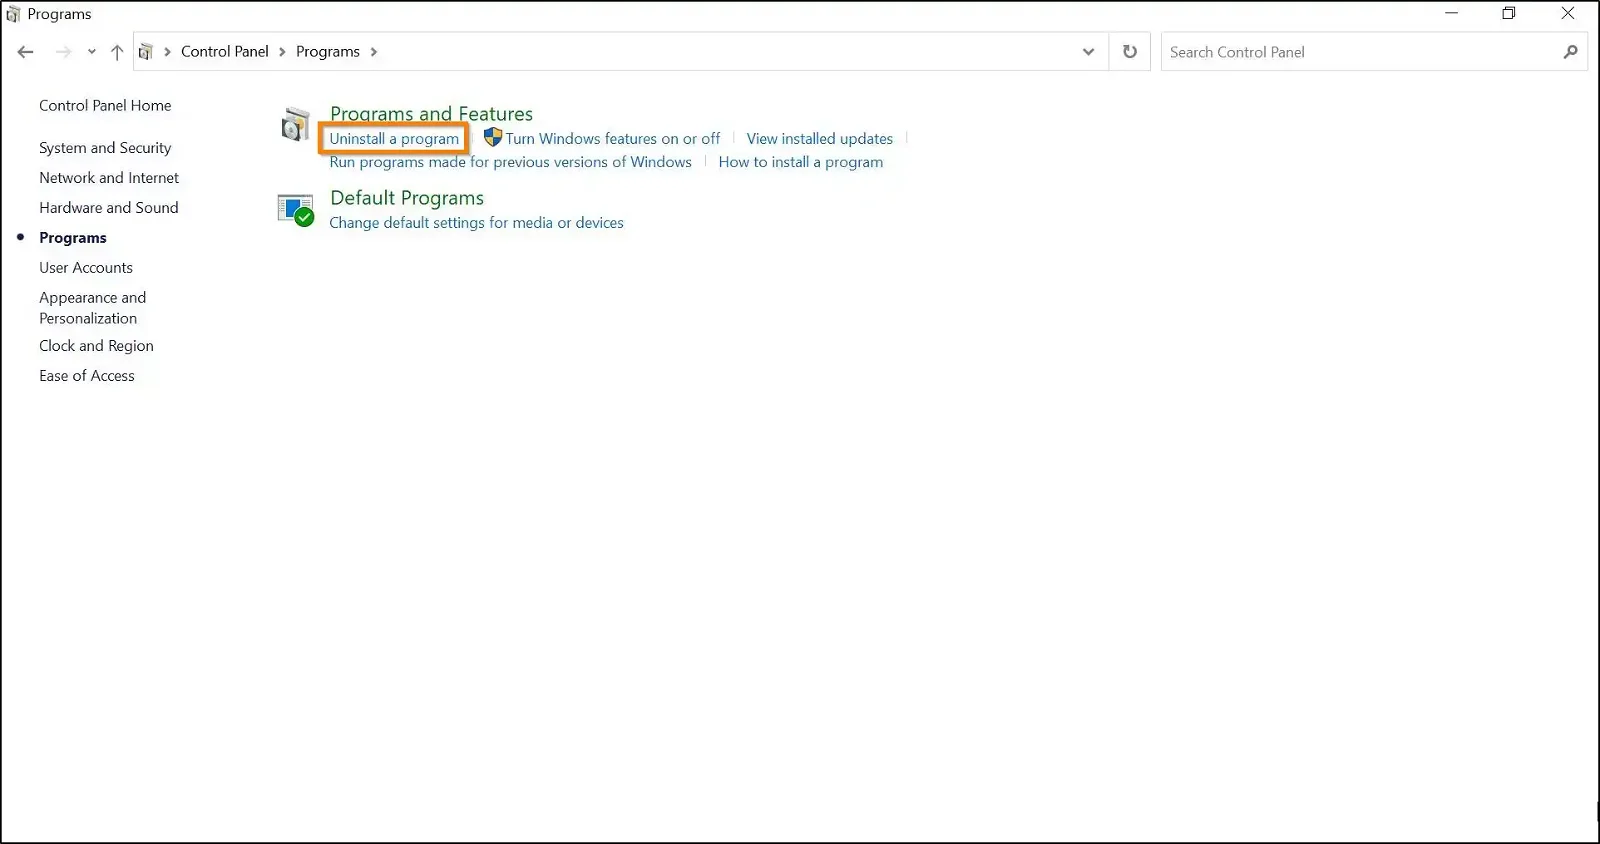
3. Right-click on the UTunnel VPN icon and click on Uninstall.
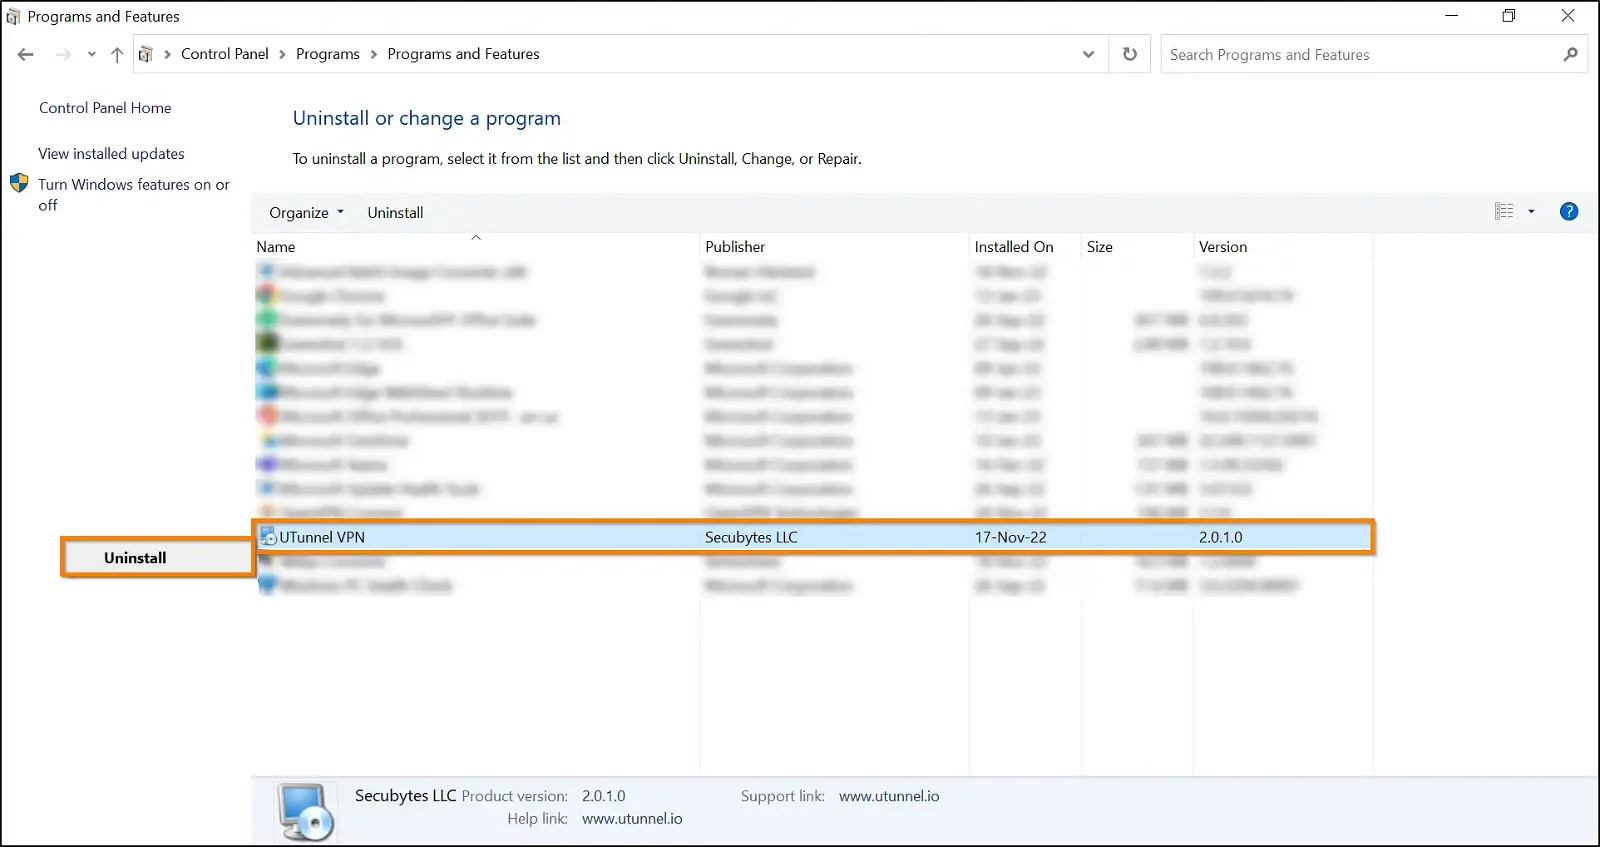
4. Click on the Yes button in the User Account Control pop-up to run the uninstaller.
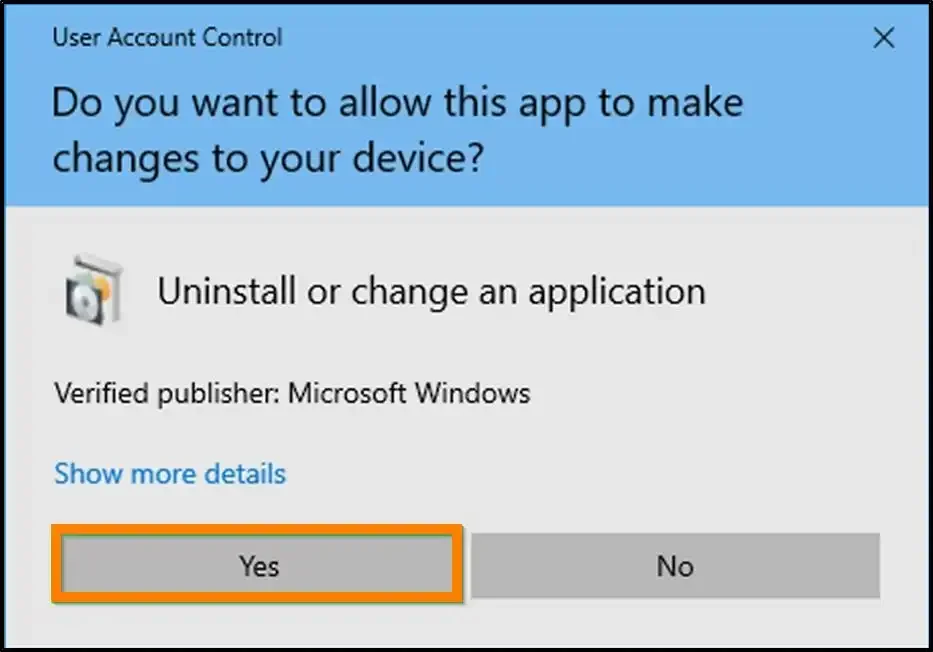
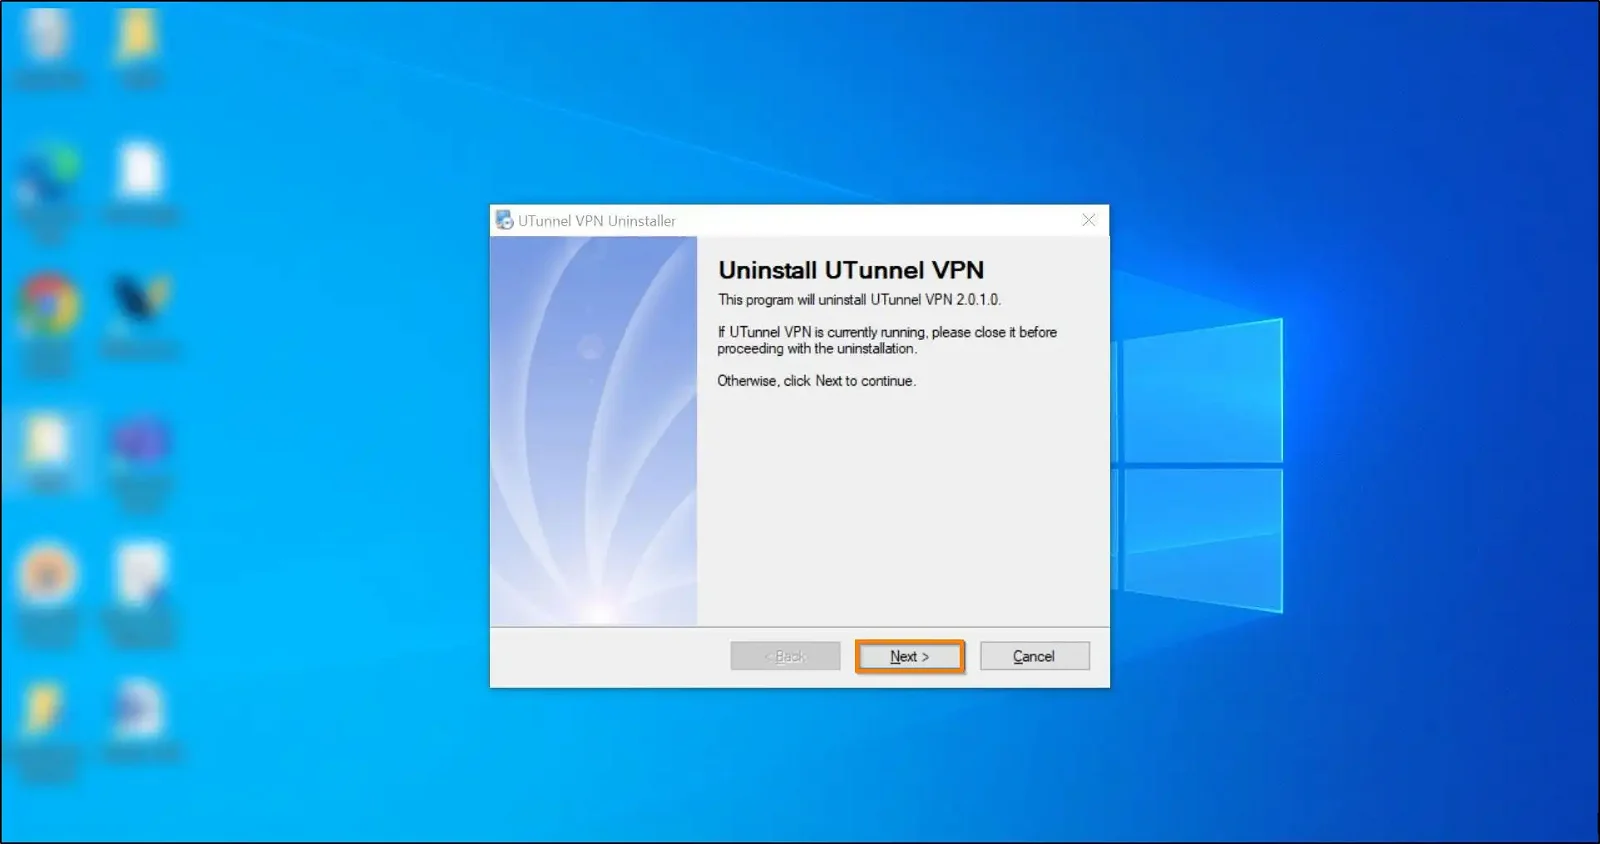
5. Close the UTunnel Windows VPN client app if it is still running. Otherwise, click on the Next button and go ahead with the uninstallation.
6. Click on the Finish button to complete the uninstallation process and exit the uninstaller.
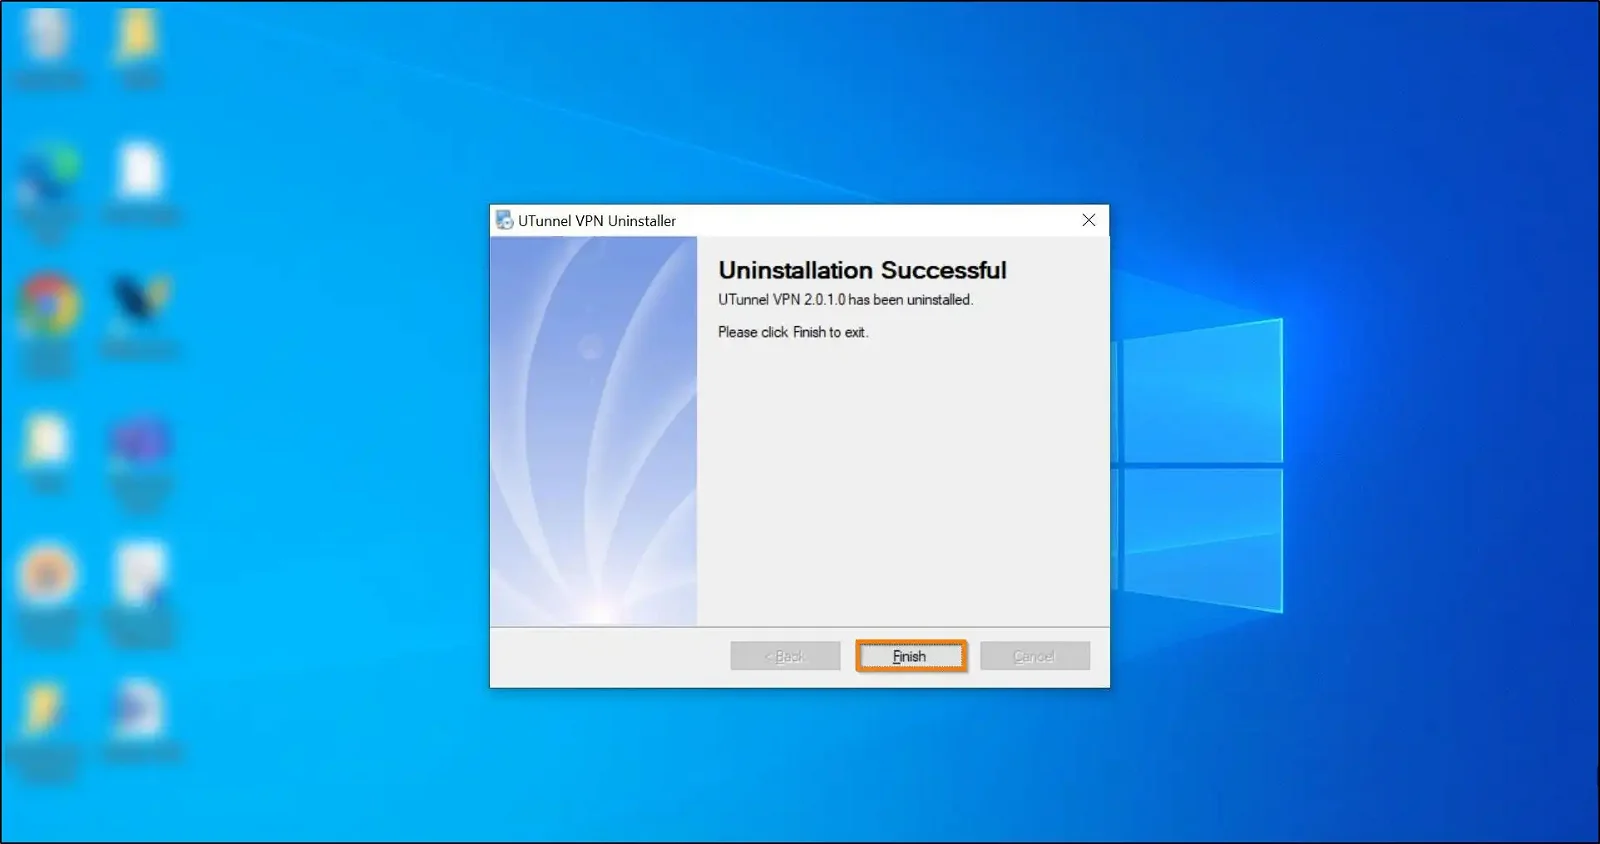
You have successfully uninstalled the Windows UTunnel client app.
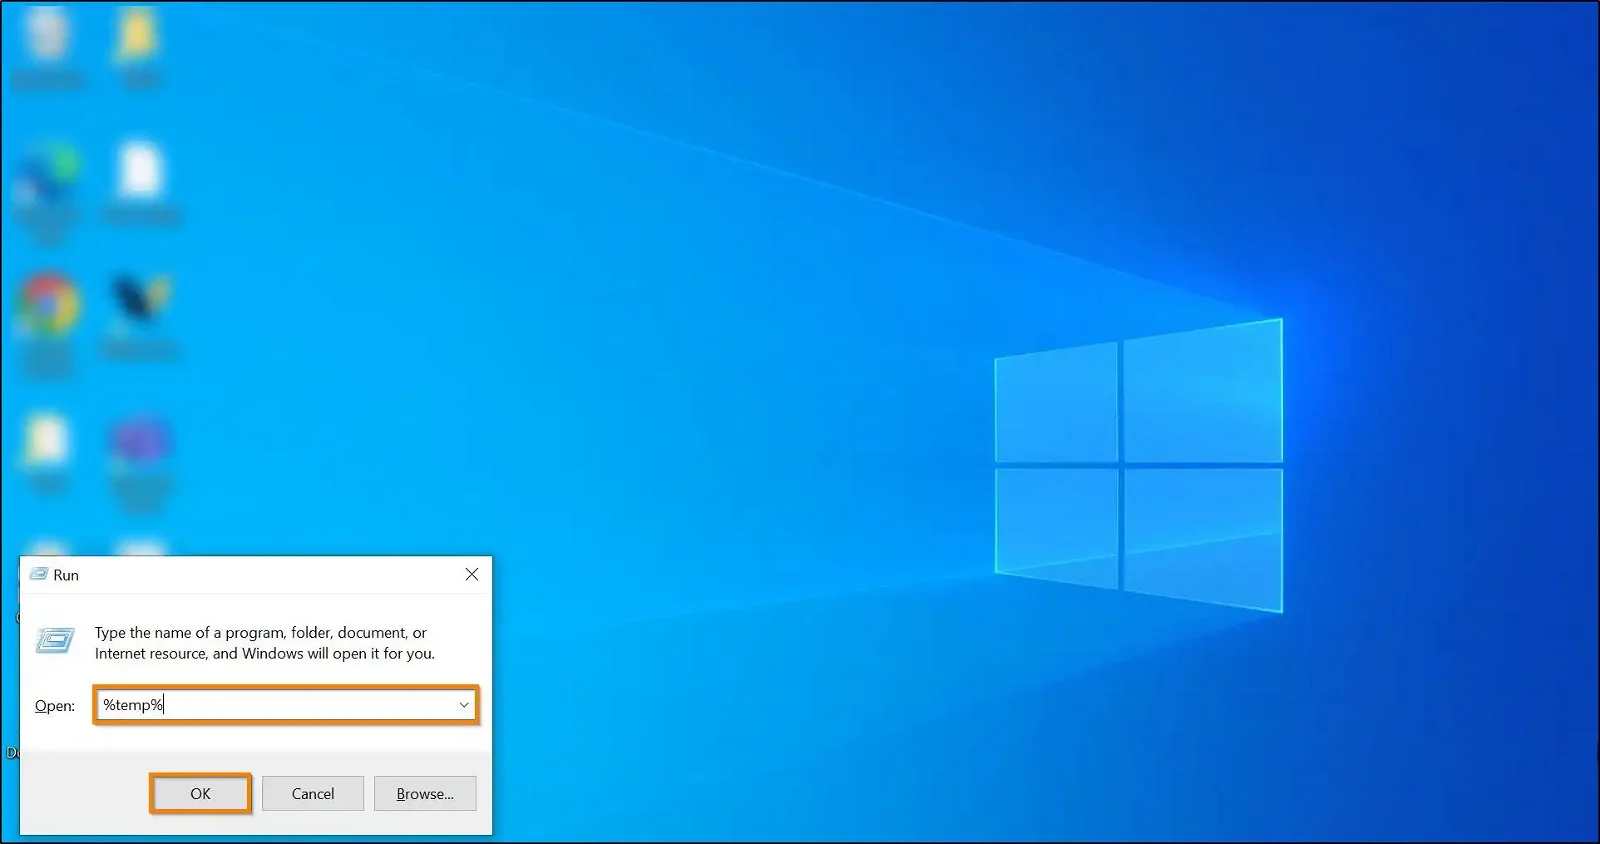
1. Press the Windows key and press R key together on your keyboard to open the Run Program Or File window.
2. Type in %temp% into the open field and click on the OK button to open the temp folder.
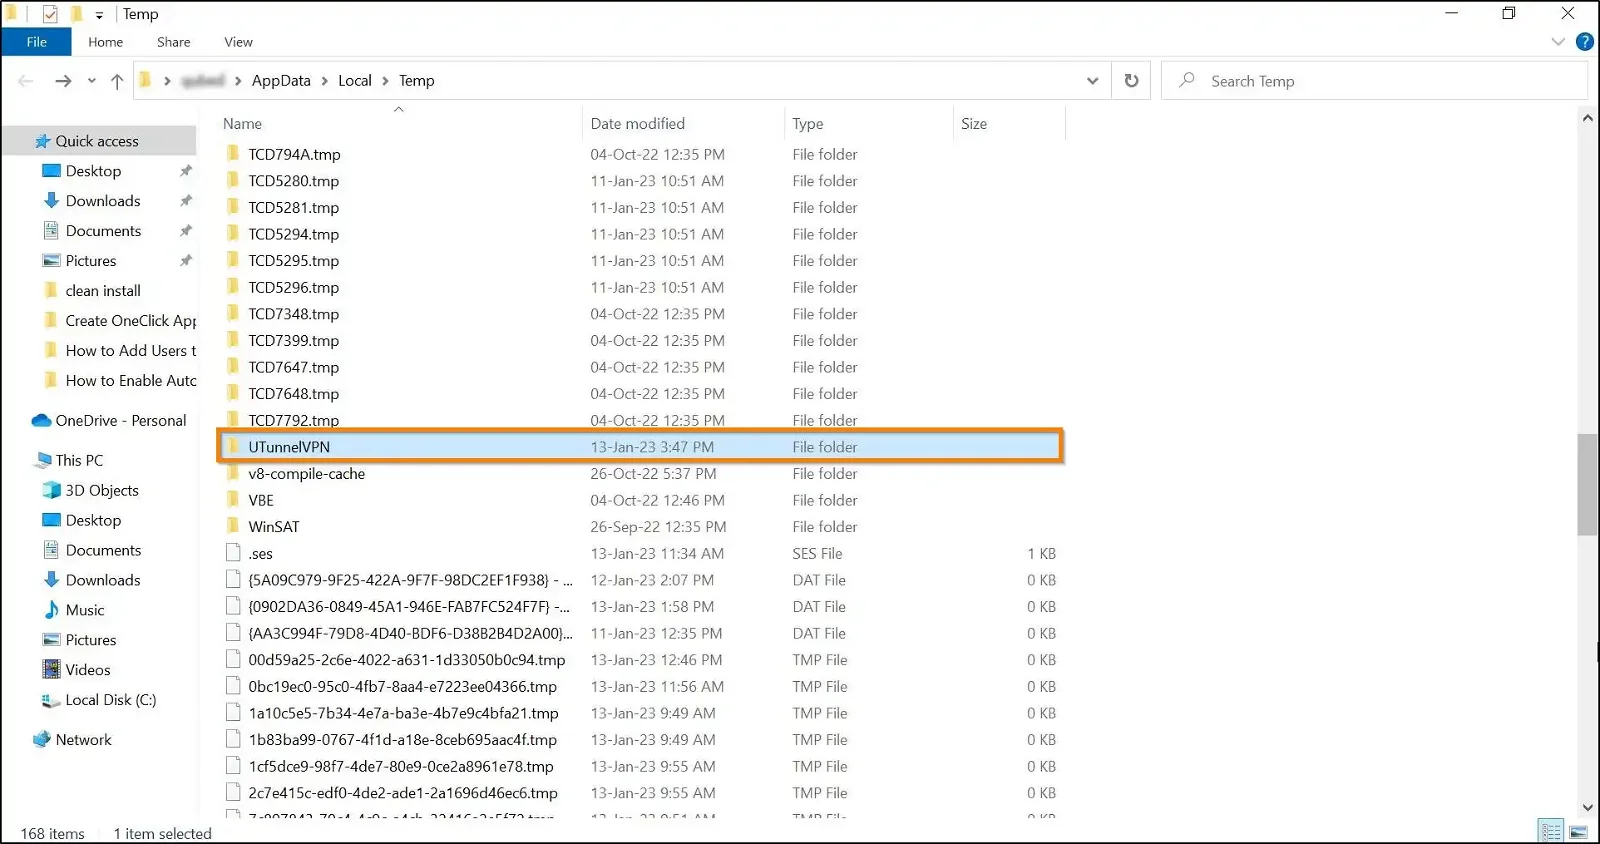
3. Select the UTunnelVPN folder from the Temp folder file list and delete it.
Log on to the UTunnel website and download the Windows UTunnel client app to install it.
And that is how you perform a clean installation of the UTunnel Windows VPN client application on your Windows device.